
Last Updated on June 11, 2023 by lindseymahoney
The DIY picture ledge in our dining room has been a huge hit!
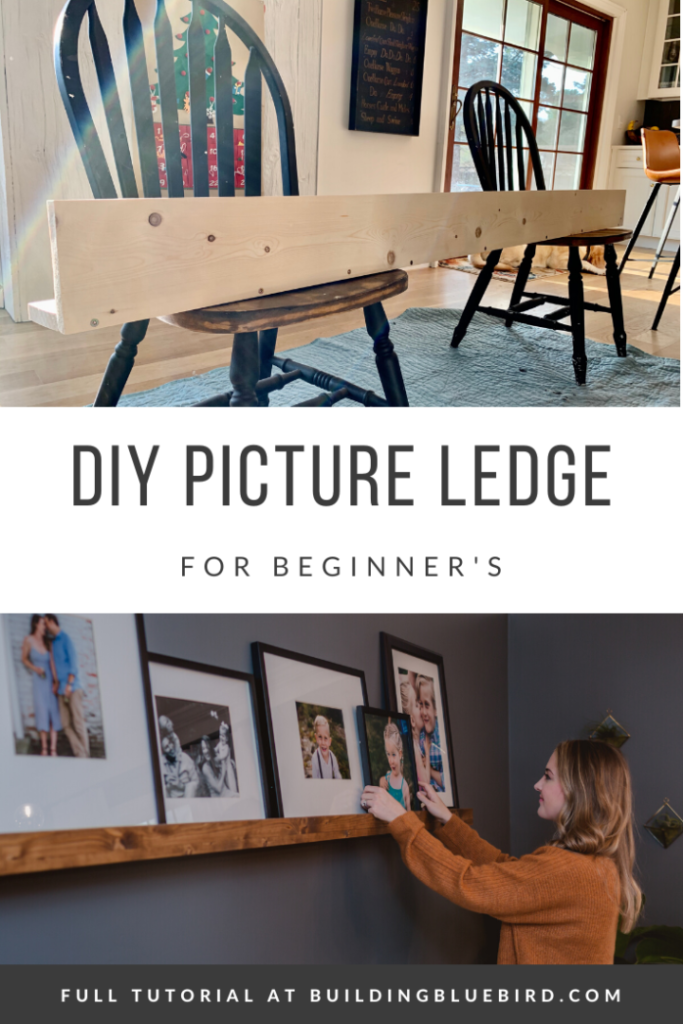

I have had so many positive responses to this piece, someone even asked if it was from Pottery Barn! How’s that for a compliment?! Building this ledge is super easy, it only takes a few hours, costs less than $30 and I am going to show YOU how to build it.
I used the tutorial that Chris Loves Julia created, but made a few tweaks based on tools I owned. You should definitely check their tutorial out as well since this project is their brainchild.
With my tutorial, I am sharing how you can still complete certain DIY projects even if you don’t own all of the necessary tools! My goal is to inspire beginner DIYers to try that pinned project, have fun with it, and don’t be afraid to laugh at yourself along the way!
Ready to check out all of my DIY hacks for building the picture ledge?!
Let’s get started!
How to Build Your Own Picture Ledge
[Affiliate links are included in this blog post, thanks for supporting Building Bluebird!]
Source Materials for Picture Ledge

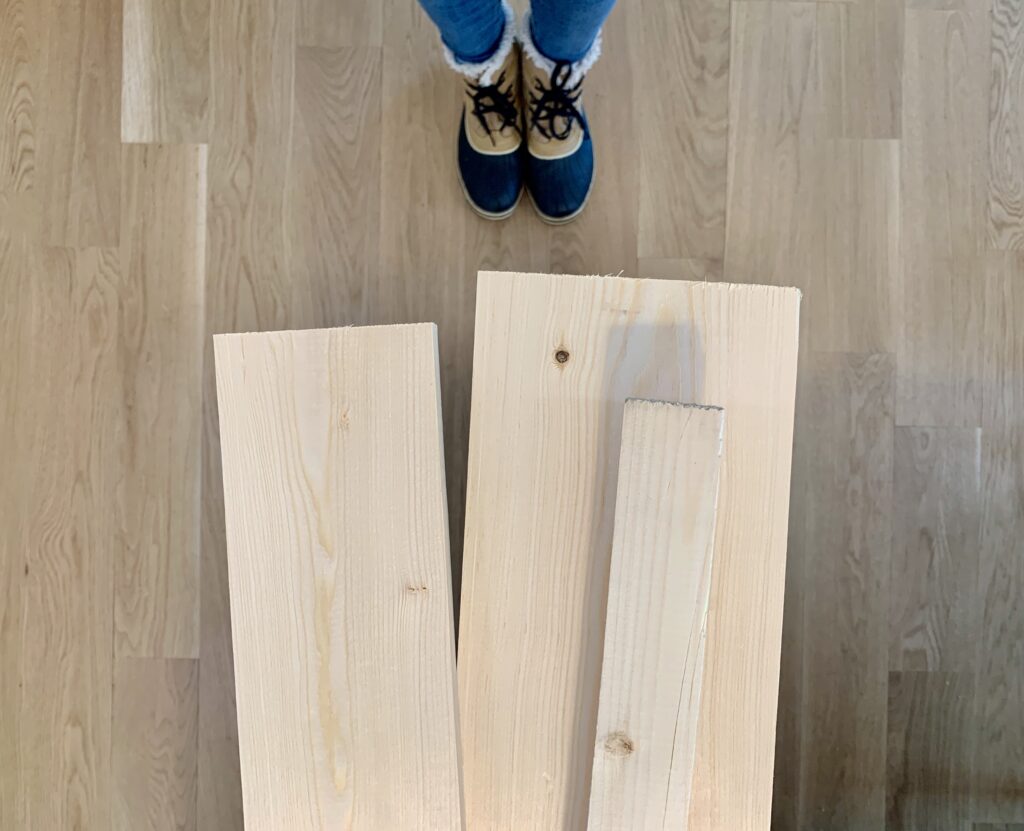
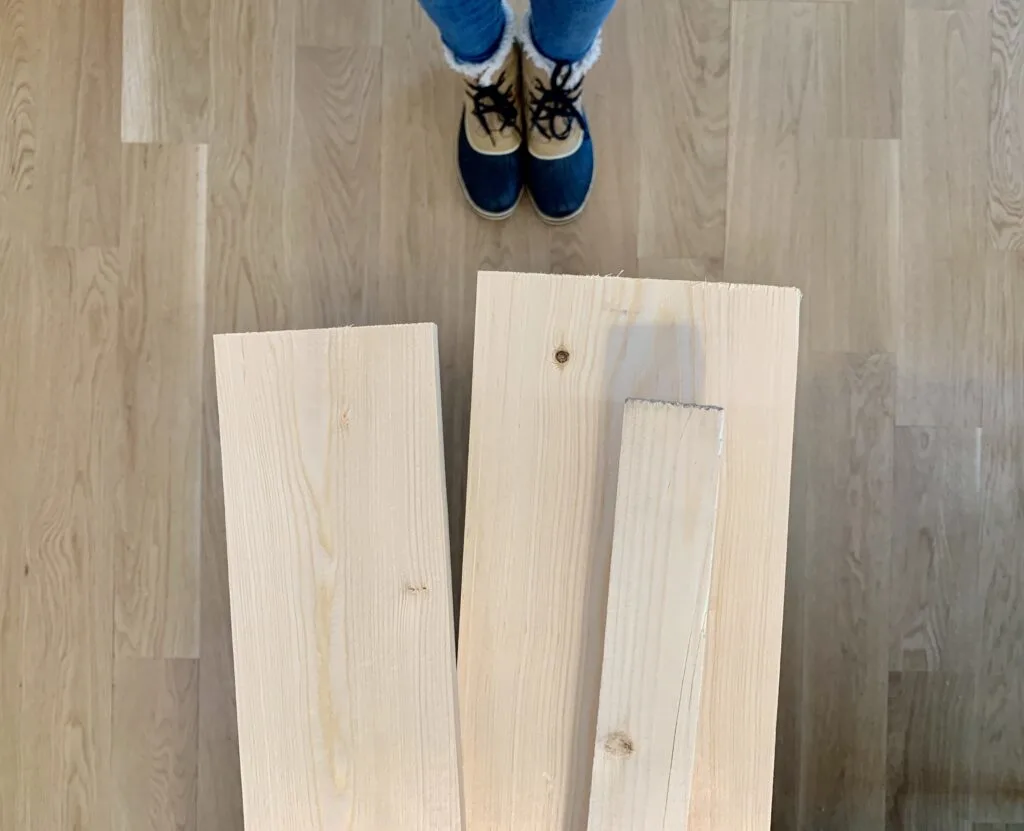
- Base: 1×6 Whitewood Common Board
- Front: 1×2 Whitewood Common Board
- Back: 1×4 Whitewood Common Board
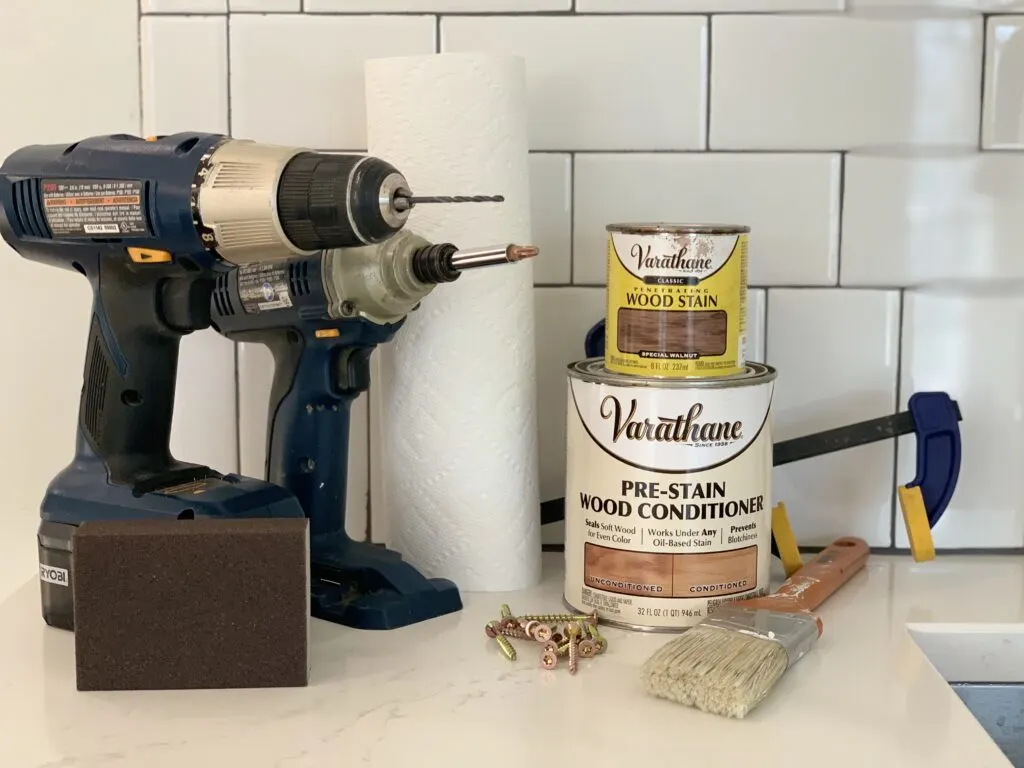
- Screws: I used wood screws I had in my garage (1 5/8 inch) that looked long enough to connect 2 pieces of wood and used the same screws to build the ledge and attach it to the wall.
- 1/4 Drill Bit: Use a bit that is slightly smaller than the width of the screw
- Cordless Drill/Driver: Match the driver type to the head of the screw you are using
- Clamps: 2-3 clamps are ideal when building the ledge
- Sanding block
- Paintbrush: I used one I already owned
- Wood Conditioner
- Wood Stain: Special Walnut color
- Paper Towels
- Level
TIP: The length of wood is always slightly shorter than how it is marketed in the store. For example, a 2×6 piece of wood is actually closer to 1.5×5.5 in true measurements.
1 | Measure
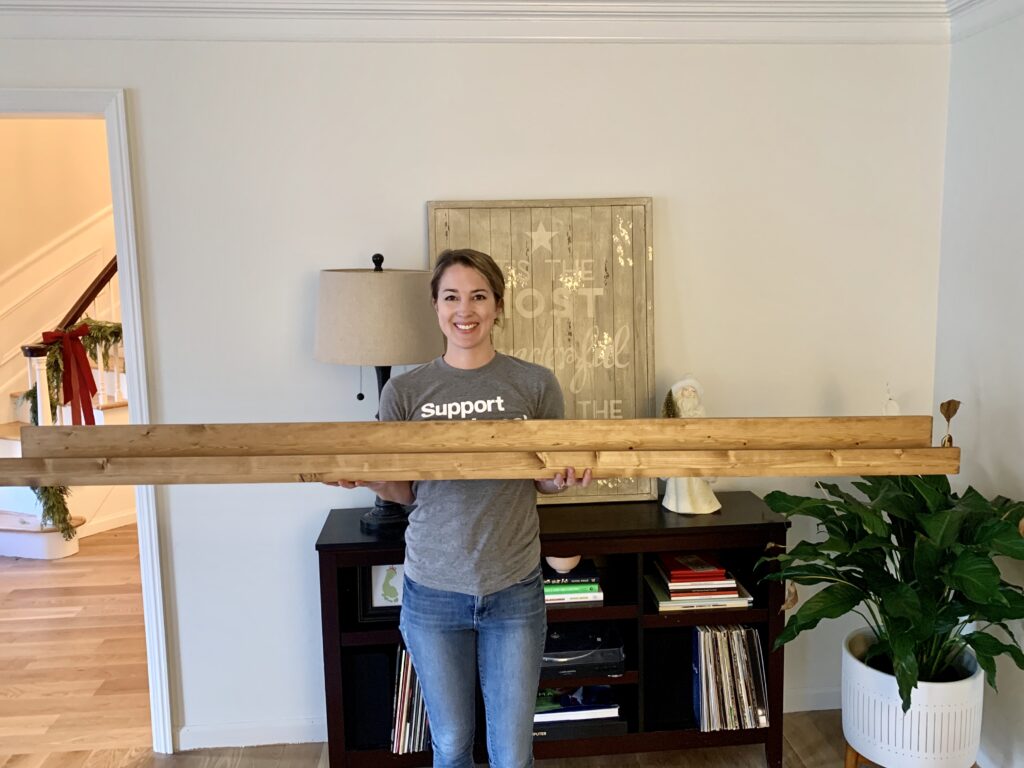
The first step for this project is to determine the length of the art ledge for your wall. You can choose any length, but for my wall, I chose 80 inches


Step 2 | Purchase Materials
At our local hardware store, I found pre-cut wood in the common board section of the lumber aisle and grabbed three sizes – 1×6, 1×4, and 1×2. All of the boards were 8 feet (96 inches) long.
Next, I had Home Depot cut each piece down to 80″.
You will want to buy any additional materials that you need for this project at the hardware store.
Before you begin building, use the sanding block on all of the boards to remove any splinters. The boards may be rough on the edges that were cut in the store.
3 | Build the Back and Base of the Ledge

First let me start by saying, it was freezing outside and I wanted to complete most of this project in my warm house…because I’m a baby.
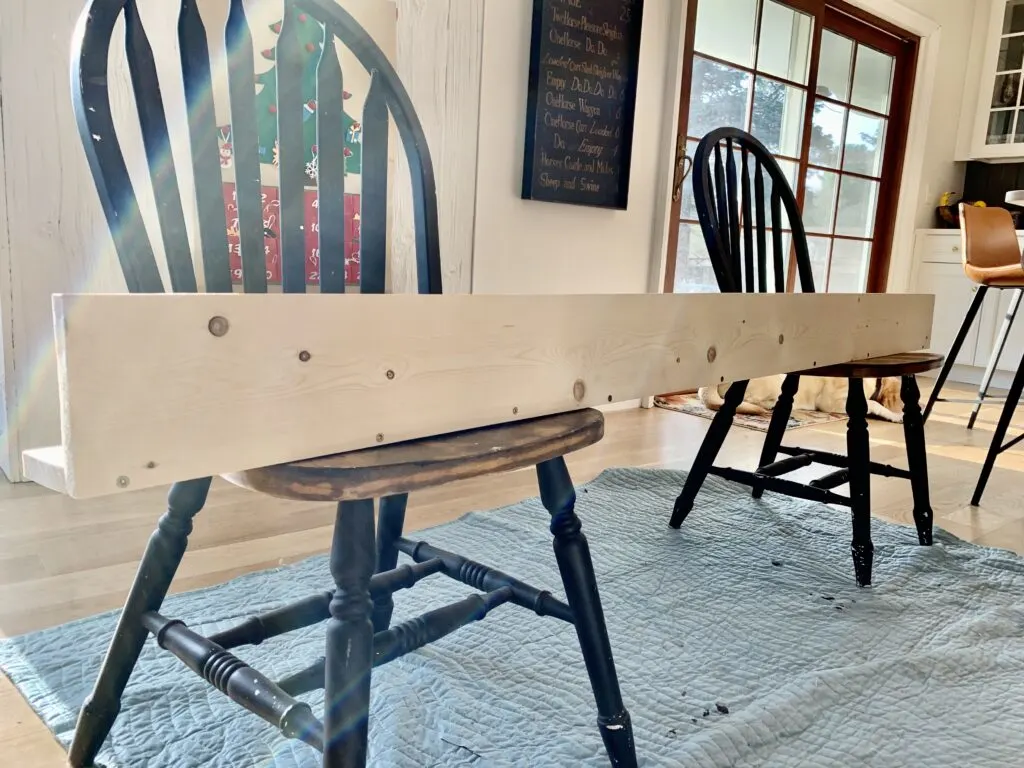
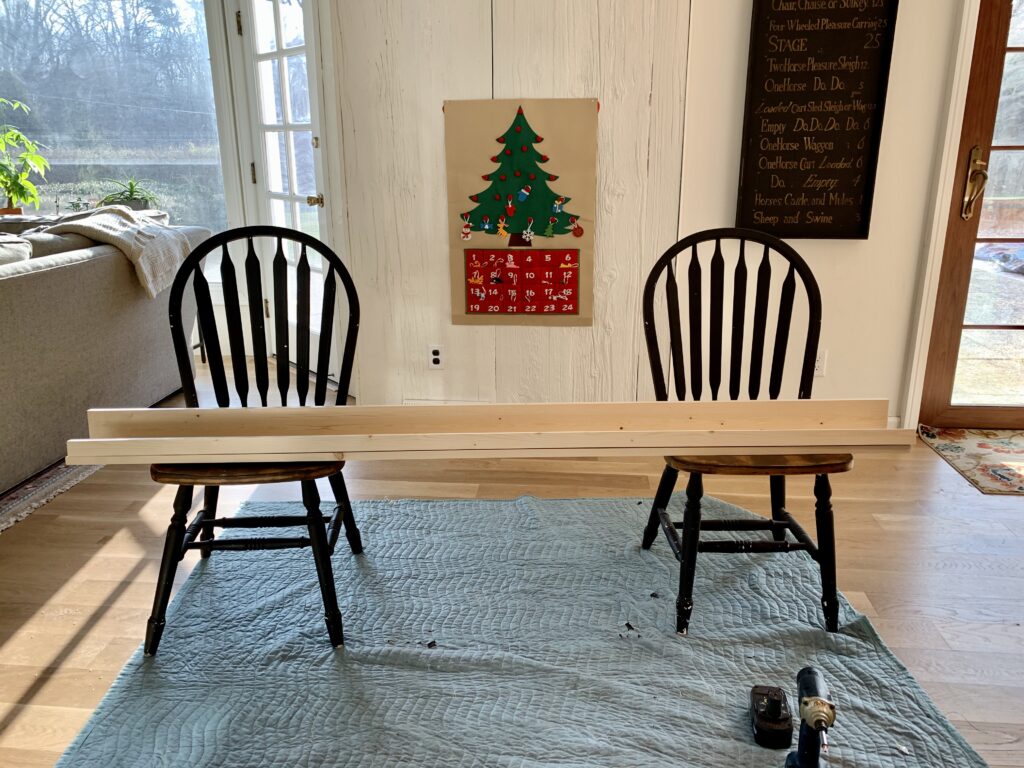
I do not own a saw horse so I worked with what I had and created a working space in my kitchen. I put down a drop cloth and two chairs to hold the wood as I built the ledge.
Would this project be easier if I had all of the required tools to build it? Probably. But I am not intimidated by coming up with creative solutions to make it work.
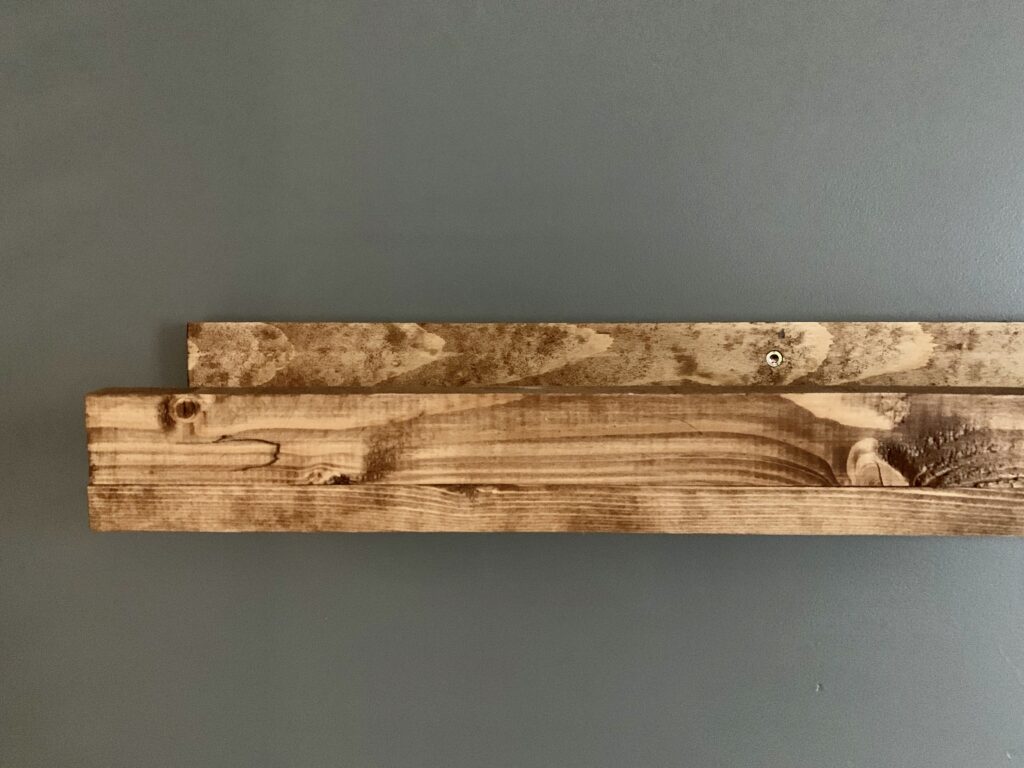
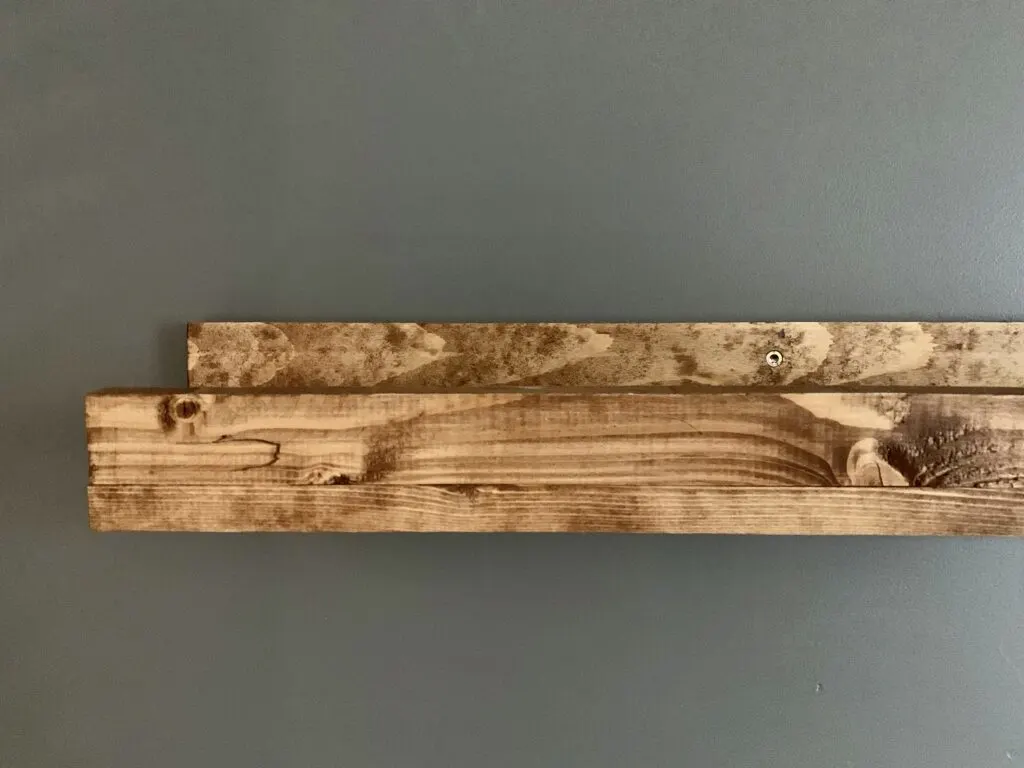
You will begin by connecting the back of the ledge (1×4) to the base of the ledge (1×6).


Place the 1×4 wood on top of the 1×6 piece of wood and clamp them together. If I had my sh*t together, I would have used 2-3 clamps to secure both sides of the ledge. Alas, I did not have said sh*t together and could only find one of our clamps.

I improvised and used the clamp on one end of the ledge and used FrogTape to connect the center and the opposite end of the ledge. This helped to keep the boards from moving too much.
Starting on the clamped end of the ledge, I drilled a pilot hole and screwed the two boards together. Once connected, I removed the clamp and moved it to the center of the ledge where I connected the boards again.
I made pilot holes about 12 inches apart and screwed the boards together for a tight connection. I used the single clamp as I moved along the ledge to ensure the boards stayed properly aligned.
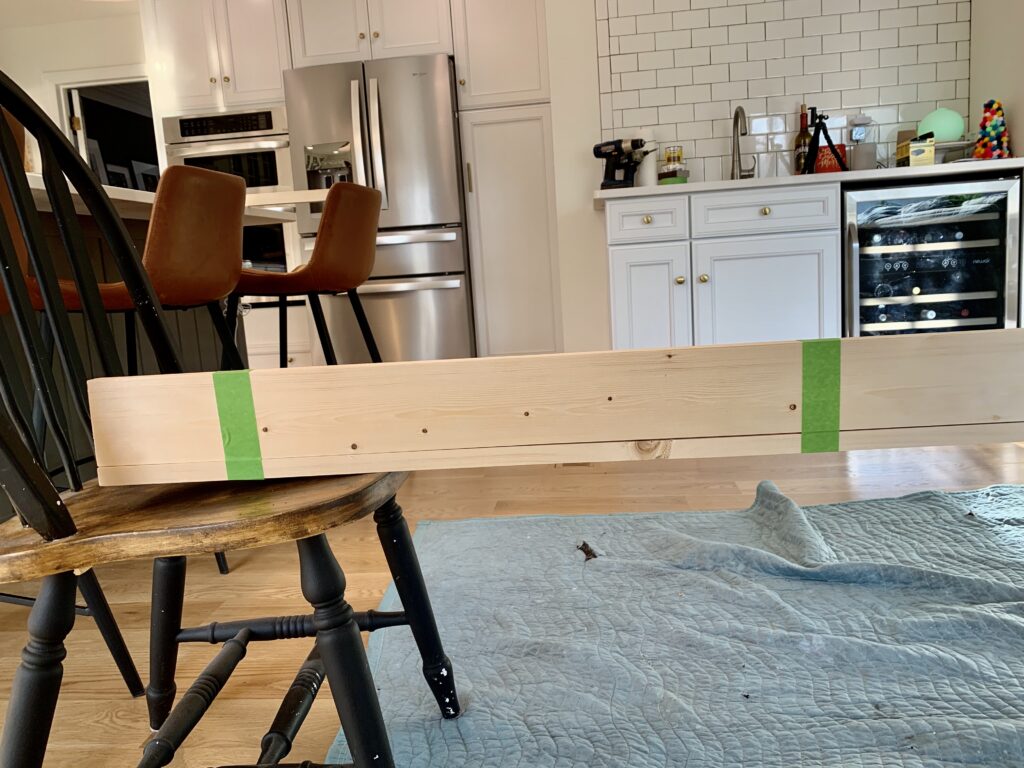
4 | Connect the Front Lip to the Picture Ledge

Once the back of the ledge is secure, take the 1×2 board and clamp it to the top of the 1×6 base board.
Again, three clamps would be ideal, but tape can work as well! I worked my way down the ledge with the clamp, drill, and driver, and wa-la, the ledge is complete!
This project is seriously so easy!
5 | Condition & Stain the Picture Ledge
If you built your ledge inside, I would recommend you complete these next steps outside or in a well-ventilated area.
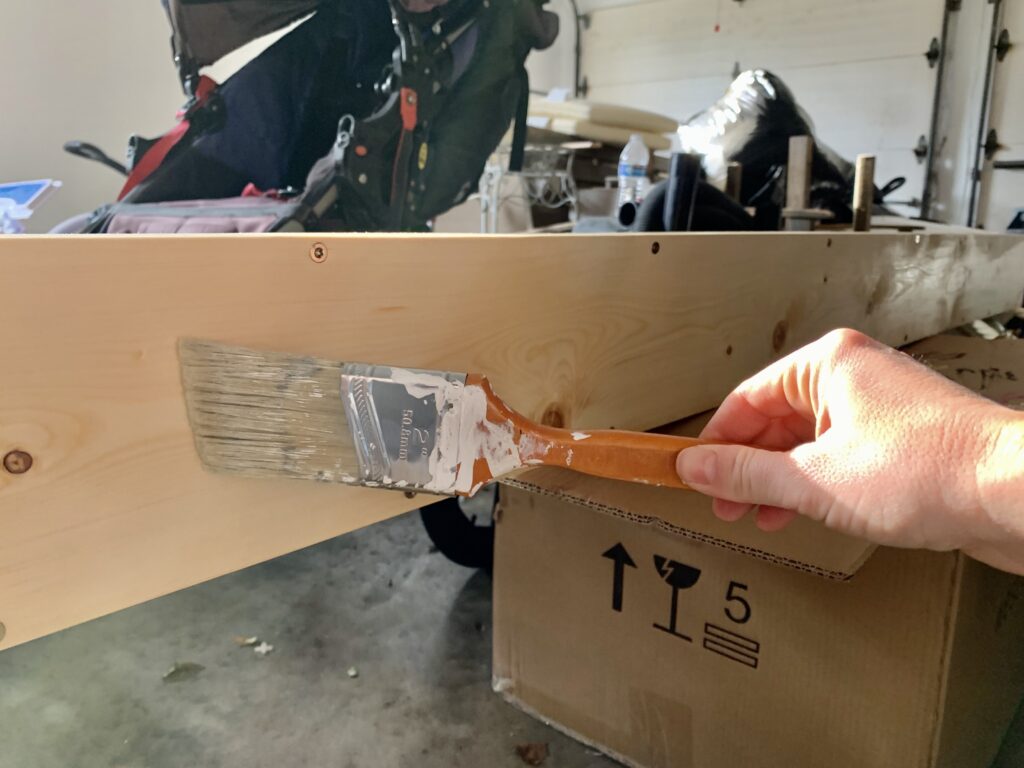

Before you begin staining, take a paintbrush and quickly apply a wood conditioner to your ledge. Paint on a thin coat and use a paper towel to wipe away any excess conditioner.
This will help the stain to take evenly to the wood. Wait 30 minutes and then begin the staining process.

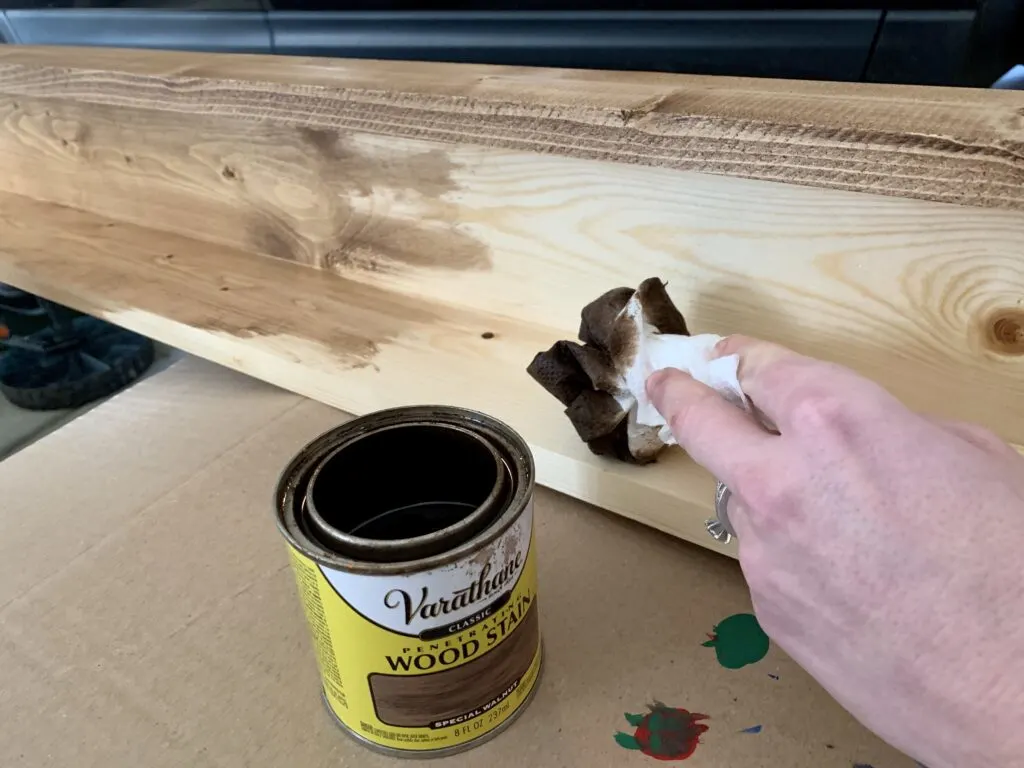
I chose a light brown stain color called Special Walnut. I love how warm it looks without being too yellow-y.
Shake up your stain mix and dip your paper towel into the mixture. Apply the stain to the board and then wipe off the access stain with a clean paper towel. I applied the stain about 2 feet at a time and then wiped it off.
The more coats you apply, the darker your stain will become. For the picture ledge in my dining room, I applied 3 coats of stain. For my current project, I applied one coat and it looks great. Wait 2 hours for the stain to dry.

You just built and stained your first picture ledge! Congratulations!
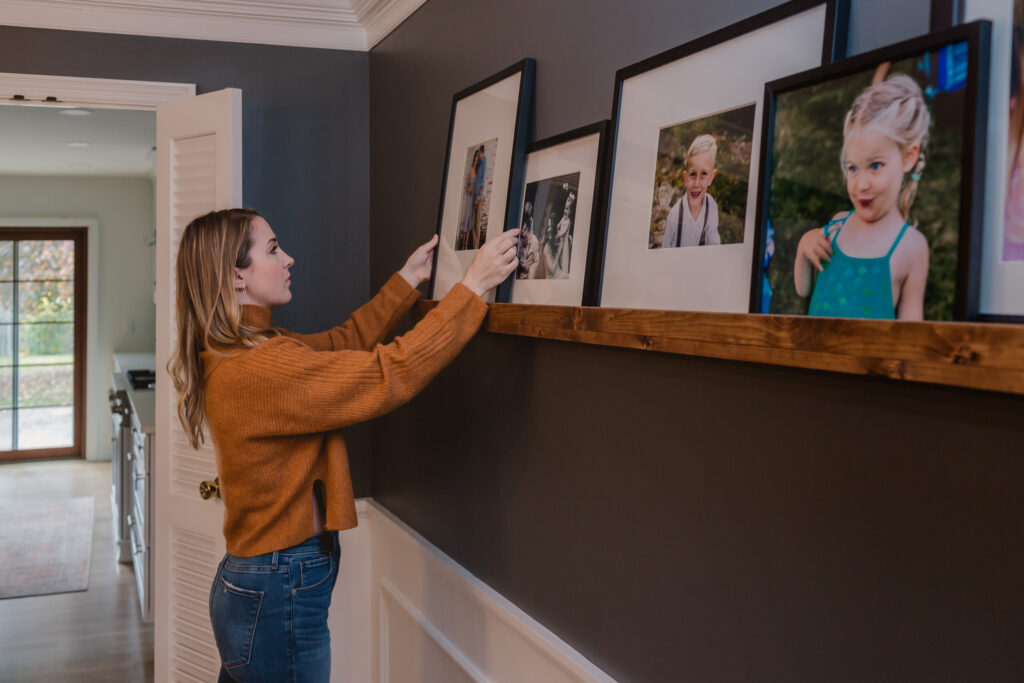
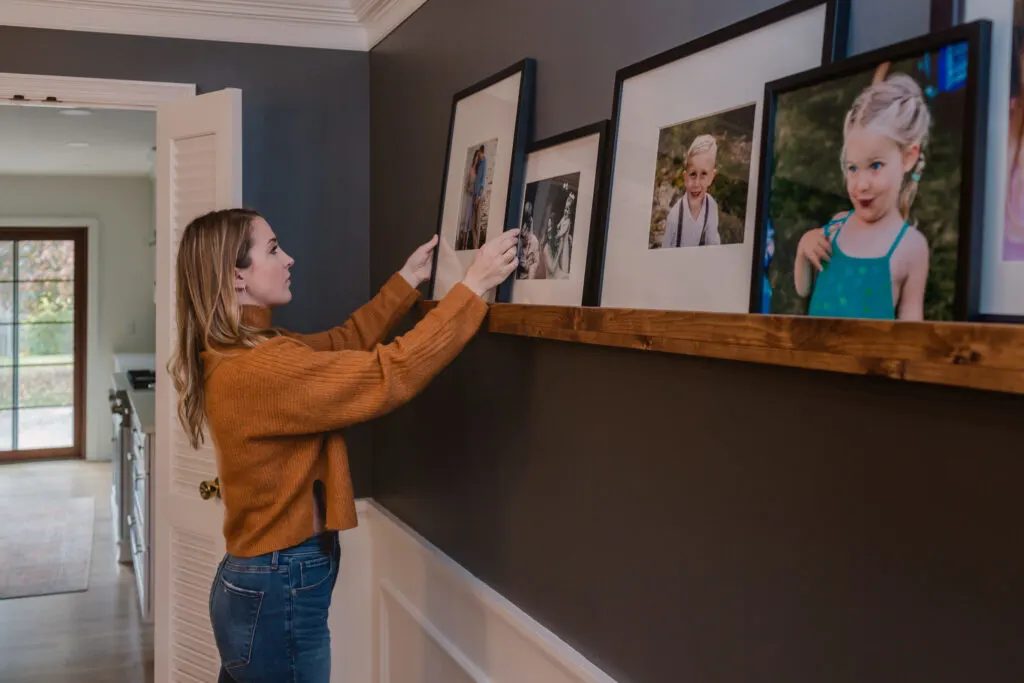
6 | Install the Picture Ledge
As you prepare to install your picture ledge, the first step will be to determine where it will hang. Hold it up to the wall and place a level on the ledge to get it straight.
Use a pencil to make the top of the ledge so you can place it in the same spot when you attach the screws.
Next, you will need to find the studs. You can do this by using a stud finder or by knocking on the wall (what we did).
Use tape as a marker to show where each stud is located. Once marked, get your ledge back into position. Find the stud closest to the center, drill a pilot hole on the back of the ledge, then attached it to the wall with your screw.
By starting in the middle of the ledge, you have the opportunity to straighten out the ledge if needed before you secure the next screw into the wall.
Having an extra set of hands during this part makes it a LOT easier to install.
Attach the ledge to 3 or 4 studs (depending on the length of your ledge) and it will be very secure to the wall. Add your favorite family photos and this DIY project is complete!
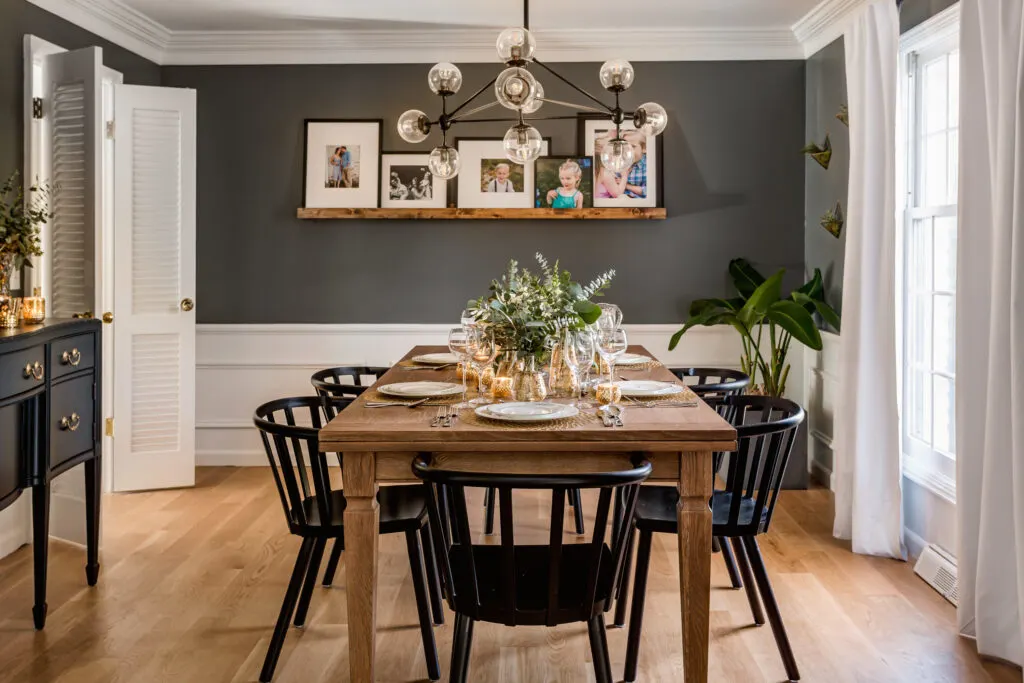
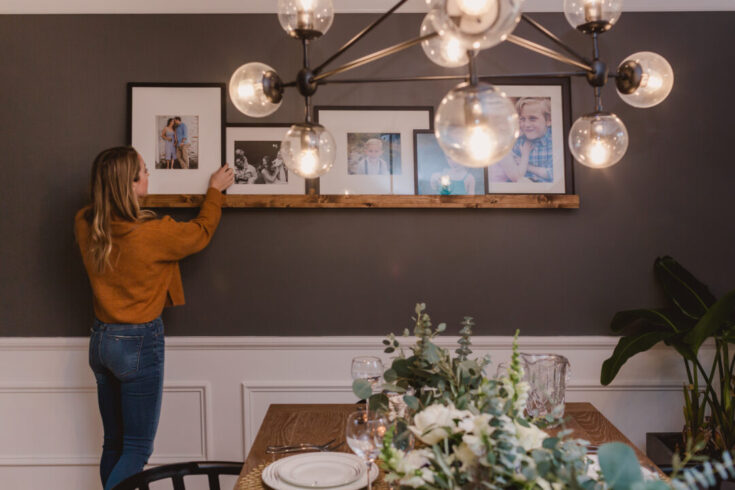
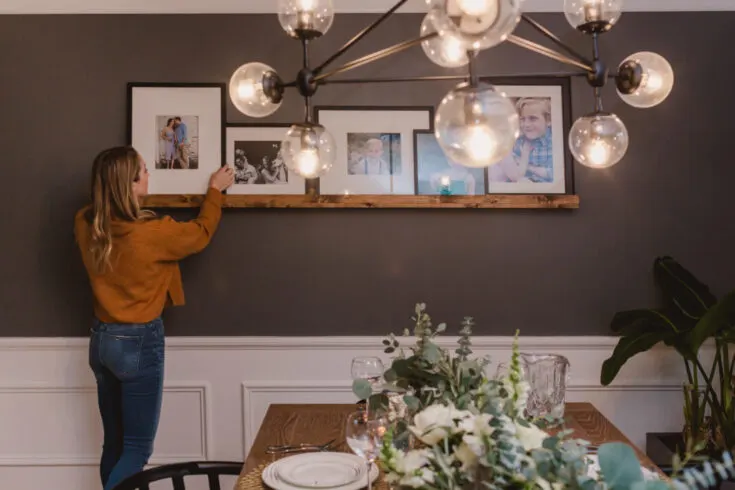
DIY Picture Ledge Reveal
Isn’t it great?!
For a cohesive look, I used all-black picture frames of all sizes. For a more casual look, I overlapped the frames and leaned them against the wall.
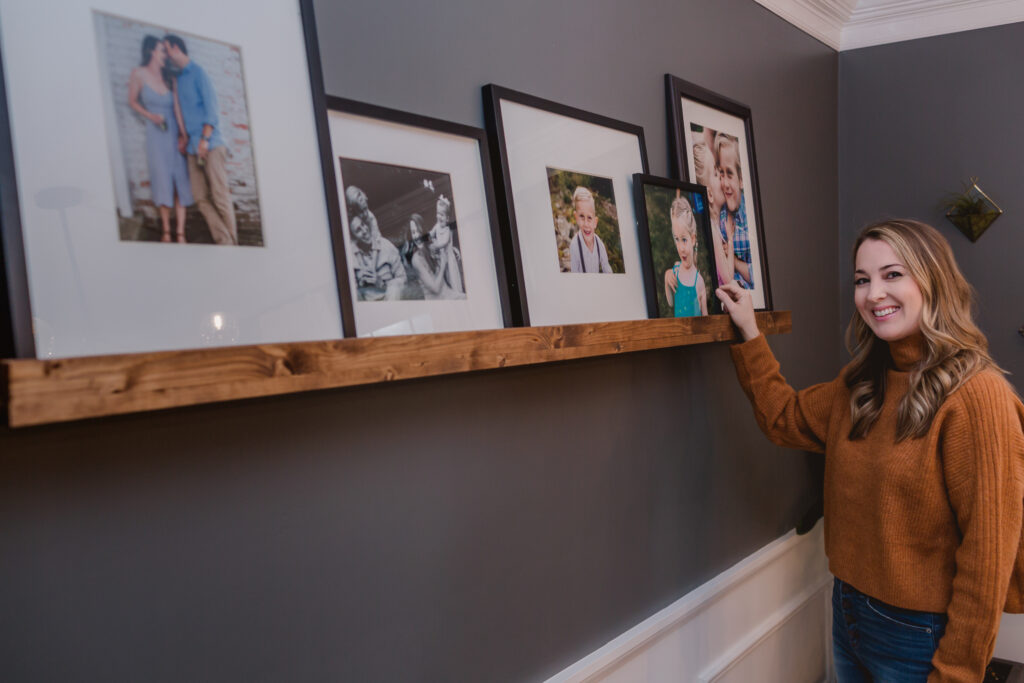

We eat most of our meals in the dining room and this wall of smiling faces makes me so happy. The picture ledge also makes a great gift for friends and family!


We gifted a picture ledge to my parents for Christmas and it now displays beautiful images of their grandkids.

How to Make Your Own Picture Ledge
Wow family and friends with this beautiful picture ledge to display artwork and family photos!
Materials
- 1x2 commonboard
- 1x6 commonboard
- 1x4 commonboard
- Screws
- Wood condition
- Wood stain
Tools
- Drill
- Level
- Clamps
- Paintbrush
Instructions
- Determine the length of your picture ledge and gather materials
- Attach the back of the ledge (1x4) to the base of the ledge (1x6) by placing the back of the ledge onto the base and screwing from the bottom of the base
- Attach the front lip (1x2) to base board (1x6). Again, attach the front lip by screwing from the bottom of the base board
- Apply wood conditioner and wood stain
- Attach picture ledge to the wall and enjoy!
Jessica Anderson
Saturday 20th of November 2021
Hello- I want to make sure I position my wood correctly. The 1x4 board is the board that gets attached to the wall and the 1x2 board is what u see after the pictures are positioned? I dont know why but that front board looks much thicker than a 1x2 to me.
lindseymahoney
Tuesday 23rd of November 2021
Hi Jessica, that is correct. The 1x6 board is the bottom of the picture ledge. The 1x4 board is placed on top of the 1x6 and attached with screws through the bottom of the 1x6 board (the screws will not be seen under the ledge). The 1x4 board is what is attached to the wall. The 1x2 board then sits on top of the 1x6 board at the front to create the lip of the ledge. It looks bigger because it is sitting on top of the baseboard so it is more like a 1x3 when the ledge is complete.
Sammantha
Friday 29th of January 2021
Thank you so much for this post made two and I couldn't be happier with them!
lindseymahoney
Saturday 30th of January 2021
Thank you for sharing!! I am so happy that you found it helpful :)
Erin
Wednesday 24th of June 2020
hi! I love everything in this room. Do you happen to know where your chairs and dining table are from?
Thanks!
lindseymahoney
Wednesday 24th of June 2020
Thank you so much! The table is from Arhaus and the chairs are from Target.