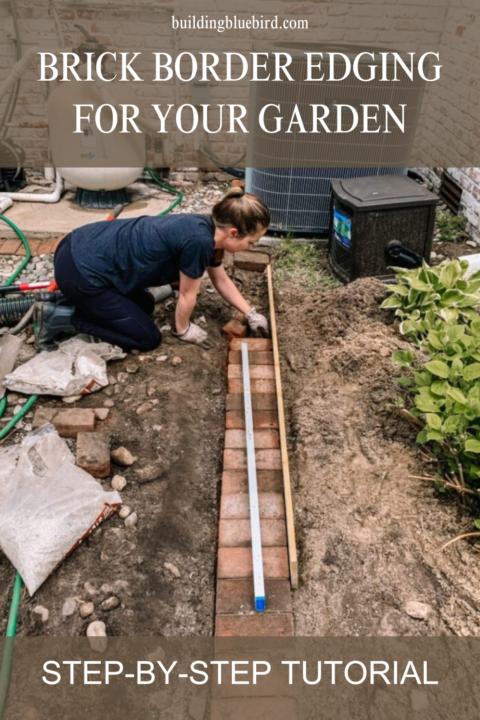
How to Lay Brick Border Garden Edging | Easy DIY
Last Updated on June 28, 2023 by lindseymahoney
If you're looking for a simple and cost-effective way to add some visual interest to your garden, consider using bricks as edging.
Not only do they provide a clean and classic look, but they also help to define garden beds and prevent grass and weeds from encroaching on your plants.
Here's how to do it right.
How to Lay Brick Edging to Border Flower Bed
Affiliate links are used in this post, thank you for supporting Building Bluebird! For a complete list of materials used in this project, scroll to the bottom of the post.
Brick Edging Purchase List

- Gardening gloves
- Bricks (similar)
- Garden Edger
- Flat Shovel
- Handheld Shovel
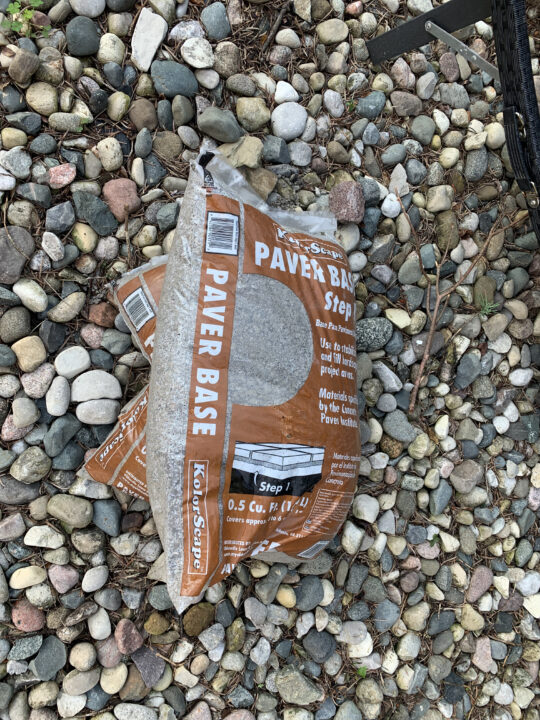
- Paver Base Step 1
- Paver Sand Step 2
- Rubber Mallet
- Short Level
- Long Level
- Measuring Tape
- String line & Stakes
- Additional edging guide options: Garden hose or a scrap of wood
Brick border edging is a great way to add color and interest to your garden and is a great DIY for beginners. It also makes for a beautiful and charming border around your flower beds.
1 | Gather Bricks for the Garden Edging
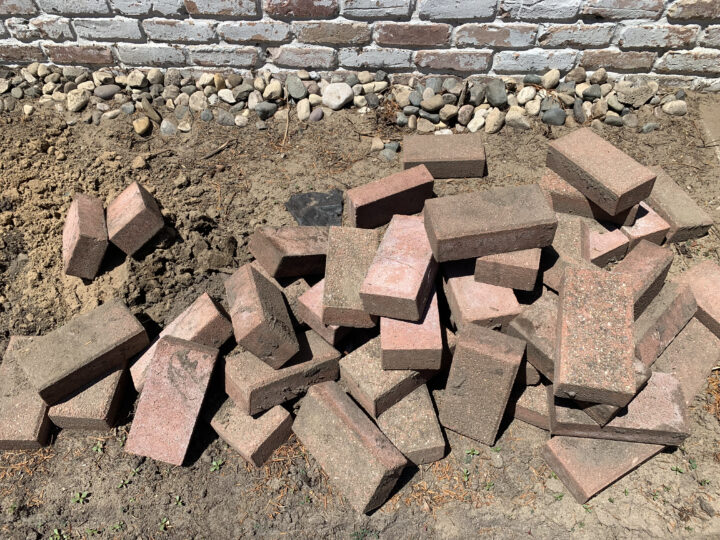
I was able to use the pile of unused bricks in the corner of our backyard. Who doesn't love free edging material?!
A few flower beds originally had bricks as edging, but were overgrown and buried. I dug up all of the bricks to install again to create a clean garden edge.
2 | Determine the Brick Border Shape
Choose the shape of your flower bed where the bricks will create the garden border. The edge line of your brick border can be completely straight or it may decide to create a soft s-curve.
To visualize the design of your brick garden border, use a hose to trace the edging. The face of the brick can be laid horizontally or vertically.
My personal preference is a vertical brick border, but it does require more bricks.
We used this style of brick border edging in the backyard of our second home, too.
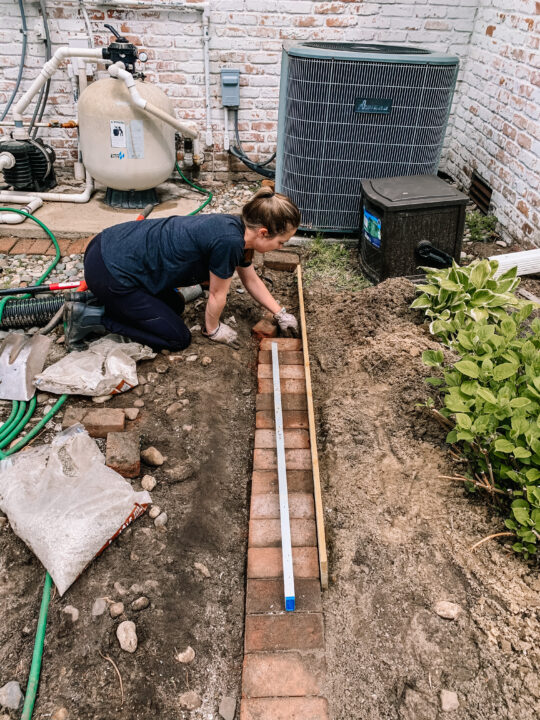
3 | Create a Guide to Install the Brick Border
When installing a straight brick border, use a string line as a guide! You can find the garden stakes and string at a local hardware store like Home Depot. I have laid brick edging in the past without a guide and my line would always start to curve.
This time, I took the following steps to keep the brick edging straight:
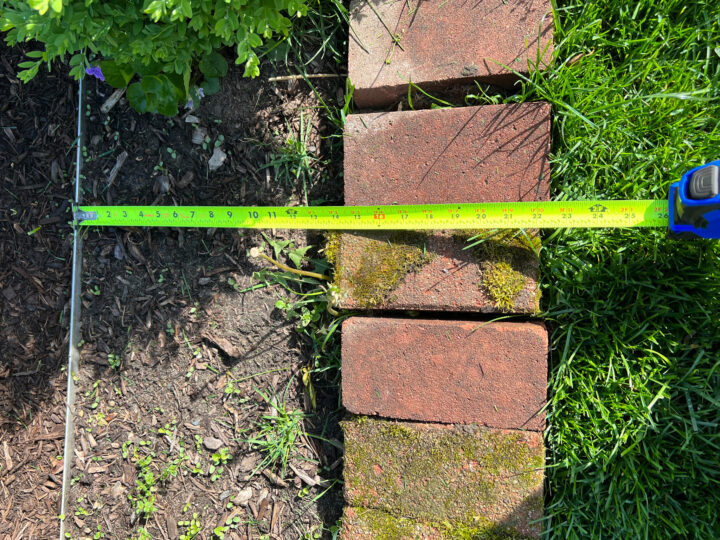
- The first thing you will do is determine the width of the flower bed and where you want the brick edge to end (24 inches)
- Measure 24 inches from the metal edging on the other side of the flower bed (measuring from the exterior of your house also works)
- Mark 24 inches with a garden stake in the center and both ends of the flower bed
- Connect the three stakes with a string to create a guide for the edge of the brick border
If your flower bed border is curved, an easy way to creat the curve is to use a hose to create guide while laying the bricks.
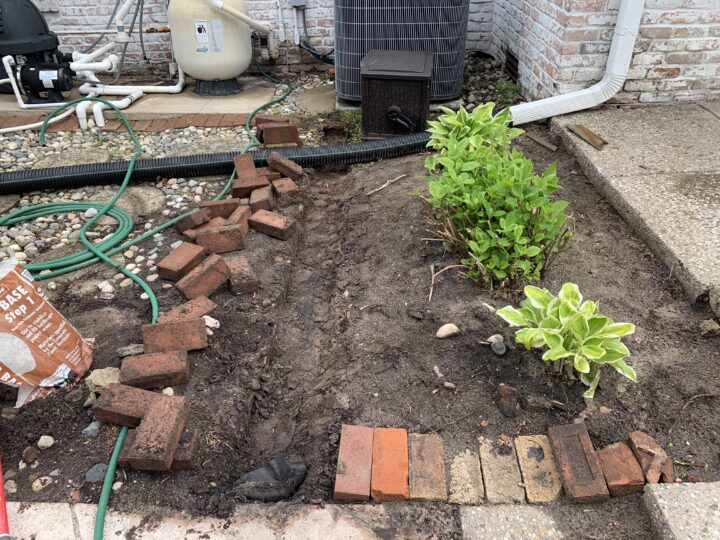
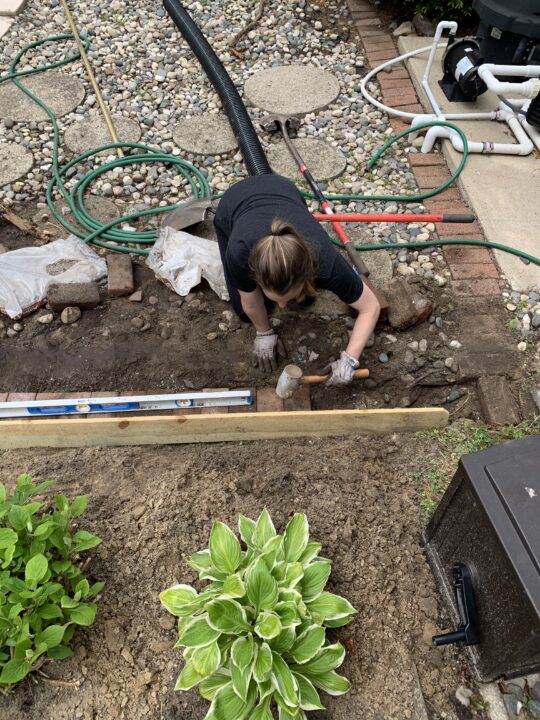
4 | Dig a Trench to Install the Bricks
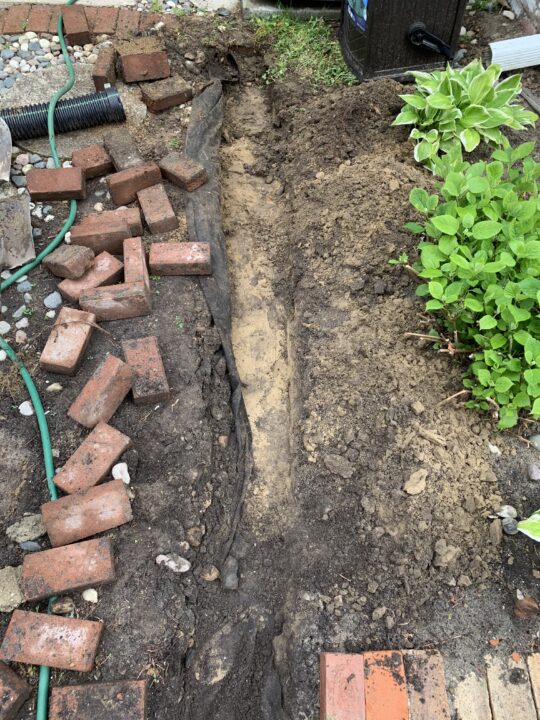
I used a flat spade shovel to dig a trench for the bricks, but a garden edger tool is the best tool to use, especially when sod needs to be removed.
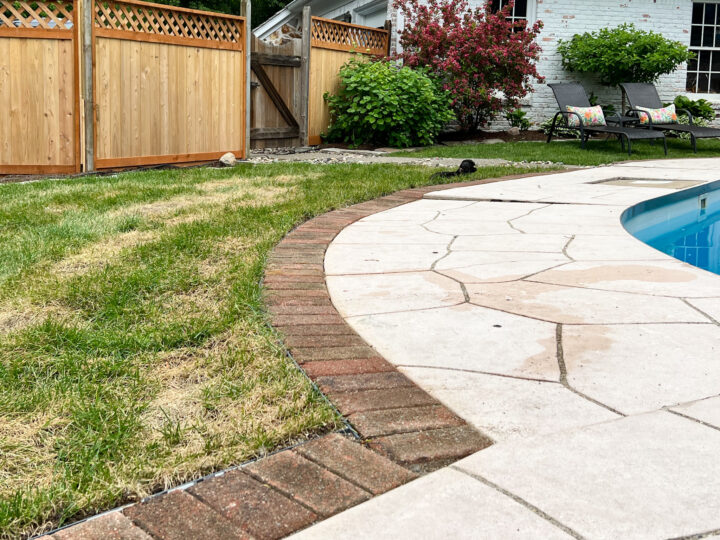
The flower bed next to the pool butted up to the concrete pool surround. I wanted the bricks to be flush with the concrete surround, which determined the depth of the trench for the brick border.
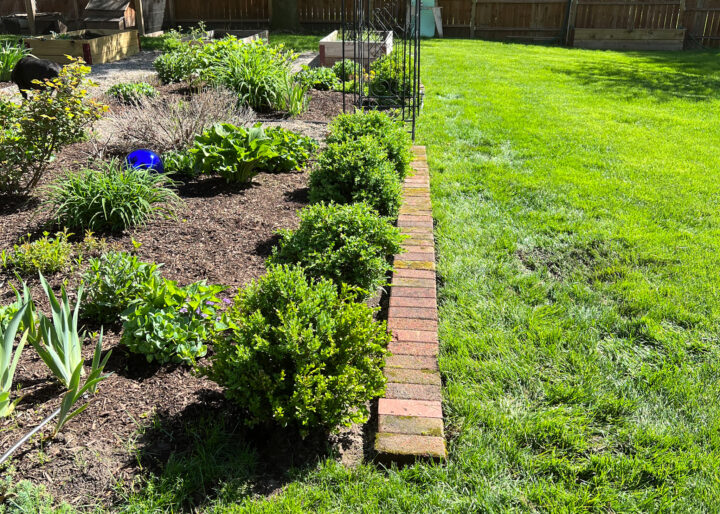
I installed another brick border around my English garden. You can see the string line I used as a guide for the trench.
5 | Add A Layer of Paver Base
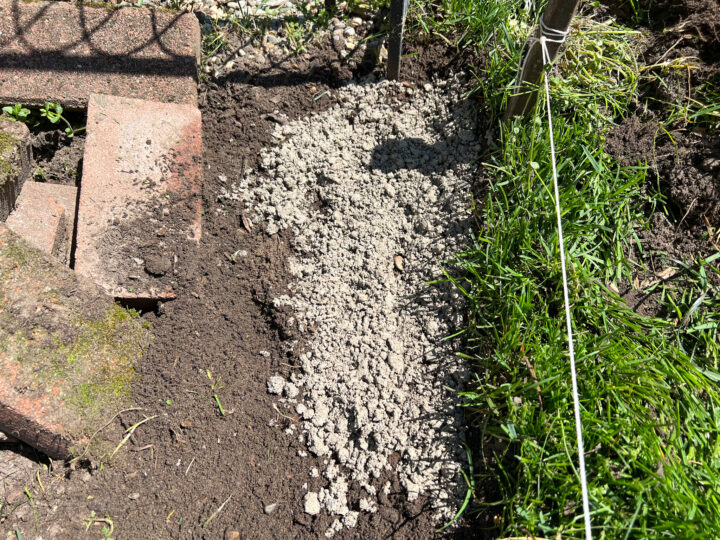
For the next step, you will add a few scoops of the paver base to help with draining and leveling the bricks.
If you would like to lay down a weed barrier fabric before the crushed gravel, that is an option and can help prevent weeds.
The crushed gravel acts as a barrier between the bricks and soil and prevents erosion of the brick.
I recommend adding gravel as you lay each brick and not laying down a bunch of gravel at once.
Some people use mortar to build their brick edging which creates a more permanent structure and helps to prevent weeds from growing between the cracks.
Because I only installed a single row of bricks, I chose not to use mortar.
Honestly, I don't mind pulling weeds if they grow near the bricks because I have to pull the weeds in the flower bed anyway!
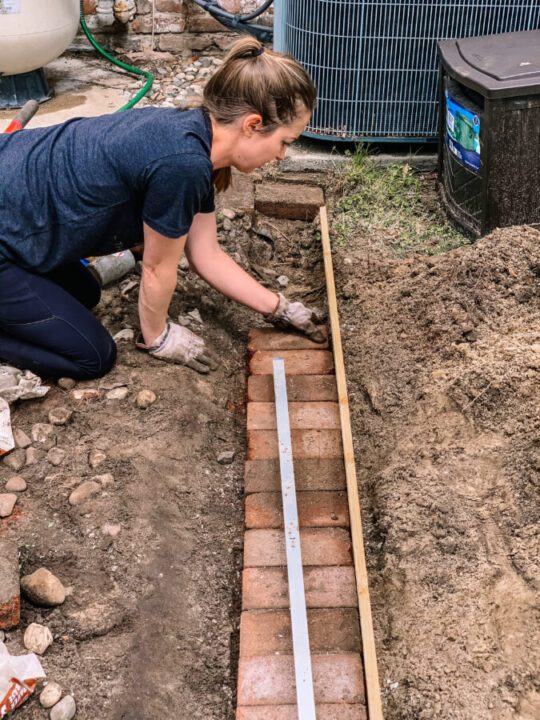
6 | Install the Bricks as Edging
When laying the brick, there are a few different areas where you want to pay attention.
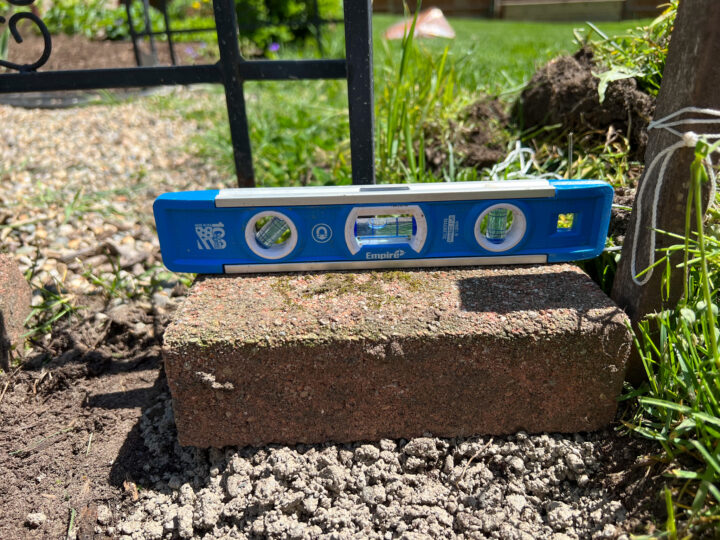
Make sure the brick border remains level.
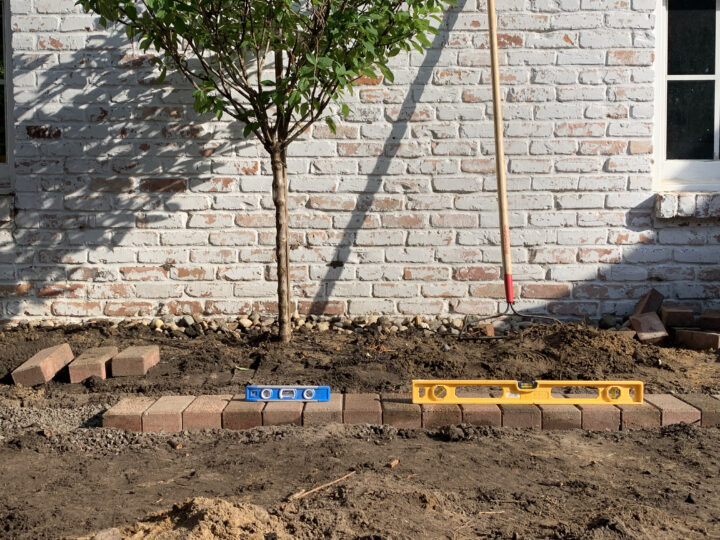
Lay the row of bricks so they are level horizontally (unless you are installing it on sloping ground).
As you begin adding more bricks to the border, use a longer level (I used 24-inch) and keep the bubble in the center.
You may have to dig out more dirt to lower the brick or add more paver base to raise it up.
One of our flower beds sloped down gently on one side, so it was not always completely level.
Each brick is slightly sloped away from the flower bed.
You want the brick to be vertically sloped away (slightly) from the flower bed.

Sloping the brick slightly will allow water to drain away from the flower bed. If it is sloped towards the flower bed, you could get flooding in the bed.
Keep the brick row from curving (if it is a straight border).
Continuously check that you are laying the bricks in a straight line, ideally by the string line guide you have set up.
When I laid the first brick border edging at our house, I had to restart 3 times because the row began to curve. Chris had a great idea to use a fence board as a guide and it worked perfectly.
If I saw a slight curve or a brick out of place, I used a flat shovel to tap the bricks back into place.
Even when I created the string line guide, I ended up with a slight curve! Luckily, it is pretty easy to tap bricks forward and realign.
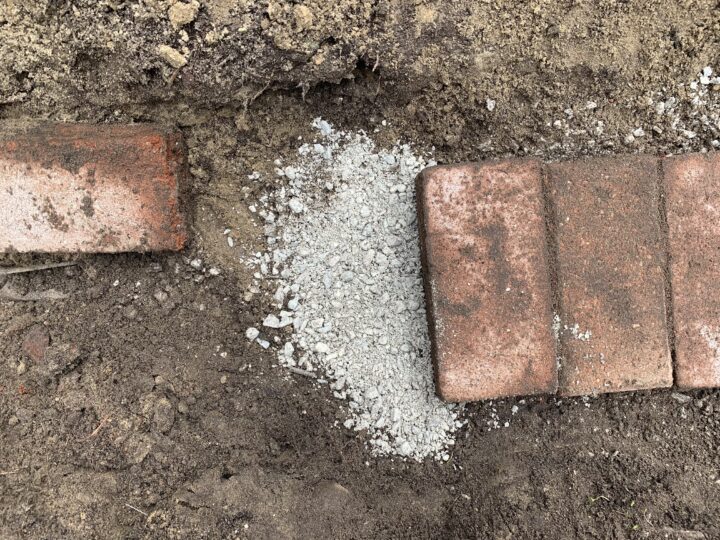
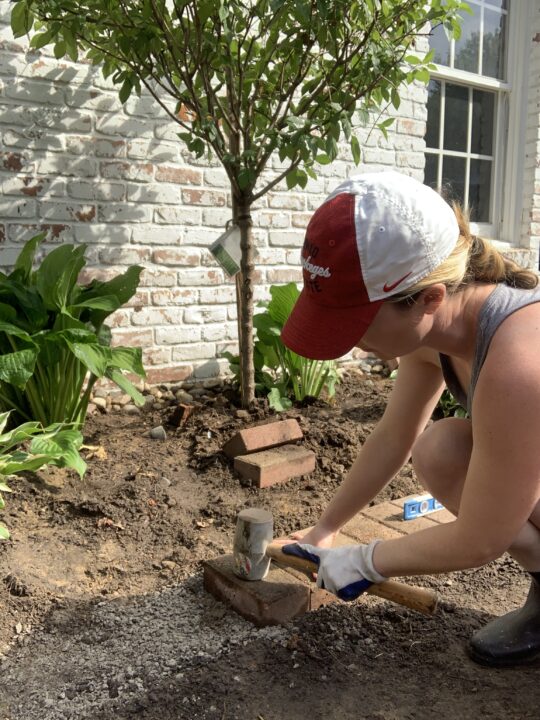
7 | Tap Each Brick with Rubber Mallet
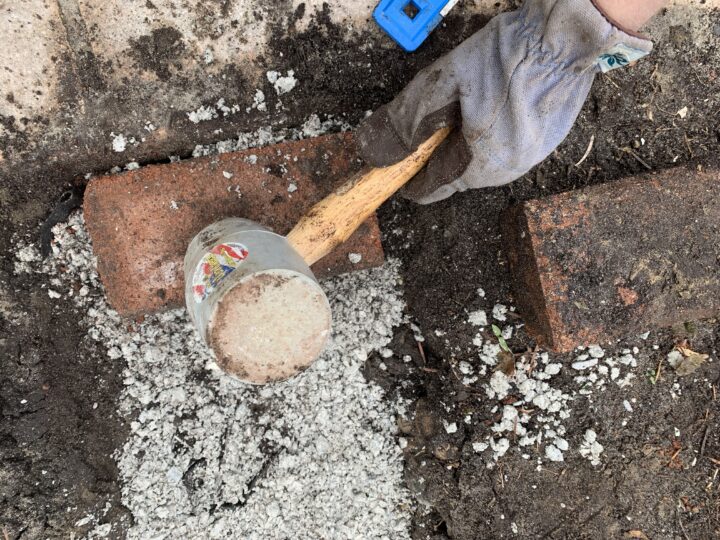
When you install each brick on the paver base, use a rubber mallet to gently tap it in place.
If the small level shows that one side is too high, use the mallet to tap it down.
If the next brick is too low when you go to install it, add more paver base I like to add enough so that the brick is slightly higher than the vertical row of bricks.
Then when I use the mallet to smack it into place to become even with the row of brick edging.
8 | Lay Remaining Bricks
Continue to lay the brick edging until you have completed the garden border!
What if the final brick doesn't fit into the last spot of the garden border?
There are a few ways to remedy this issue:
- Flip the whole brick on its side for half of the width to complete the border - this will require a deeper trench to keep a consistent height
- Use a saw suitable for masonry and cut the brick to fit perfectly
- Fill the remaining border with gravel or soil - I would only suggest this if it is an inconspicuous area or will be covered by foliage
9 | Brush Sand Into the Cracks
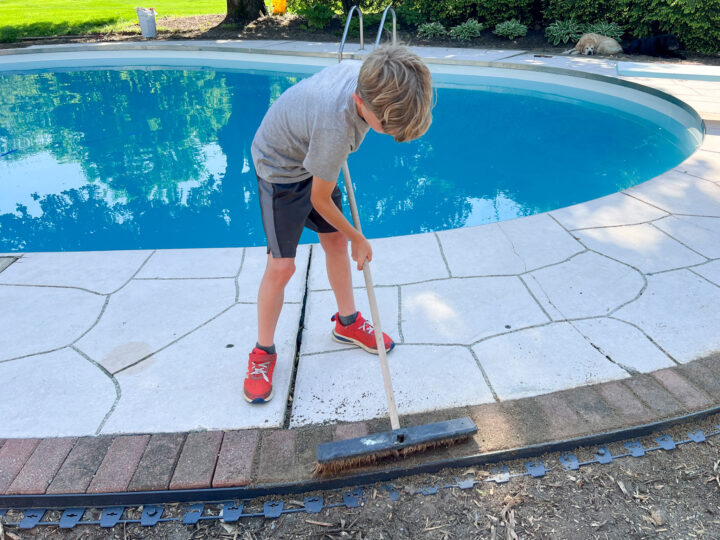
Brush paver sand into the cracks of the border to stabilize the bricks. I have used a push broom or my hands to fill the cracks with sand between the brick edging.
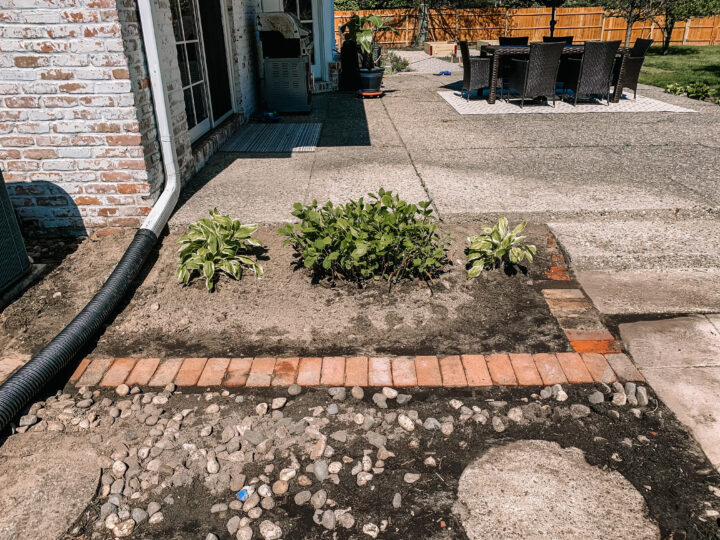
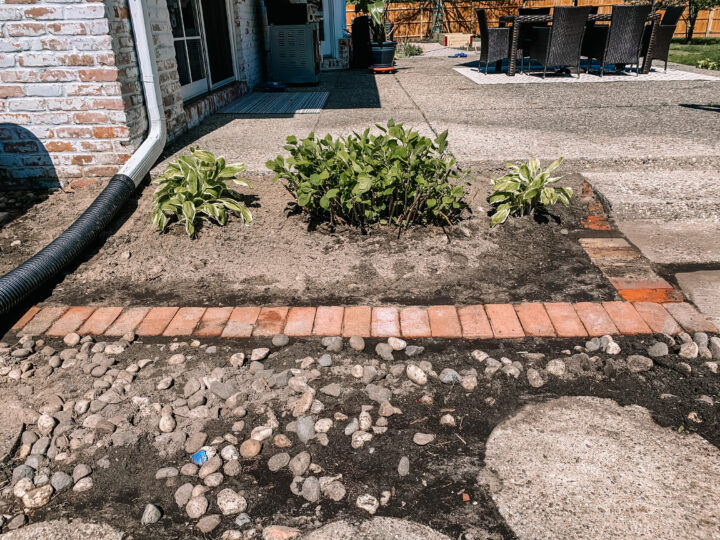
Charming Flower Bed Reveal with Bricks as Edging
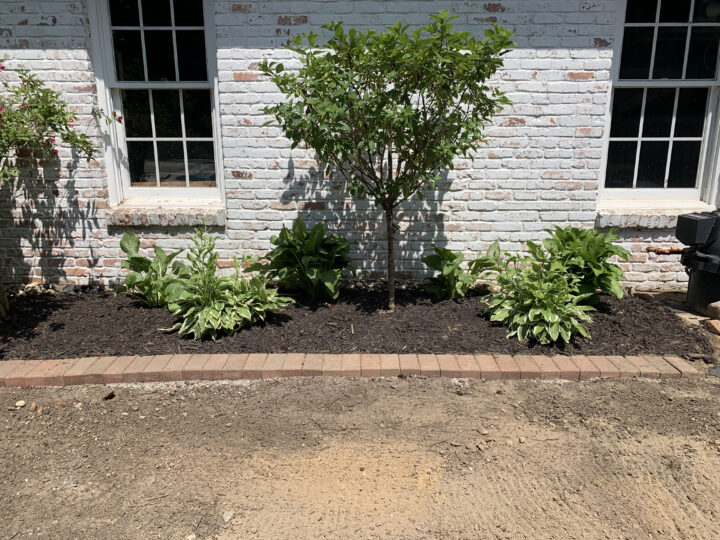
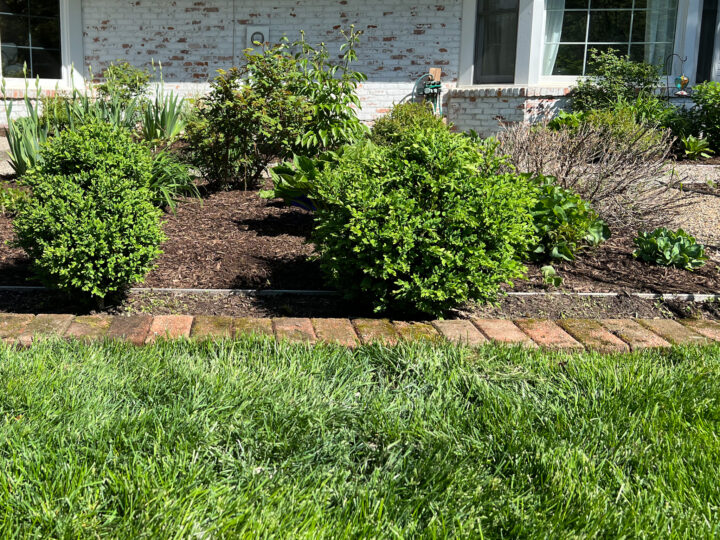
I love how the green plants look against the distressed white brick of our house and the charming brick border!
We will be adding a small fence around the pool equipment and fresh sod in the coming weeks that will complete the look of these charming flower beds.
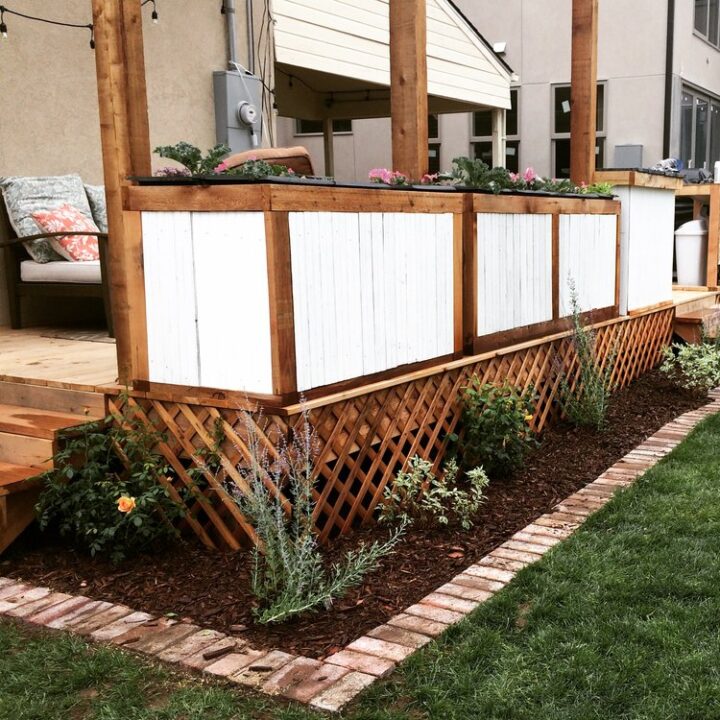
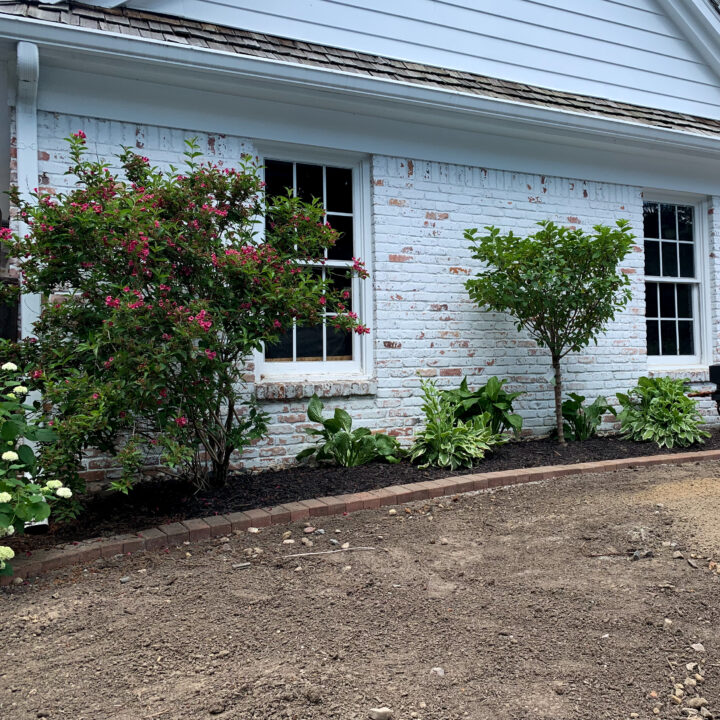
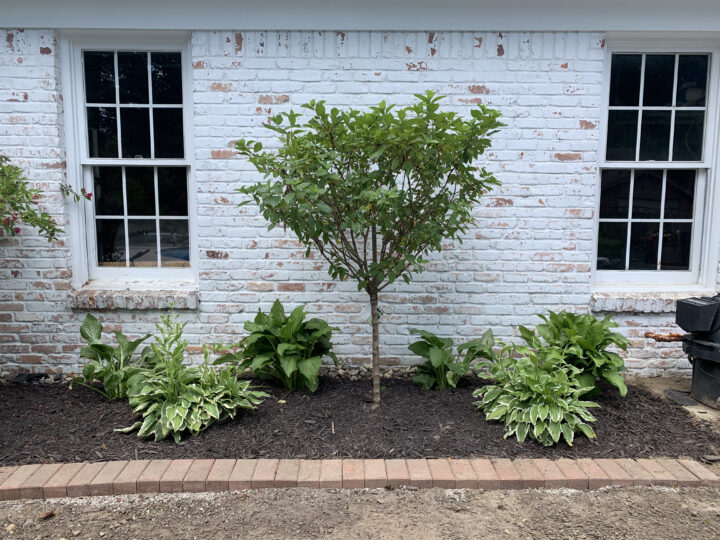
Here is another view of that area just a few weeks later with fresh grass!
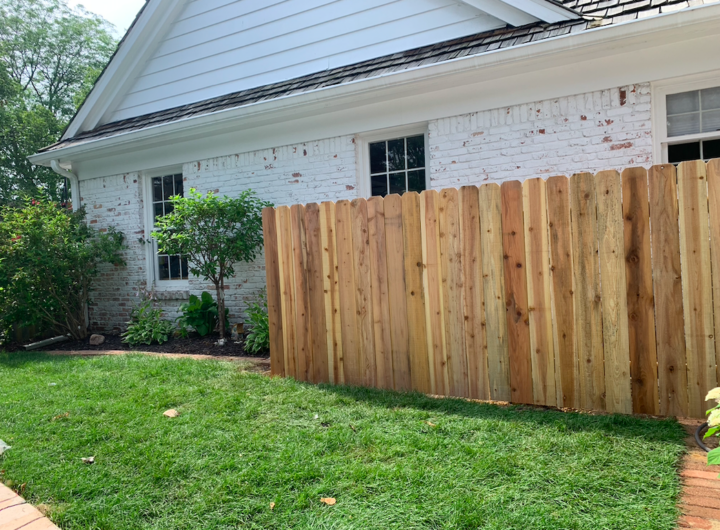
And a few weeks later with the new fence hiding the pool equipment.
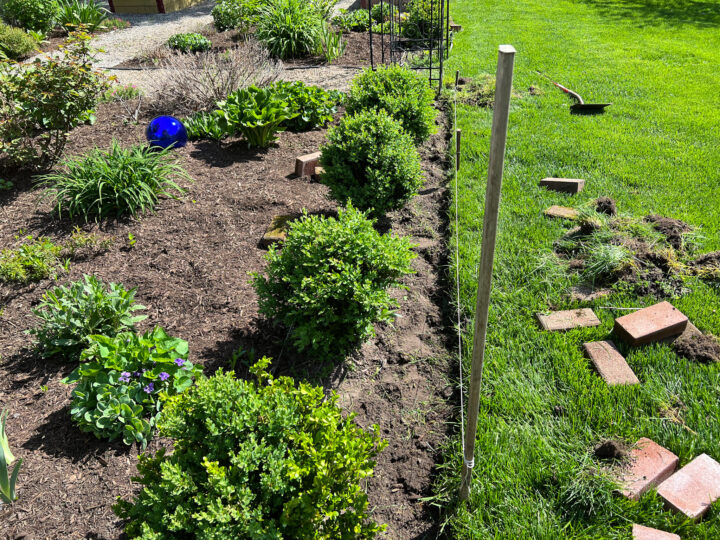
Here is my latest brick border installation around our English garden. The bricks give a defined edge to the garden while still feeling casual.
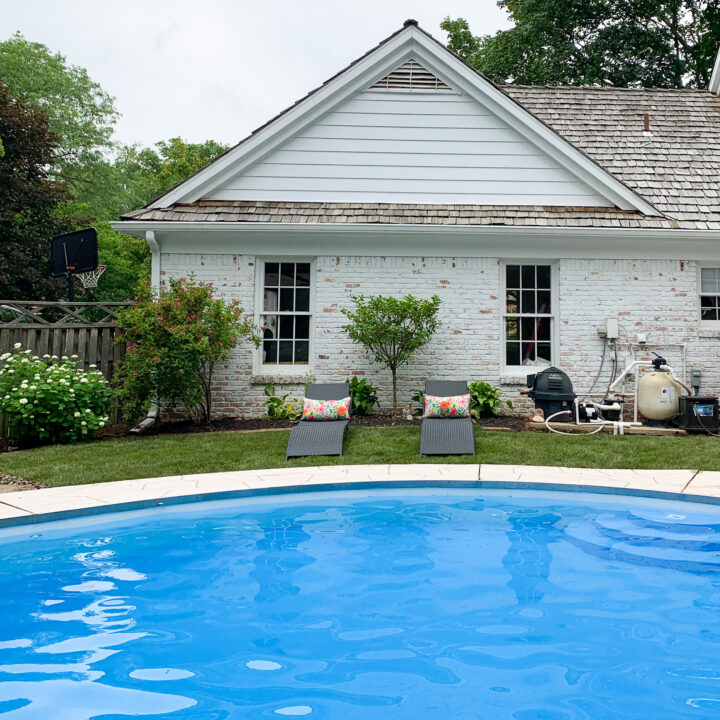
I also installed brick edging around the concrete skirt of our inground pool.
This DIY project takes a little patience but it is pretty simple once you get the hang of it! Plan on spending a few hours completing this project.
Garden Bed Planting Tips
If you're planting flowers, choose perennials that bloom year after year. Perennial flowers last longer than annuals, so you'll enjoy blooms throughout the season.
Choose bulbs that flower early in spring, such as tulips, daffodils, crocuses, and hyacinths.
You can also plant bulbs later in the summer when temperatures are cooler.
Looking for more DIY and Landscaping Projects to Try Outside?
- How to Camouflage Your Meter Box with Paint
- How to Paint a Shed Yourself | Beginner's DIY
- Build Your Own Composting System at Home
- How to Build a Simple Raised Garden Box | DIY
- Hardy Perennial Plants to Split & Share with Friends
- 25+ Easy Outdoor DIY Projects to Try This Year
FAQs
Why should I use bricks as edging for my garden?
Bricks are the perfect material for garden edging for a few reasons:
Cost Benefit
Bricks are an inexpensive option to add a charming decorative feature to your yard.
I found a pile of old bricks in our yard and was able to reuse them for garden edging. Facebook marketplace or Craigslist is a great place to find inexpensive bricks for this project.
Durability
Brick edging is meant to last for years and has been tested to withstand weather and other elements.
Appearance
Brick garden edging comes in a variety of colors and styles. You can find everything from simple brick rows to elaborate designs.
Maintenance
Brick edging requires little maintenance, just weed around the bricks occasionally.
Can you lay bricks directly on the soil?
You can lay bricks directly on the soil but I would not recommend it.
Adding a base layer of gravel will prevent the bricks from eroding. The paver base helps with drainage and keeps the bricks in place.
How much does it cost to lay brick border edging?
The cost of a brick border really depends on the size and design of your border and what you already own.
For our brick border project, we owned all of the tools and a pile of old bricks in our backyard.
The only material we had to purchase was the paver base, which is about $5 per bag.
If you don't own some of the tools, reach out to friends and family and ask if you can borrow theirs. If you don't have any bricks, make it known to friends and family that you are looking.
Sometimes a simple Facebook post asking if anyone has bricks they are willing to give away is all you need to secure affordable or even free materials.
Do you need mortar for brick border edging?
No! Brick edging does not require mortar. You absolutely can use mortar to create a sturdy border, but it is by no means required.
What do you put under brick garden edging?
I like to use paver gravel beneath the bricks in the garden.
When bricks are directly on the soil, they can erode more quickly. the paver gravel improves drainage and helps with keeping the brick edging level.
Some people prefer to use sand underneath the bricks which works well too.


Three questions. How is one layer of brick enough? In every place I have lived the soil would heave the bricks, or the grass would completely overtake them in one season. Which leads to the second question. Wouldn’t you put a weed barrier down before laying the brick? How do you keep the weeds out?
A single layer of bricks has worked fine for me at our homes. A weed barrier is a great option to help prevent weeds from popping up, but even with the barrier down in other areas of my garden, the weeds seem to find a way through. I am constantly weeding out in my garden, so I just pull up any weeds that may be growing near the bricks - definitely manageable. I have not seen any heaving with the soil beneath the bricks either - I think the screening below helps to prevent this issue because it improves drainage.
@Steve Salisbury,
@Steve Salisbury,
Your right about heaving in any area that freezes. There's no guidance here for depth the trench and gravel base or compacting it. You'll need several (+/- 4") of base
all looks great apart from the timber fence over the pool equipment. that looks out of place
Thanks. If I had an unlimited budget, no doubt I would choose a different way to hide the pool equipment. For now, the wood fence is a great solution to hide the ugly pool pump and AC!
love love love this site
Thank you!
My flower bed in the front of our house slopes down from left to right. Should I follow the slope or build it up so it is level?
Thank you
It depends on the look you want to achieve. I have installed a brick border that slopes and it looks great.
Can I ask what tree and plants are in the garden bed you paved?
Cheers
Absolutely! The tree is a limelight hydrangea and the plants below are hostas.