
Last Updated on June 20, 2024 by lindseymahoney
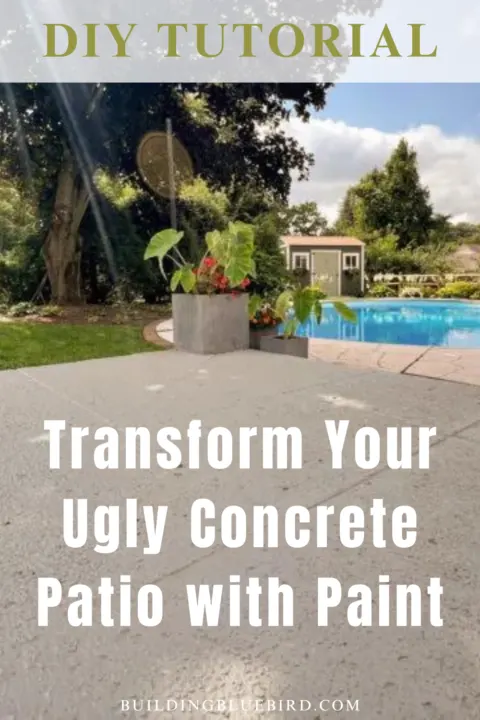
Is your concrete patio looking dull and uninviting? Painting your old patio is a simple yet effective way to transform its appearance and bring new life to your outdoor space. The concrete makeover on our back patio was the perfect budget-friendly refresh for our back porch!

From the day we moved into our home, replacing the concrete slab in the backyard has been on our list of projects to tackle. Our concrete has large cracks and is sinking in various areas around the patio.
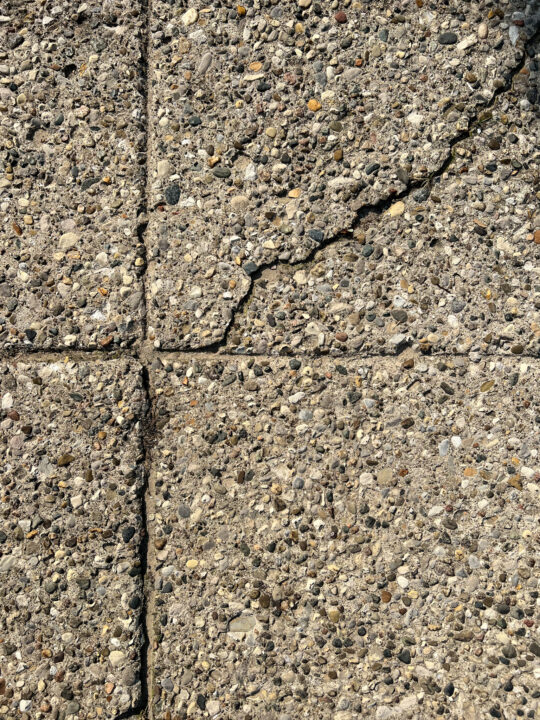
The surface of the concrete has an aggregate finish and it is incredibly uncomfortable to walk on with bare feet. This is a challenge when you have a pool right next to the patio!
Table of Contents
- Why Paint Your Concrete Patio?
- How to Paint a Patio Yourself | Concrete Makeover
- 1 | Gather Supplies and Choose a Paint Color
- 2 | Clean Your Concrete Patio
- 3 | Fill the Cracks with Self Leveling Concrete
- 4 | Prime the Patio Surface
- 5 | Paint the Edges of the Patio
- 6 | Apply the First Coat of Paint
- 6 | Apply the Second Coat of Paint
- Concrete Makeover Reveal
- Patio Furniture Sources
- Concrete Patio Makeover Ideas
- More Content You Will Love
- Frequently Asked Questions About Painting Concrete Patios
Concrete Patio Before
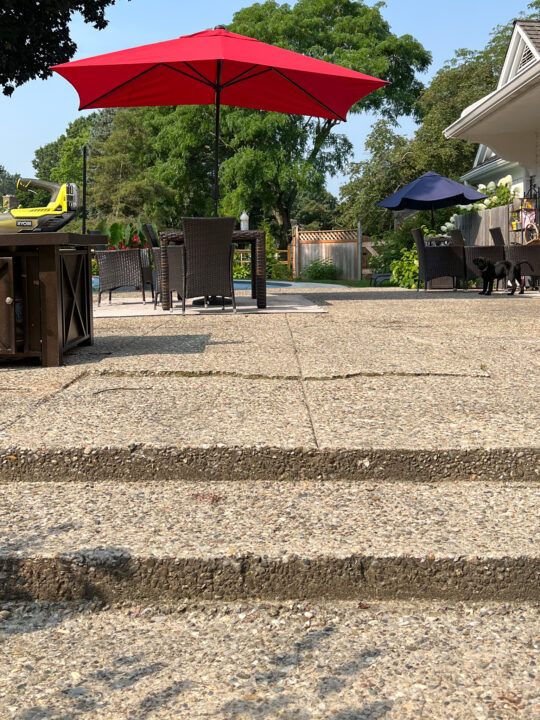

The patio surface is cracked and rough on our feet.

Dirt and dust easily get trapped on the existing slab of concrete and it is not as inviting as I would like it to be.

Whatever we decide to do when we replace this concrete, it is going to have a larger price tag. Until I am absolutely certain what we want to do in our backyard, I do not want to spend the money to build a new patio with concrete.
Painting the concrete patio is a fantastic short-term solution for us and I don’t know why it took us this long to even consider it! I am excited to share this outdoor DIY project with all of you and share our tips and tricks to improve the look and feel of our outdoor concrete patio.
So don’t let your ugly concrete be an eyesore any longer. Grab your paintbrush and get ready to transform your space with a fresh coat of paint. Let’s get started!
Why Paint Your Concrete Patio?
We decided to paint our concrete patio for a few reasons:
- Affordability: Our patio is in rough shape and in an ideal world, we would tear it out and replace it. In the real world, we do not have the budget for such a large project. Painting the patio will improve the look and feel of our backyard at a fraction of the cost.
- Aesthetics: Not only did our concrete patio look bad, but it hurt your feet to walk on it too! A fresh coat of paint creates a smoother surface and a more aesthetically pleasing look.
- Maintenance: I wish we would have painted our patio sooner! Filling in the cracks around our patio prevents water from seeping under the slab and causing further damage. It also prevents pests, like chipmunks from burrowing in the cracks.
- Reuse An Existing Item: Although I do think our patio, in particular, will eventually need to be replaced, in many cases an old concrete patio needs a little cosmetic update to feel like new! If an existing item can be repurposed, I am always a fan of this option.
How to Paint a Patio Yourself | Concrete Makeover
[Affiliate links are included in this post where I receive a small commission when you purchase a linked item at no additional cost to you. Thanks for supporting Building Bluebird!]
1 | Gather Supplies and Choose a Paint Color
Before you begin, make sure you have all the necessary materials on hand.
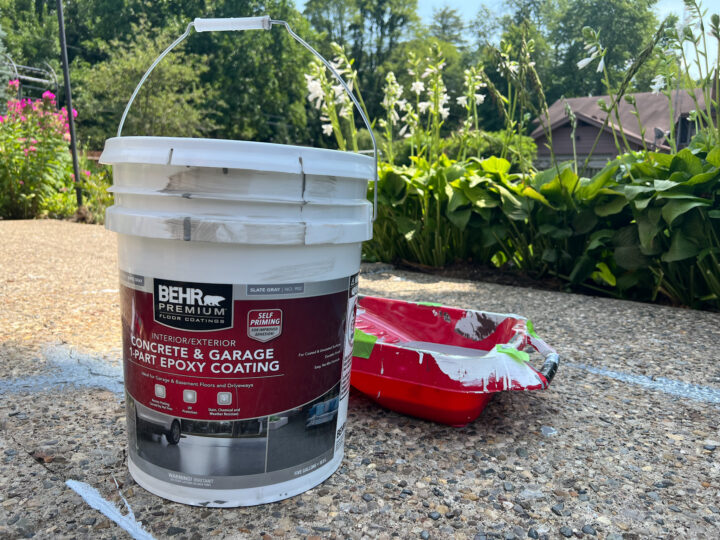
- Concrete and Garage Epoxy Coating: I tinted the epoxy to the color Wet Concrete
- Self Leveling Concrete: To fill in cracks
- Patio Concrete Primer
- 1-1/2 inch thick paint roller cover and paint tray
- Paintbrush
- Extension pole
- Power Washer: To clean the concrete
- Leaf Blower (and Screwdriver to loosen dirt if necessary): To remove dirt from cracks

*Check out my favorite painting tools whenever I tackle DIY projects at home!
Choosing Your Patio Paint Color
When choosing the paint color for your patio, it is important to consider the undertones as well as how the color looks throughout the day.

When we purchased our supplies, I chose a 5-gallon bucket of paint that was premixed in a color called Slate Gray.
The color looked great in the store, however, I did not consider the undertones that would show through when the sun was shining down on the patio.
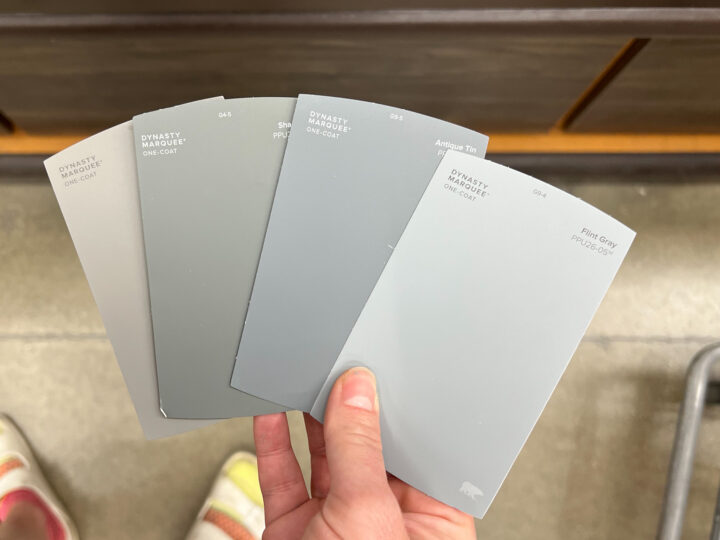

When it came time to paint the patio, the blue undertones of the gray color were very noticeable. Our concrete looked blue!
Instead of panicking, we decided to use the slate gray paint as another sort of primer for the concrete.
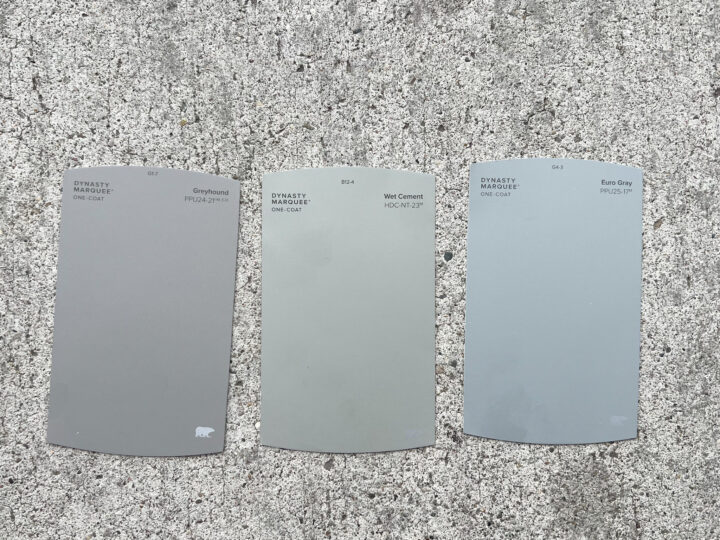
I went back to Home Depot and carefully chose a new gray color that was a neutral gray. After testing a few of the color swatches outside in the sunlight, I chose the color Wet Concrete.
2 | Clean Your Concrete Patio
Start by thoroughly cleaning your patio to remove any dirt, debris, grease, or stains. A leaf blower or broom will work.

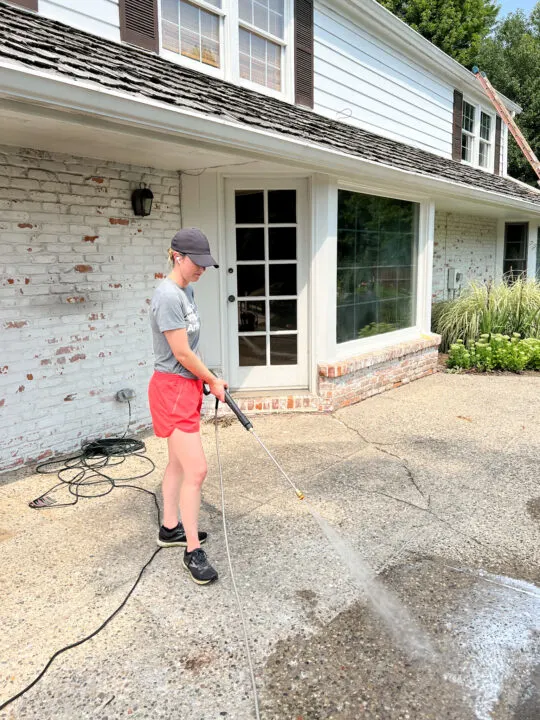
Sweep the area to remove loose dirt, then use a pressure washer or hose to rinse off any stubborn grime. For stubborn stains, you may need to use a concrete cleaner or degreaser.
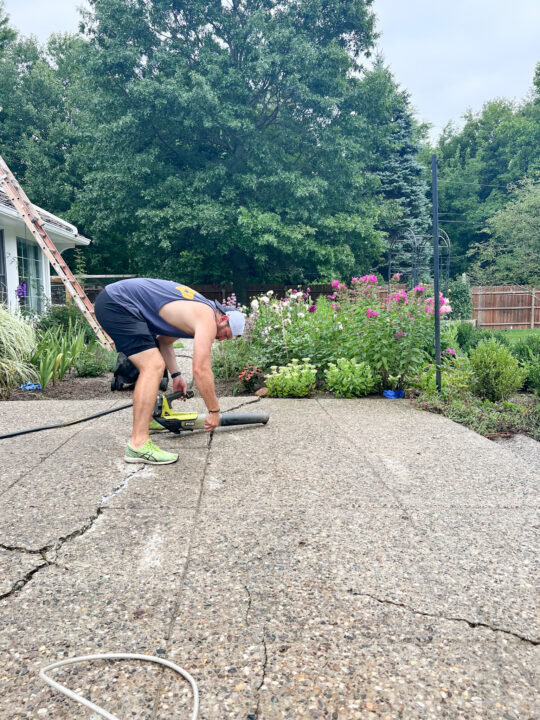
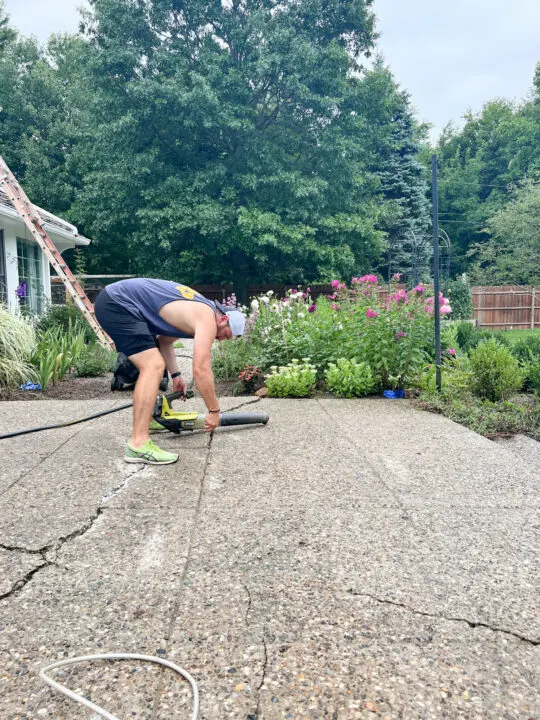
The large cracks across our patio collected dirt and debris, so we used a screwdriver to loosen any remaining dirt.

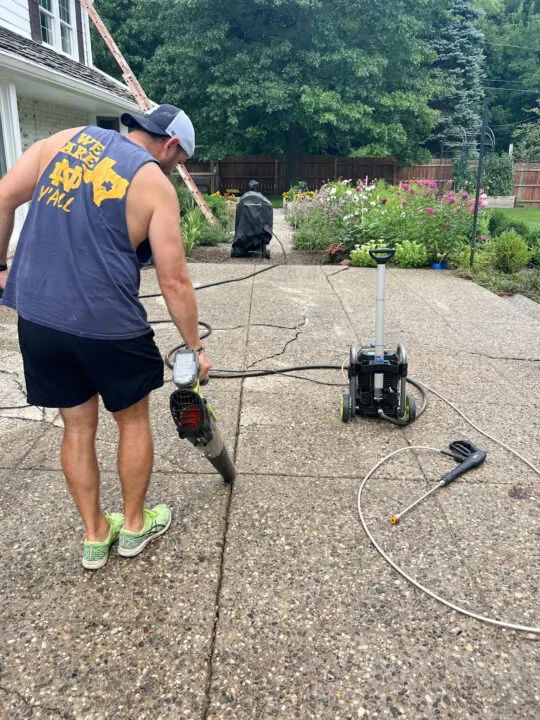
Next, we used the leaf blower to blow off any remaining dirt on the concrete surface.
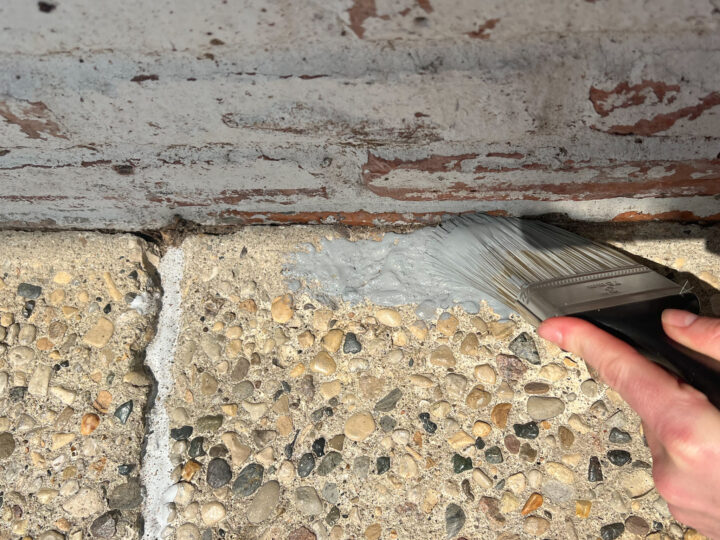
3 | Fill the Cracks with Self Leveling Concrete

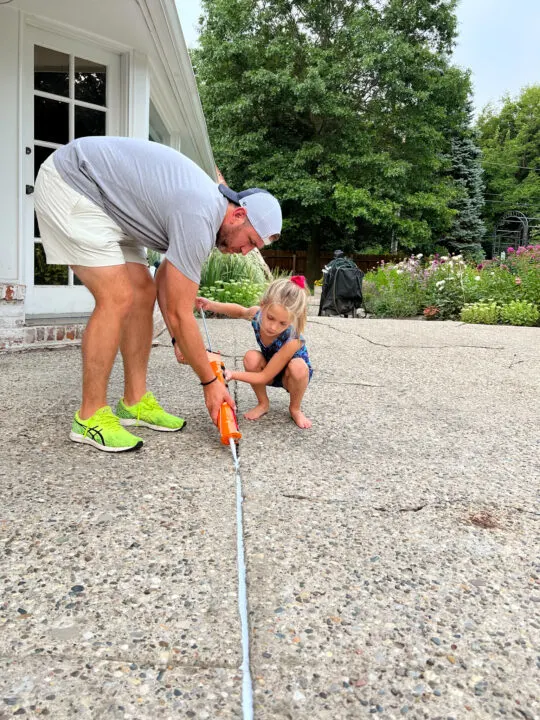
Inspect your patio for any cracks, chips, or other damage. Use a concrete patching compound to repair cracks and holes. Smooth out the patched areas with a trowel, and allow them to dry according to the manufacturer’s instructions.
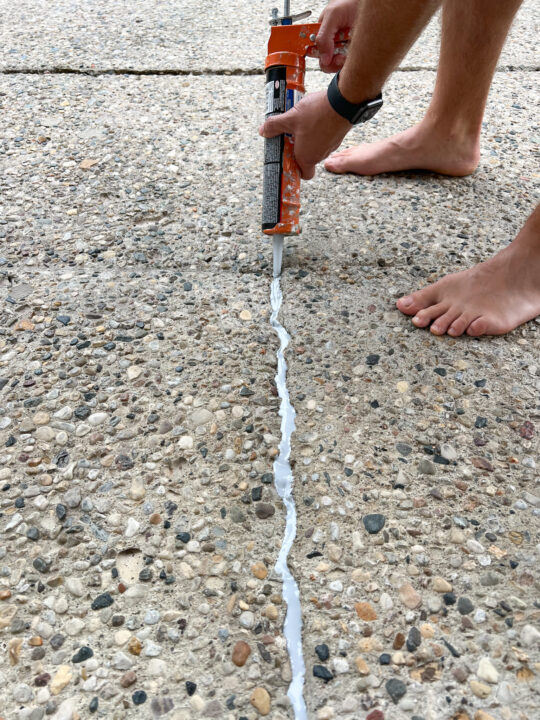

We used self-leveling concrete that easily filled the deep cracks throughout our concrete patio.
*If your patio has a smooth surface, you will want to apply a concrete etching solution before priming the concrete to improve paint adhesion. Because the surface of our patio is already a rough surface, we skipped the etching solution.
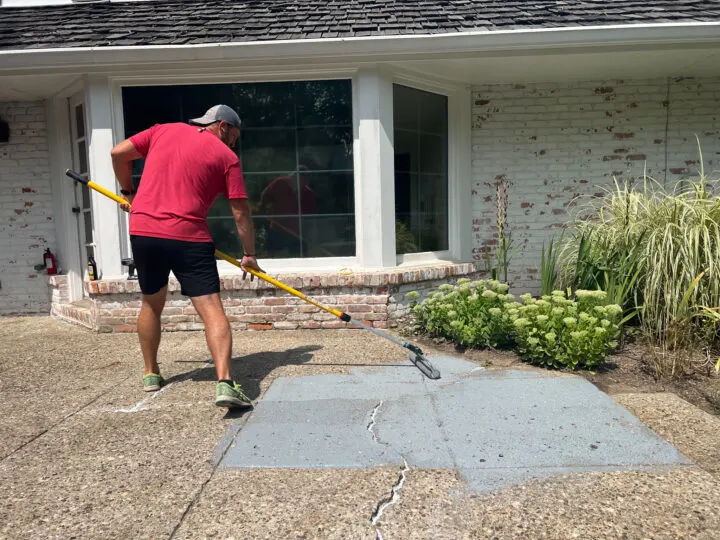
4 | Prime the Patio Surface


Applying a primer is essential for optimal paint adhesion and durability. Our concrete sucked the primer right up.
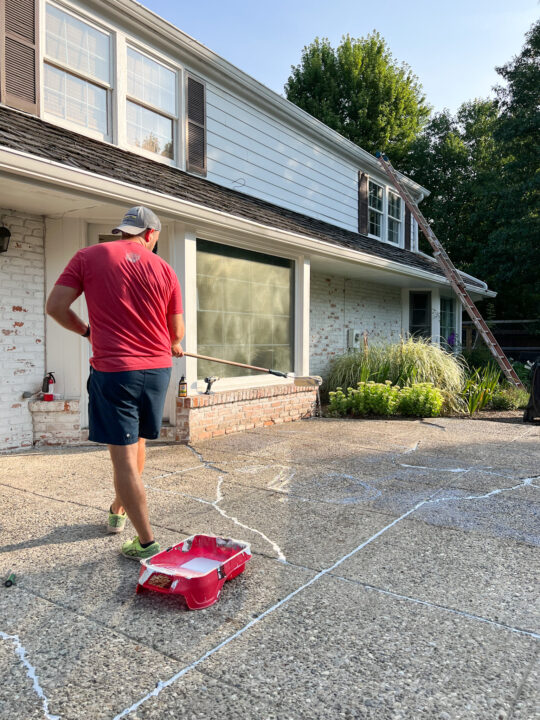
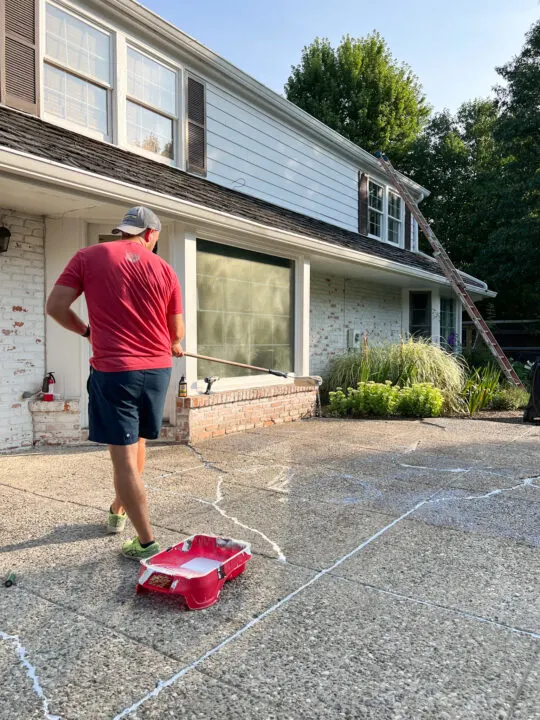
Chris drizzled small sections of the patio with the primer liquid and then used the paint roller to spread it evenly across the concrete. To cover our large patio, we used three cans of primer.
Allow the primer to dry completely before moving on to the next step.
5 | Paint the Edges of the Patio

Begin by painting the edges of your patio using a brush. This will allow for more precise control and help prevent paint from accidentally getting onto adjacent surfaces.
I use the brush to paint the cracks throughout the patio as well.
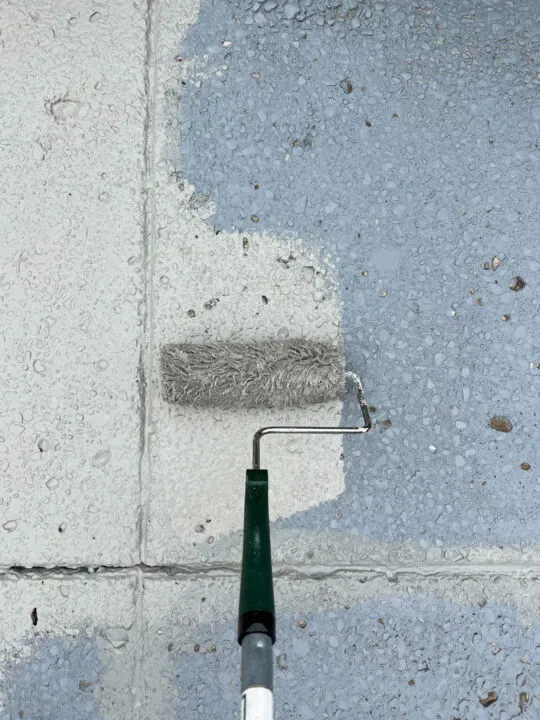
6 | Apply the First Coat of Paint

Once the edges are done, pour your paint into a paint tray and use a roller to apply the first coat of paint to the entire surface of your patio.

Again, once we started applying the first coat of paint with Slate Gray, I knew it was the wrong color. For the second coat of paint, we changed the color to a more neutral gray without the blue undertones.
If your concrete is heavily textured, the thicker the roller nap, the better. I used a 1-1/2 inch thick roller nap to paint the deeper holes across the surface of the patio.
Work in small sections, applying the paint evenly and in smooth, overlapping strokes. Take care to avoid drips or puddles. We used the 5-gallon bucket of Slate Gray for the first coat of paint.
Allow the first coat of paint to fully dry.
6 | Apply the Second Coat of Paint
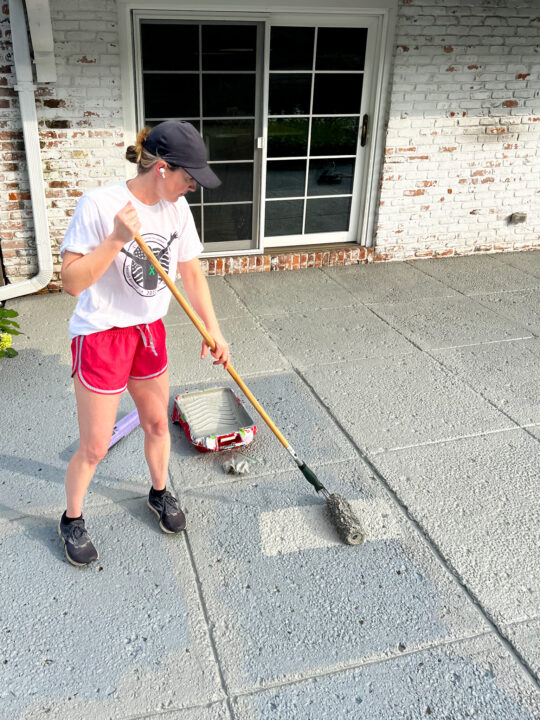

Once the first coat is dry, apply a second coat of paint using the same techniques as before.

For the second coat, I bought another 5 gallons of epoxy paint and had it tinted to the color, Wet Concrete. This gray is much warmer than the Slate Gray and it looks much better!

This second coat will help achieve a more consistent color and coverage. Again, allow the paint to dry completely before moving any furniture or walking on the surface.
Congratulations! You’ve successfully painted your concrete patio.
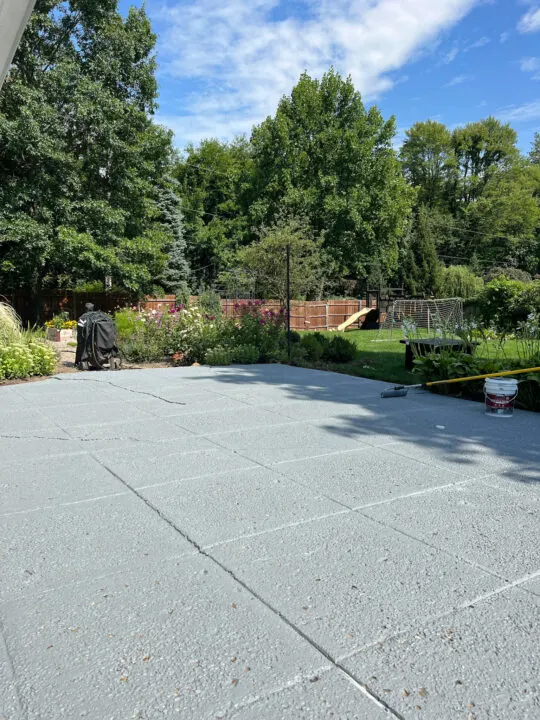
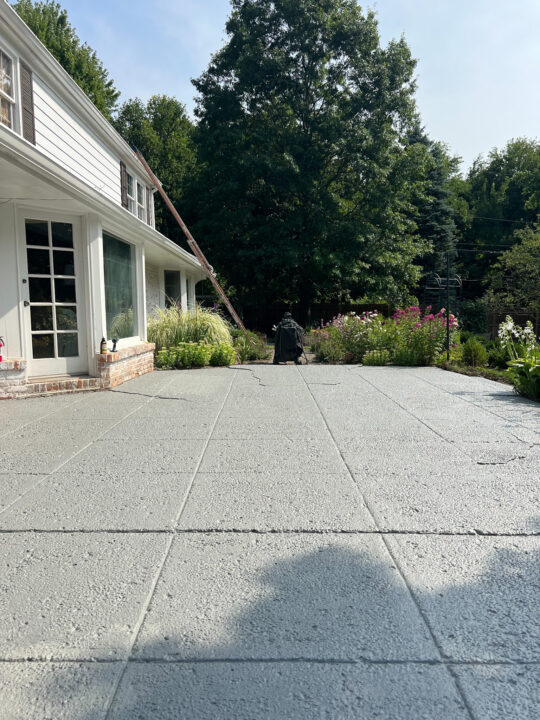
Concrete Makeover Reveal

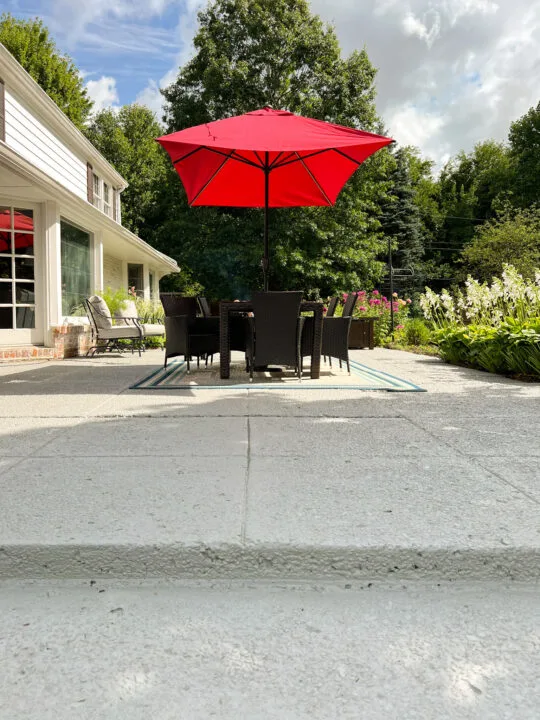
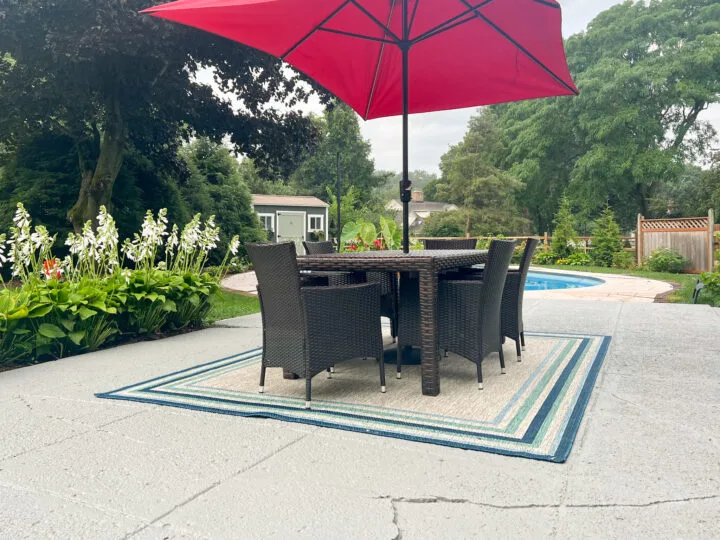
The patio space looks 100% better with a fresh coat of paint! This is the easiest way and most cost effective option to tackle a concrete makeover. The cracks are filled and the neutral gray paint creates a clean surface for our patio furniture. The cottage garden bed I planted is the perfect backdrop to the freshly painted patio.
Over the summer we installed a shed behind our pool that now stores a lot of stray items that were on our patio.

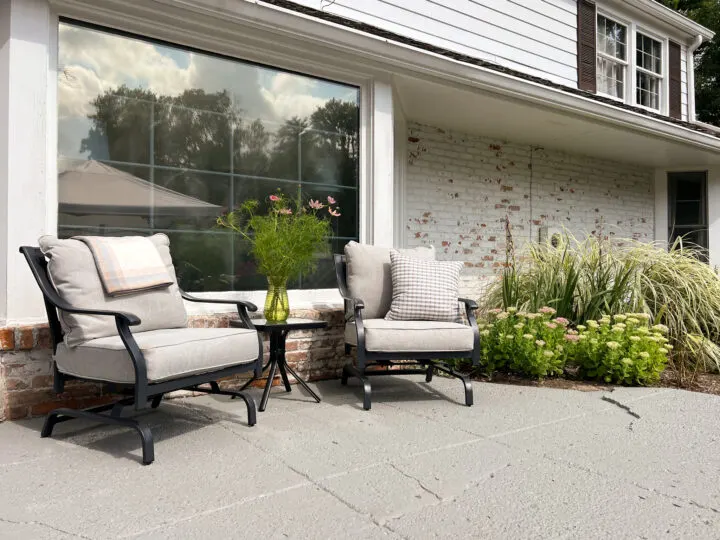
With the pool storage bin now in the shed, this was the perfect opportunity to add additional seating in front of the bay window.

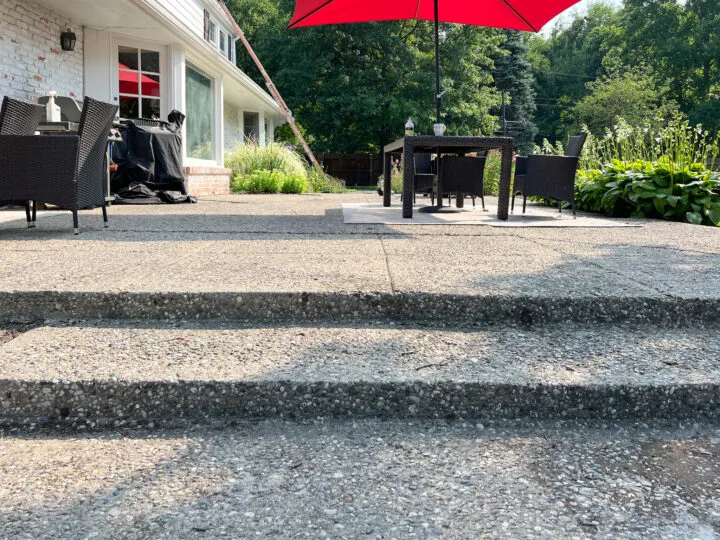
Concrete Patio Before Makeover
Here is a reminder of the aggregate concrete patio before we applied the epoxy paint.
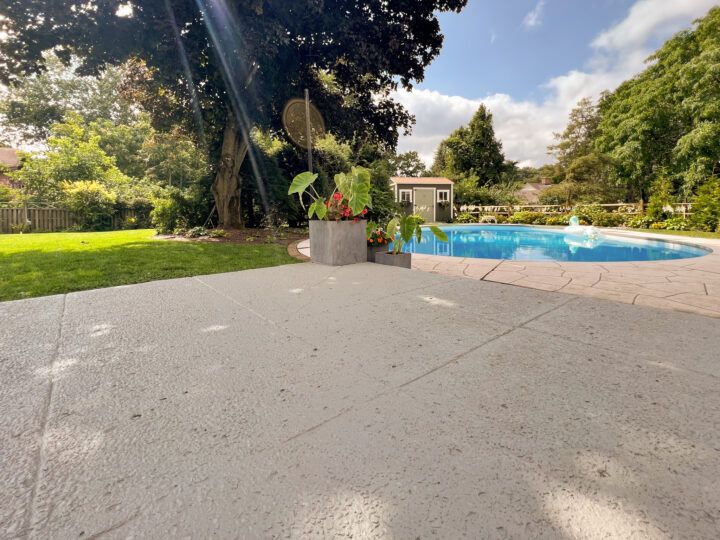
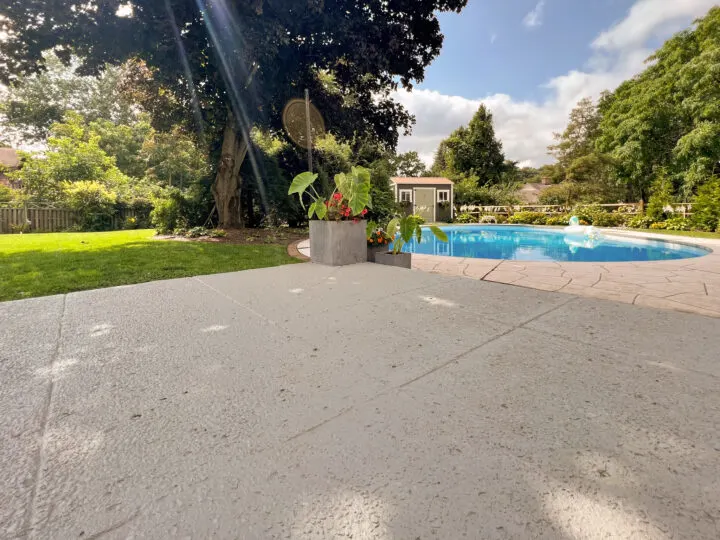
Concrete Patio After Makeover
And that same view after we painted the patio gray.
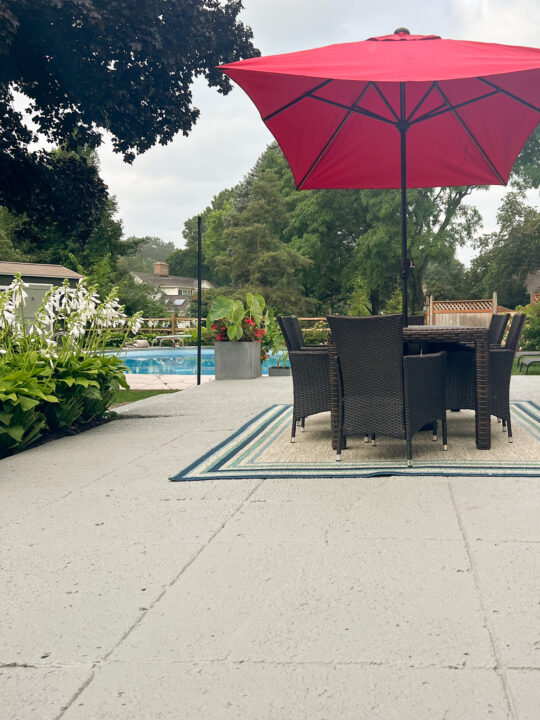

The surface is still a little rough on our feet but it definitely feels better than before this project.
Transforming your concrete patio with a fresh coat of paint is a fantastic way to revitalize your outdoor space.
With the right paint, proper preparation, and careful execution, you can achieve a professional-looking finish that will enhance the aesthetics of your patio and protect it from the elements.
Patio Furniture Sources
For the best results, remember to choose a paint specifically designed for outdoor use, prepare your patio thoroughly, and follow the step-by-step instructions for painting.
Epoxy paint is a good option for high traffic areas and outdoor spaces that can withstand the weather. Happy painting!
Concrete Patio Makeover Ideas
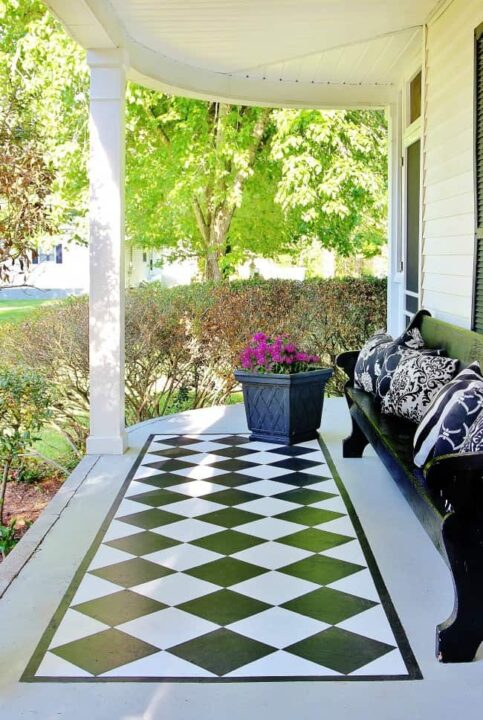
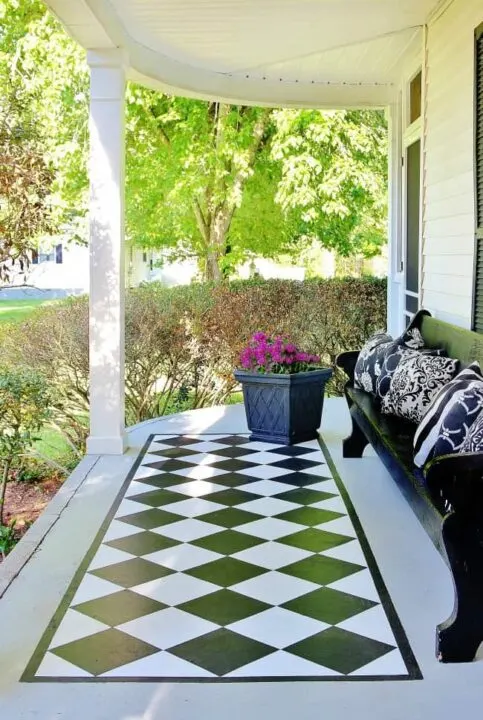
Karianne painted this adorable checkered runner on her concrete porch and I absolutely love it! Painting a checkered pattern is always a great choice for a traditional and beautiful design.
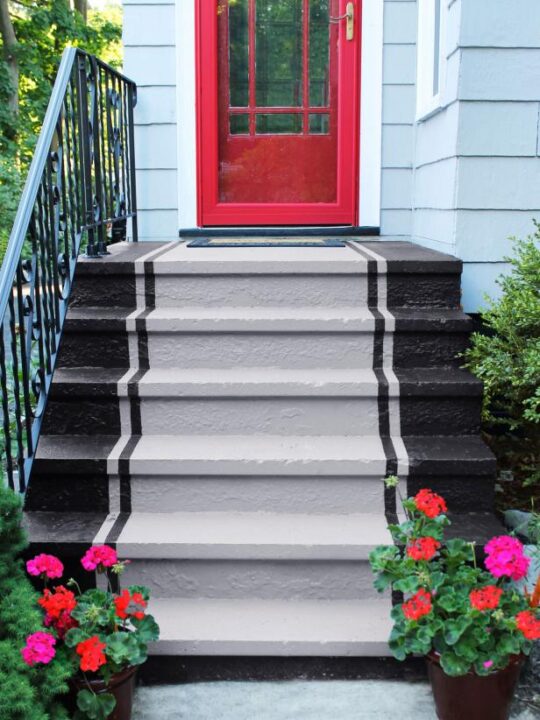
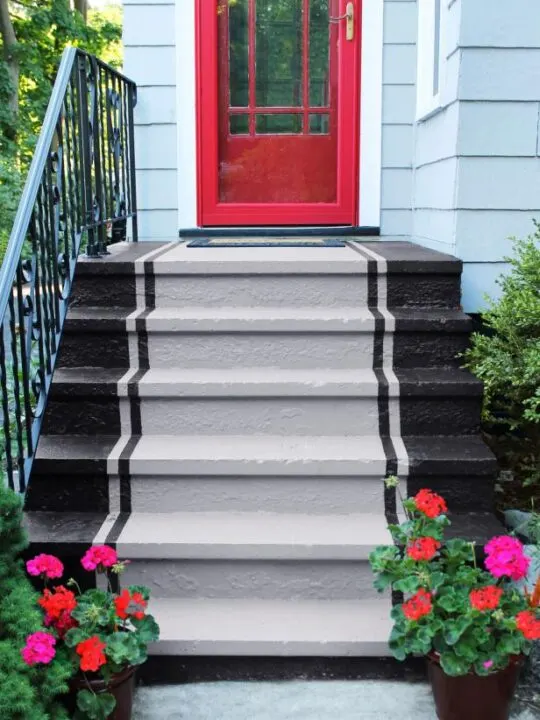
I absolutely love the idea of painting a faux runner on concrete porch steps!
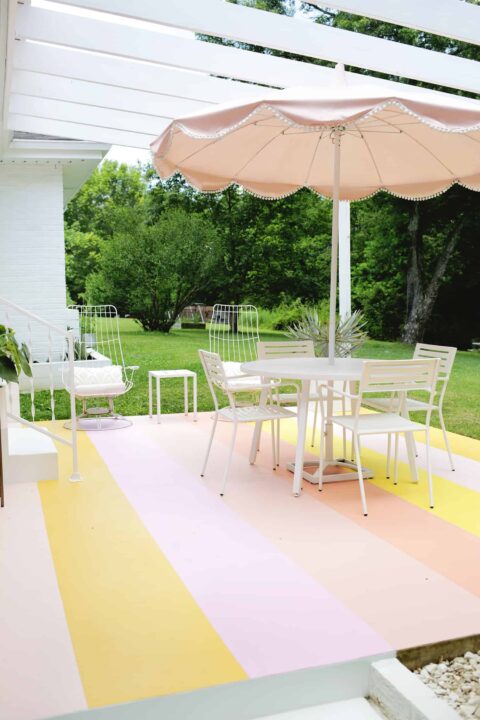

For a pop of color, these sherbert-colored stripes are a fun option to create a unique look for your patio!
More Content You Will Love
- 8 DIY Garden Edging Ideas for a Beautiful Yard
- 21 Stunning Garden Shed Ideas for Your Backyard
- How to Install Brick Edging Around a Patio
- The Ultimate Guide to Hanging a Window Box
- 10+ Affordable Unfinished Basement Ideas
- How to Paint Interior Concrete Floors
Frequently Asked Questions About Painting Concrete Patios
Can I paint a concrete patio myself?
Yes, painting a concrete patio is a DIY-friendly project. With the right tools, materials, and knowledge, you can achieve professional-looking results.
Along with painting our outdoor patio, I have also painted the concrete floors in our basement! It is incredible how much more polished our unfinished basement looks with a fresh coat of paint on the floors.
Is it necessary to use a primer before painting a concrete patio?
Yes, using a primer is crucial for optimal paint adhesion and durability. It helps create a strong bond between the paint and the concrete surface, ensuring a long-lasting finish.
How long does it take for the paint to dry on a concrete patio?
The drying time can vary depending on factors such as temperature, humidity, and the type of paint used. It’s best to follow the paint manufacturer’s instructions for specific drying times.
Can I paint over an existing painted concrete patio?
Yes, you can paint over an existing painted concrete patio. However, proper preparation is essential. Make sure to clean the surface thoroughly, repair any damages, and apply a fresh coat of primer before painting.
How often do I need to repaint my concrete patio?
The frequency of repainting will depend on various factors, such as the quality of the paint, the amount of foot traffic on your patio, and the climate in your area. Generally, you can expect to repaint your patio every 3-5 years.