
Last Updated on April 11, 2023 by lindseymahoney
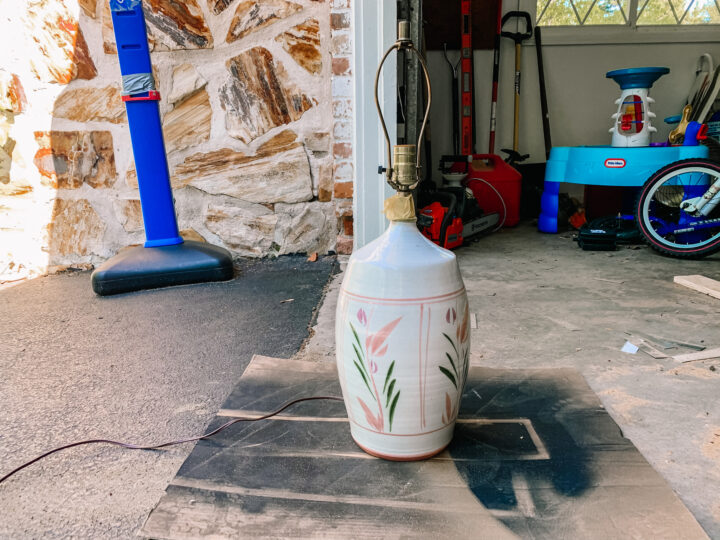
Ever since I was a little girl, I have loved a good DIY project, especially when I can upcycle an old item. I found an old lamp at a local thrift store and decided to give it a modern look with an easy DIY by adding plaster to the lamp base.
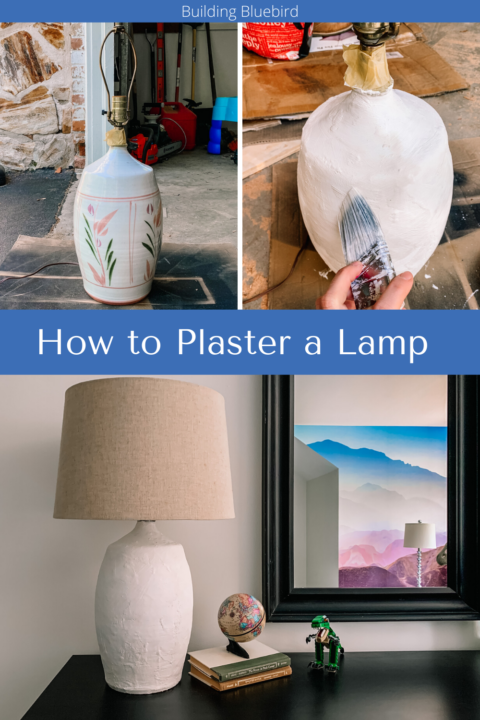

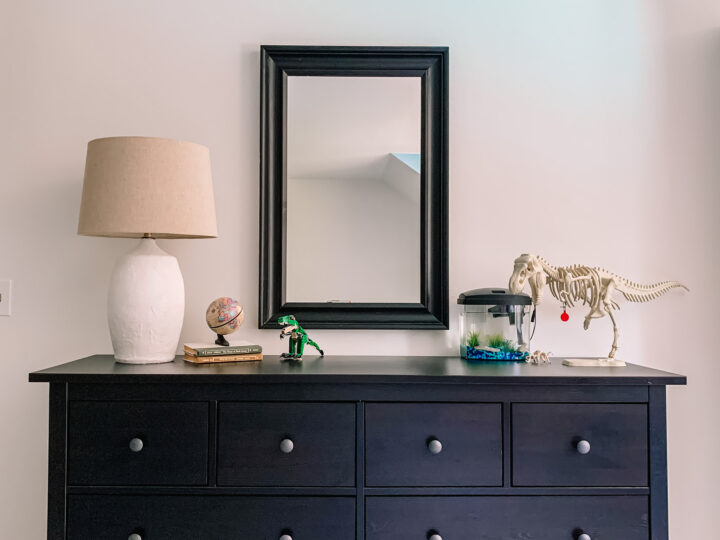
This beautiful new lamp cost less than $30 to create and looks perfect in my little boys bedroom.
Easy and Affordable Plaster Lamp DIY
[Affiliate links are included in this blog post, thanks for supporting Building Bluebird!]
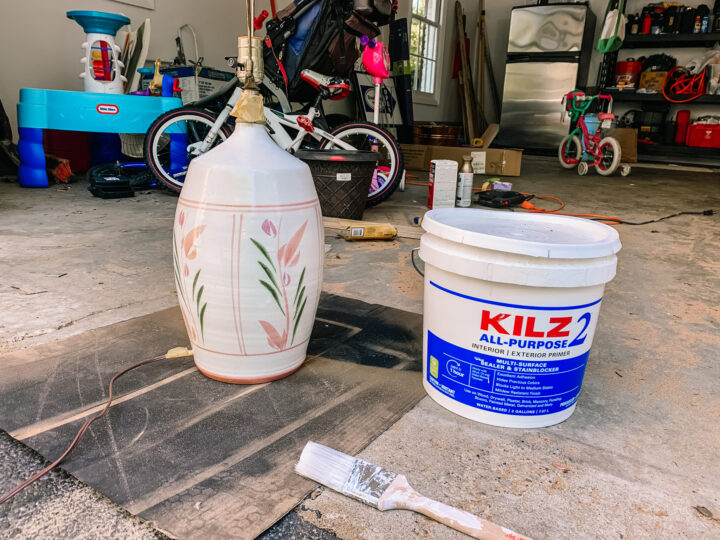
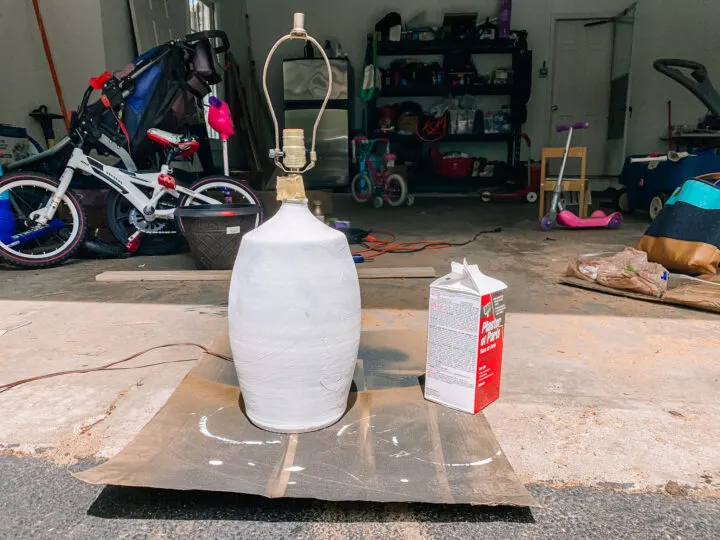
This old lamp base was $15 at our local thrift store and I knew I could turn it into something modern for my boy’s bedroom.

Plaster Lamp Source Materials
- Lamp Base (thrifted)
- Paintbrush
- Painters Tape
- Paint Primer
- Plaster of Paris
- Krud Kutter
- Disposable Bowl & Fork (owned)

1 | Clean and Tape the Lamp Base

First, clean the lamp base (I use Krud Kutter) so the paint and plaster can adhere properly.
Next, protect the lamp cord and top of the lamp base with painter’s tape. This will prevent any stray paint splatters and create that professional look you want when tackling a DIY project.
2 | Apply Primer Paint to the Lamp Base
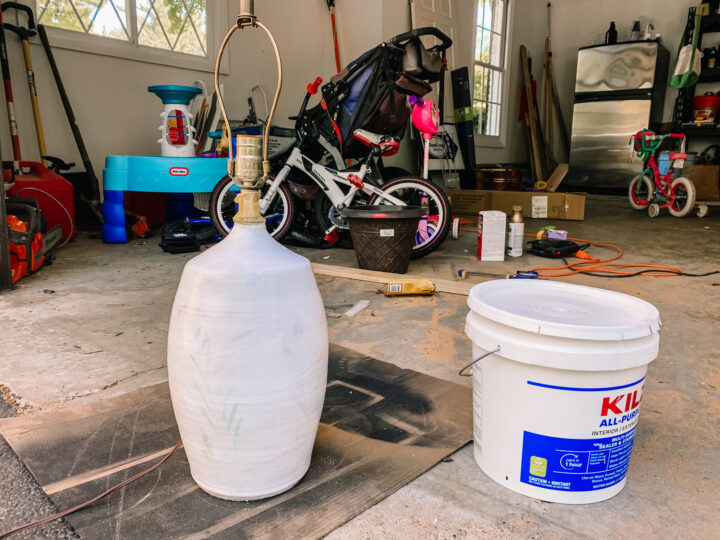

For lamp bases with a glossy finish, I recommend a quick base coat of paint primer.
This also helps to block any strong patterns that may be on the lamp base – like the floral design on mine.
If I could do this DIY project over again, I would definitely apply a second coat of primer to really cover up the floral pattern.
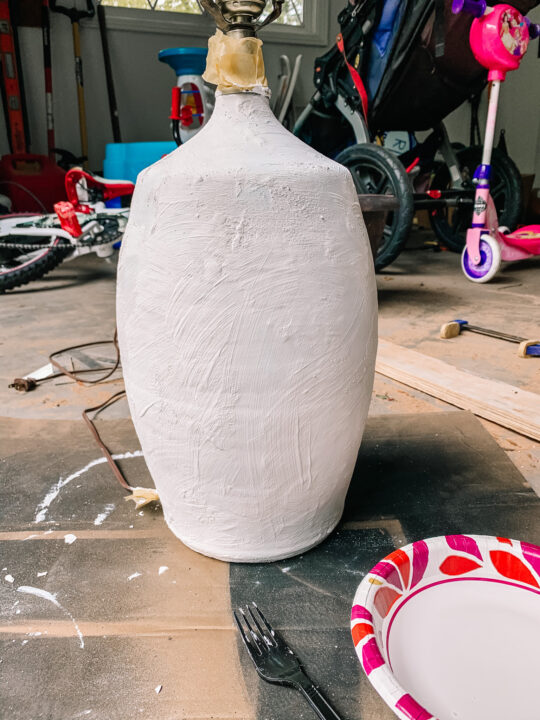
3 | Apply 1st Coat of Plaster to the Lamp

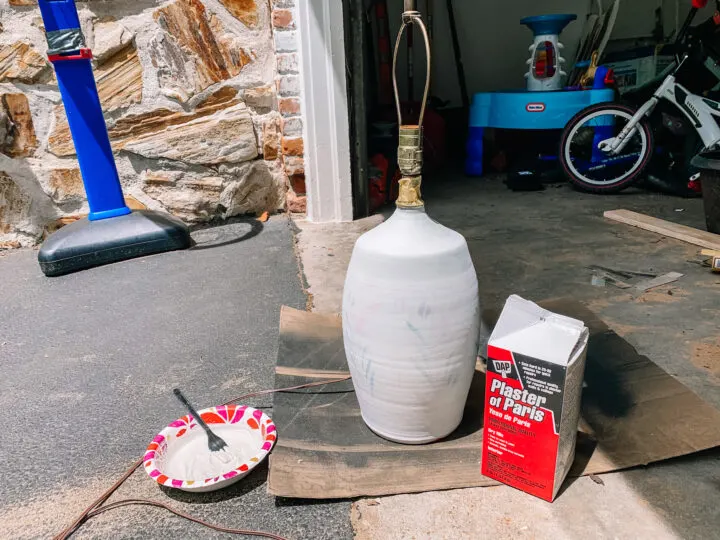
Next, you are going to apply your first coat of the Paris of Plaster material.
Mix the plaster powder and water in a disposable bowl that can be disposed of after the DIY project. Read the instructions on the plaster container, but I mixed one part of water for every two parts of plaster powder.
I just eyeballed this measurement.
Once the consistency was somewhat thick (and not super watery), I began applying it to the lamp base with a paintbrush.
For the application, I brushed the plaster in different directions to add texture to the lamp base. There is a 5-10 minute window to apply the plaster before it begins to dry and become chunky.
Let this first coat of plaster dry for about 30 minutes.
4 | Apply 2nd Coat of Plaster
Follow the same application technique for the second coat of plaster.
If your lamp base is a lighter tone and does not have a pattern, two coats may be enough. Let this layer of plaster dry for another 30 minutes.
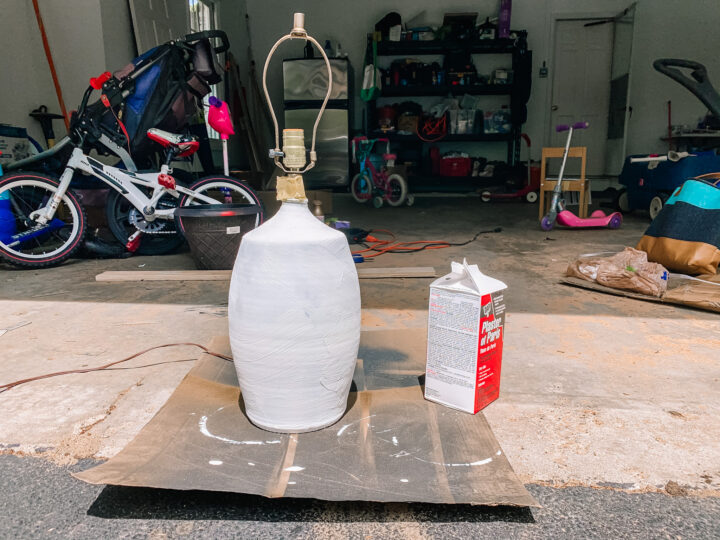
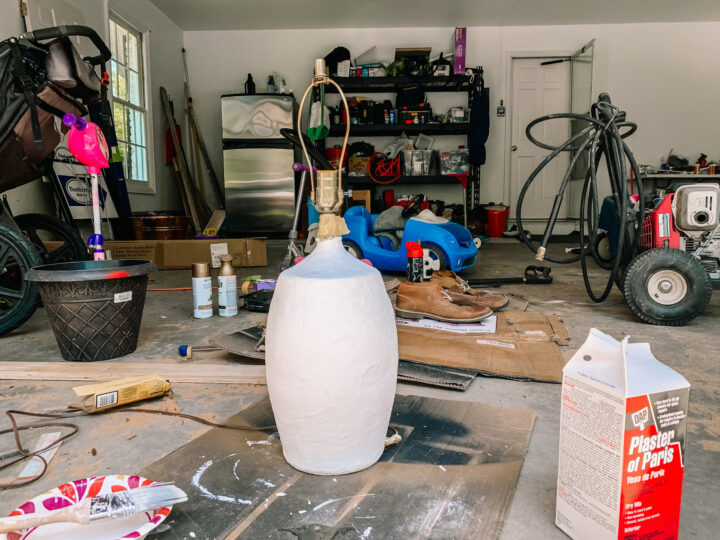
4 | Apply 3rd Coat of Plaster to the Lamp

I decided to apply a third coat of plaster to completely hide the floral design on the lamp base. With each layer of plaster, you will have to mix up a new batch in a bowl because it hardens so quickly.
Each coat takes about 30 minutes to dry.
You can see the texture on the lamp base that I created by painting the plaster in various directions.
5 | Smooth Plaster with Wet Brush


For the final step, dip a clean paintbrush in a bowl of water and brush it on the lamp base. This softens the edges of the plaster and blends any spots you may not be pleased with.

Let the lamp dry for another 30 minutes and then remove the tape. You now have a beautiful new lamp base!
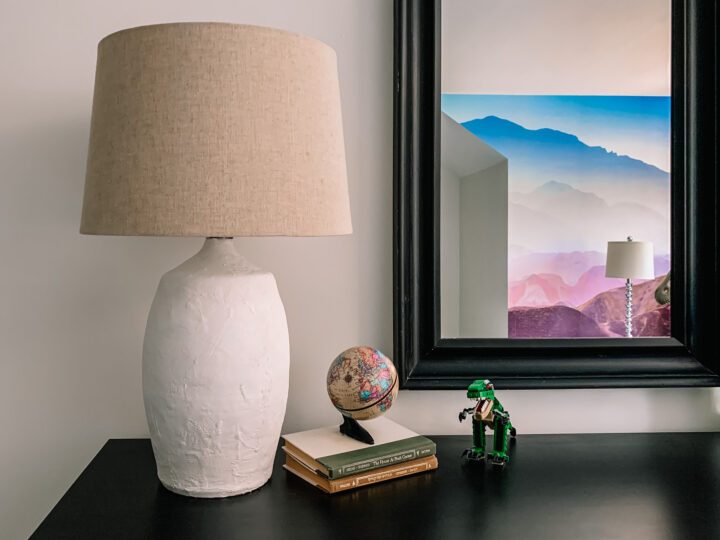
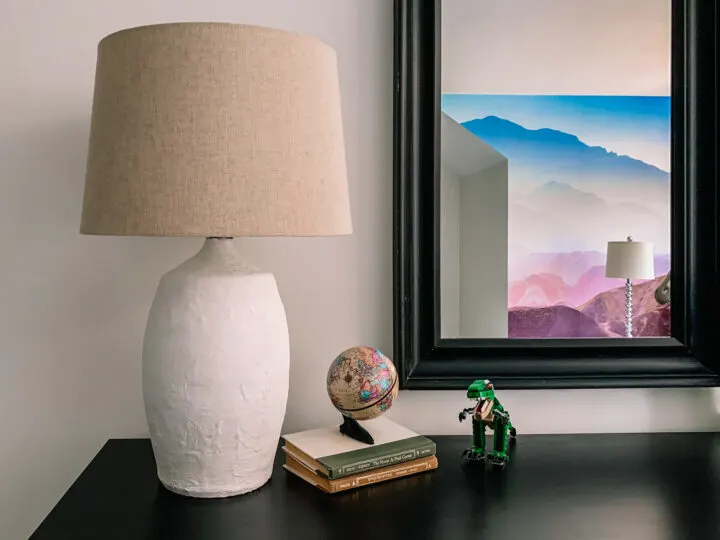
Plaster Lamp DIY Reveal
I snagged the lampshade from another table lamp in my home that I don’t love and it fits great.

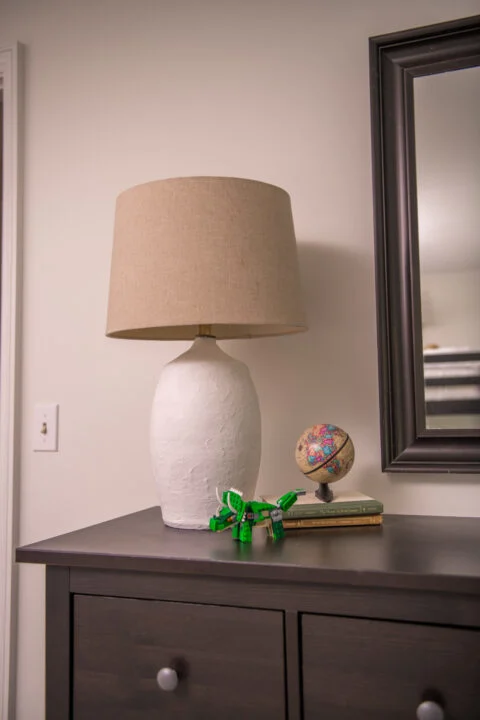
It was the perfect size and color for this new lamp! For less than $30 I have a large, modern lamp for my son’s bedroom and it was so easy to make!


More Content You Will Love
- DIY Upholstered Headboard with Tufted Buttons
- 15+ Thrifted Christmas Decor Items to Buy This Year
- Easy DIY Lacquer Tray | Rita Konig Dupe
- DIY Scalloped Edge Shelf | Easy IKEA Hack
- How to Spray Paint a Lamp | DIY
- Install Picture Frame (Box) Molding | Easy DIY
- Paint an Exposed Basement Ceiling Black | DIY
- Guest Bedroom / Office Makeover Reveal
Kelly Julien
Thursday 4th of January 2024
Could you add color to the plaster
lindseymahoney
Friday 5th of January 2024
I'm sure you could add color but I have not tried it!
Ikea Hack : Une lampe en platre avec la lampe Ikea Rasegel | My Blog Deco
Monday 21st of August 2023
[…] Un pied de lampe relooké avec du plâtre par Building Bluebird2. Une lampe DIY avec du plâtre par Nadine […]
25 DIY Lamp Ideas: How To Make a Table Lamp
Saturday 12th of August 2023
[…] The final result is a stunning lamp that will look perfect in any room. This step-by-step guide is perfect for anyone looking to add a creative touch to their home decor without breaking the bank. buildingbluebird […]
ALAINE EDGAR
Saturday 8th of January 2022
CAN I USE PLASTER OF PARIS OVER A LAMP SHADE
lindseymahoney
Saturday 8th of January 2022
I am not sure, but I would say probably not if it is a fabric shade. If the base shifts at all the plaster could crack. You can always test it out on an old shade and see if it works!