
Last Updated on July 13, 2023 by lindseymahoney
Are you looking for a simple and affordable way to elevate the style of your bedroom? Look no further than a tufted headboard DIY project that will leave your space looking like a high-end boutique hotel.
Creating a tufted headboard may seem like a daunting task, but with the right materials and a little bit of patience, you can achieve a luxurious look without breaking the bank. This is one of my favorite DIY projects yet!
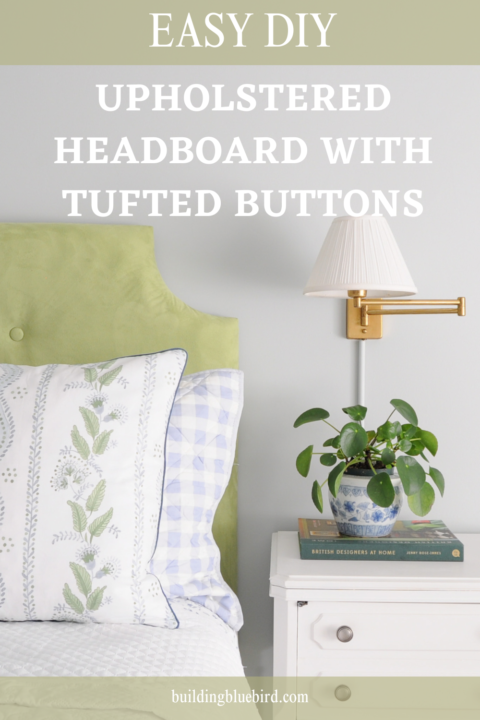

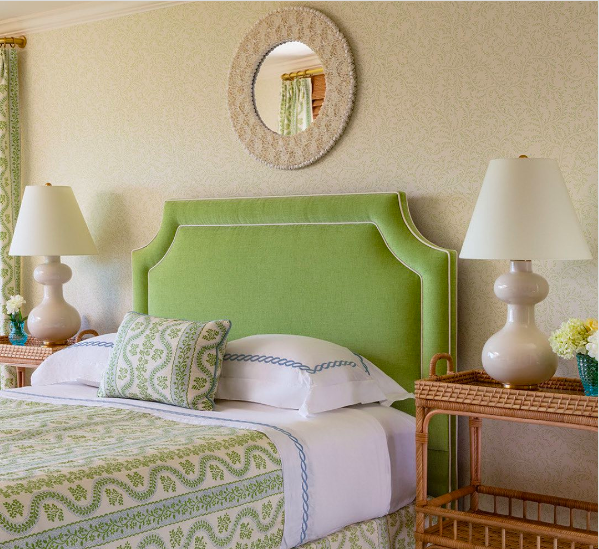
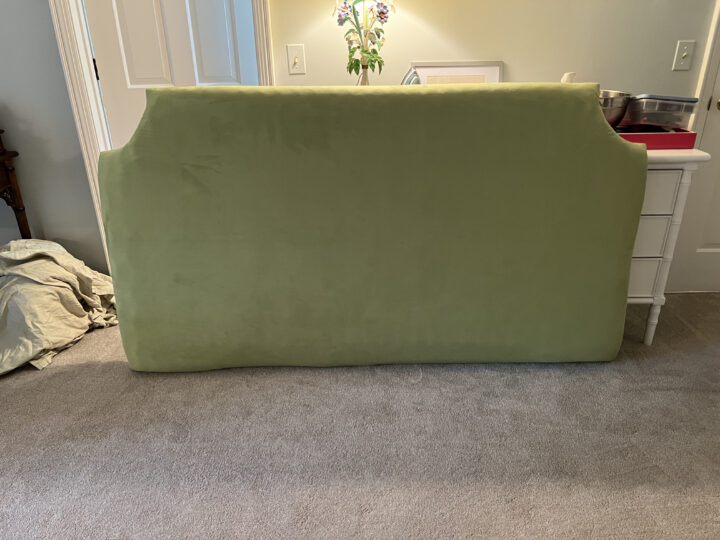
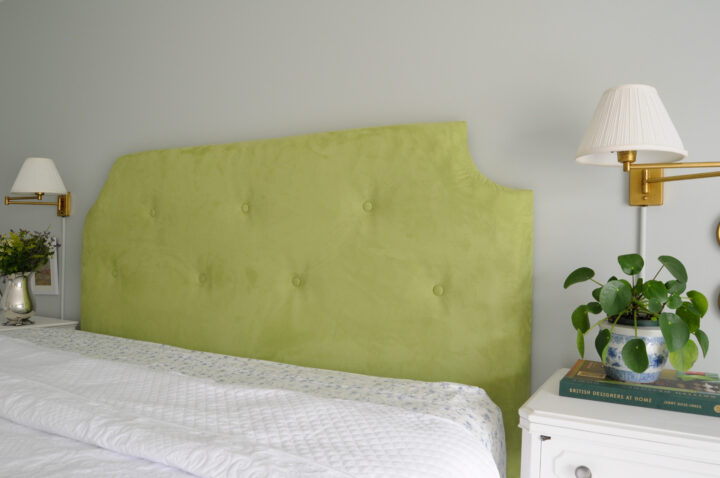
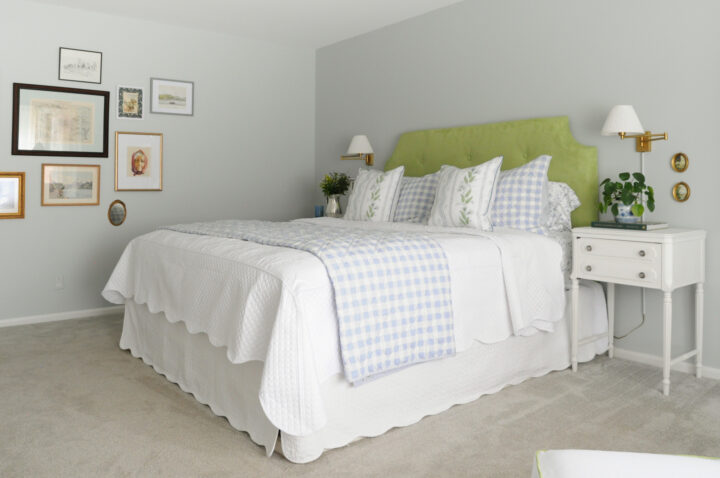
I created this simple DIY tufted headboard for our guest bedroom and it completely transformed the look of our old platform bed. The beautiful green looks fantastic against the pale blue/gray walls and is really the focal point of the entire space.
In this tutorial, I will guide you through the step-by-step process of creating your own tufted headboard that looks expensive but is surprisingly easy to make.
Whether you’re a seasoned DIY enthusiast or just starting out, this project can be completed with minimal tools and less than $200!
Easy DIY Tufted Button Headboard for Under $200

[This post includes affiliate links, thank you for supporting Building Bluebird! For a complete list of materials for this project, scroll to the bottom of the post.]
DIY Upholstered Headboard Materials
Before diving into the actual process of creating a tufted headboard, let’s go over the materials you’ll need to get started. Fortunately, most of these items can be easily found at your local craft or fabric store, and you may even have some of them on hand already. Here’s what you’ll need:
- Plywood: $15
- Buttons Kit: $7
- 3 yards of fabric (similar): $27 total
- 3 yards of batting (similar): $15 total
- 1.5 inch Memory foam for XL twin (3) – $75 total
- French cleats (2) – $24 total
- Staple gun (owned)
- Staples (owned)
- Bowl for scallop (owned)
- Jigsaw to cut scalloped corners (owned)
- Drill for holes (owned)
- Long needle & string for buttons (borrowed)
- Long level (owned)
- Measuring tape (owned)
- Spray adhesive glue – $8
Total = $171

Now that you have all the necessary materials, let’s move on to the step-by-step guide to creating a tufted headboard.
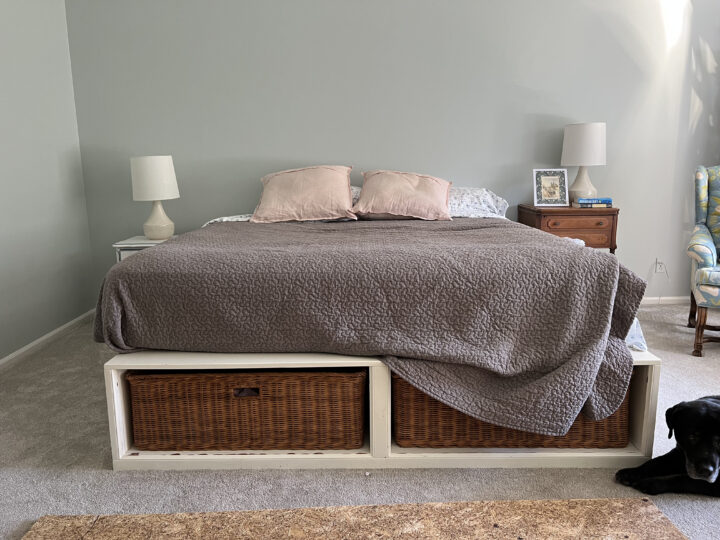
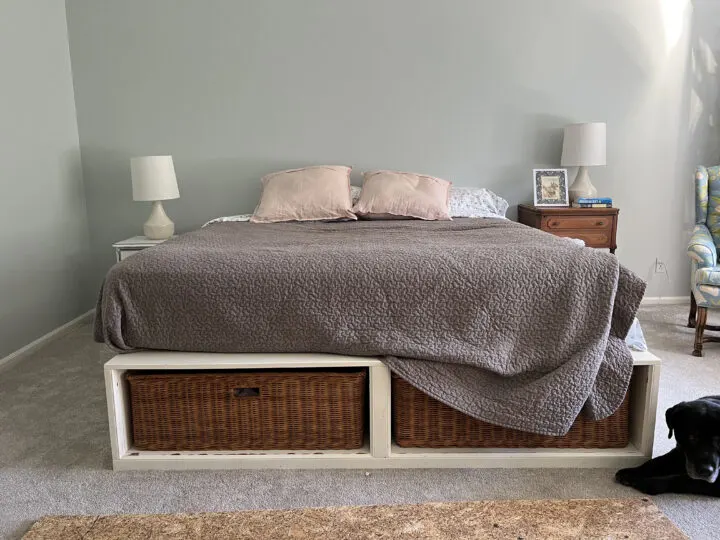
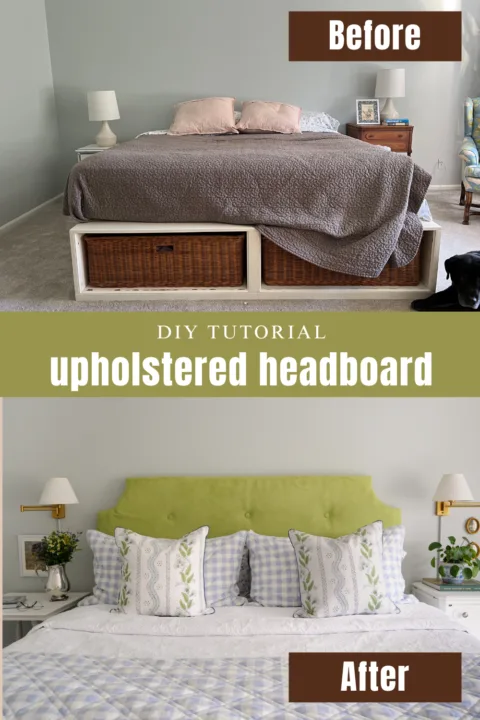
We purchased this Pottery Barn platform bed after buying our first home over 12 years ago. It now sits in our guest bedroom and is still in good shape, so I decided to keep it and make it work in the new design. For a fresh new look, a DIY upholstered headboard was immediately added to my to-do list.
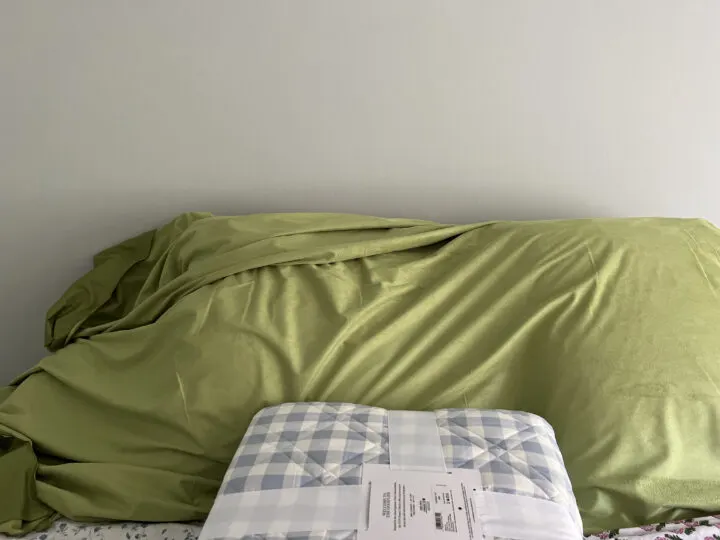
I also purchased new bedding, including a bed skirt that hid the platform and baskets and softened the overall look.
1 | Choose the Design of Your Tufted Headboard
Size
To begin, I measured the length of the platform bed (76”). I chose the width of the headboard to be 75” so there would not be any overhang on either side of the platform bed.
For the height of the DIY tufted headboard, I measured from the top of the platform to my desired height which totaled 41”. I want the headboard to make a statement and to be visible even with the pillows propped up against it.
Shape and Style
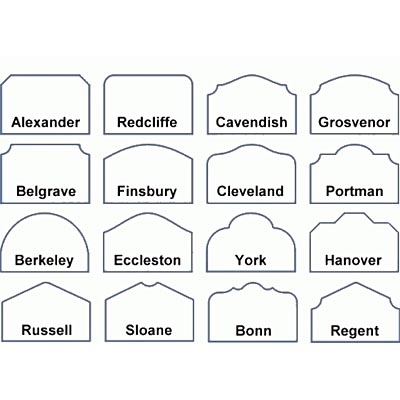
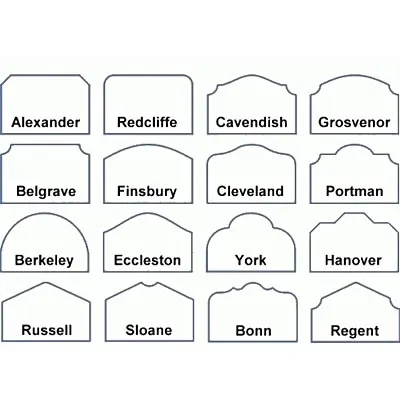
Once the dimensions were determined, I considered the shape of the upholstered headboard. While a tall square headboard is nice, I wanted to give it a more custom look.
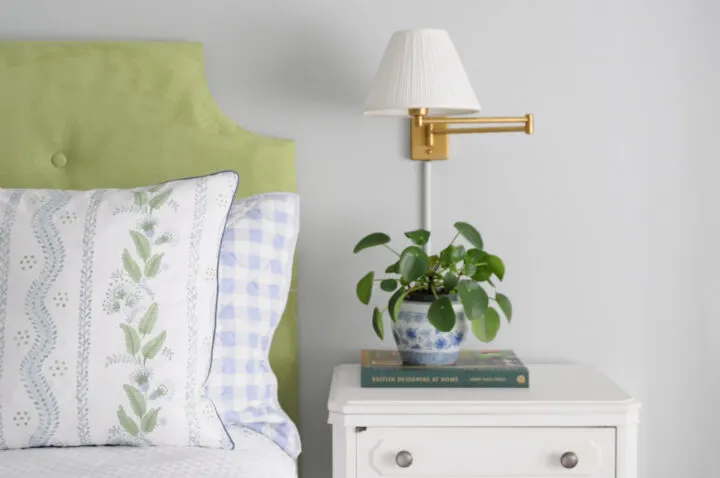
The Belgrave headboard shape has the traditional look I wanted and seemed easy enough to create. To further add dimension to the headboard, I added a few tufted buttons to the overall design.
Fabric
Originally, I planned on using a neutral fabric, like a soft khaki, for the headboard. Then I saw an image on Pinterest of a stunning green headboard that I could not get out of my head!
Choosing a bright green fabric for the headboard was definitely out of my comfort zone but I was excited to give it a try.

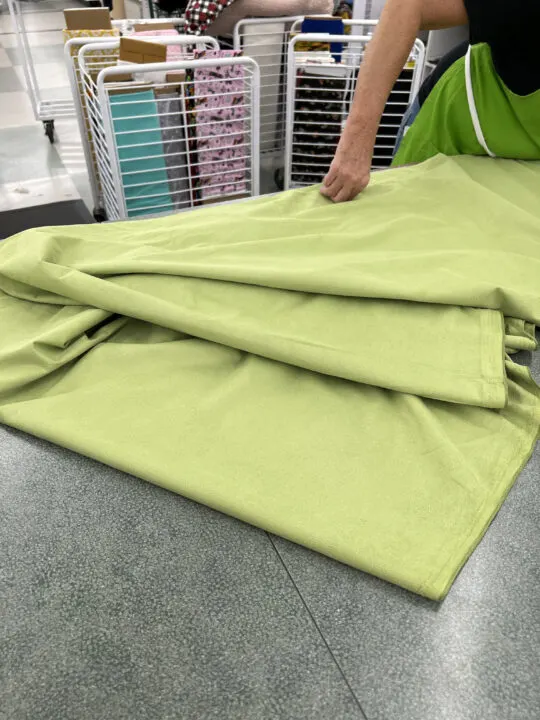
In the Bargain Hunting bin at Joann Fabrics, I found this green suede fabric (similar) for $9 a yard.

The green fabric looks nice in front of the gray/blue walls and the blue checkered bedding.
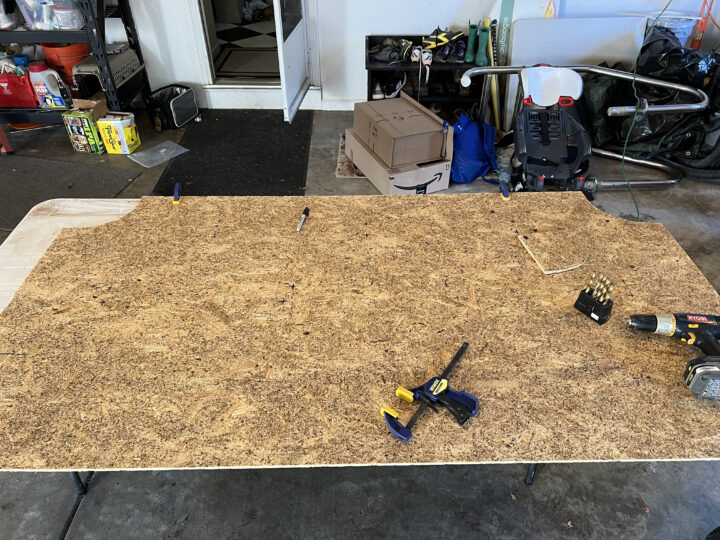
2 | Purchase & Cut the Plywood

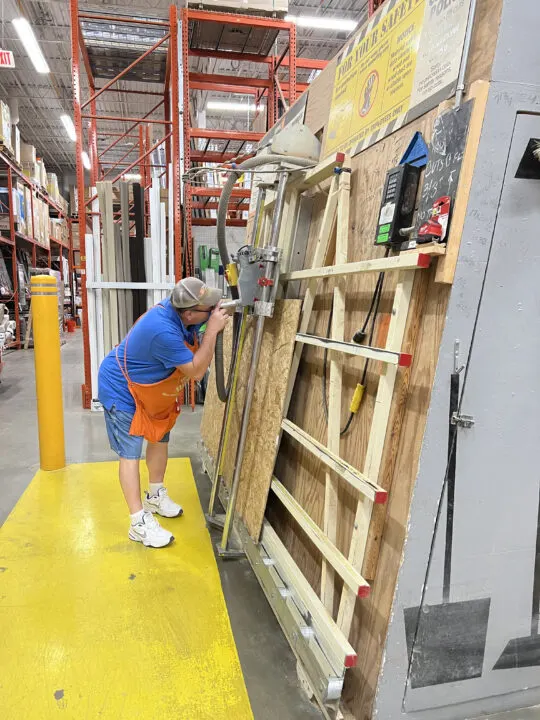
The plywood is the base of the upholstered headboard where the fabric is attached.
I found a piece of plywood at Home Depot for $14 and they cut it down to the headboard size. This service is available free of charge at local Home Depot stores.

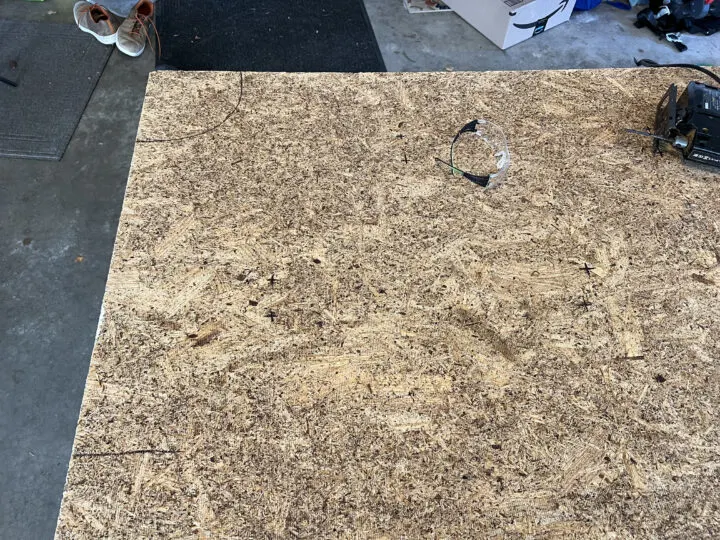
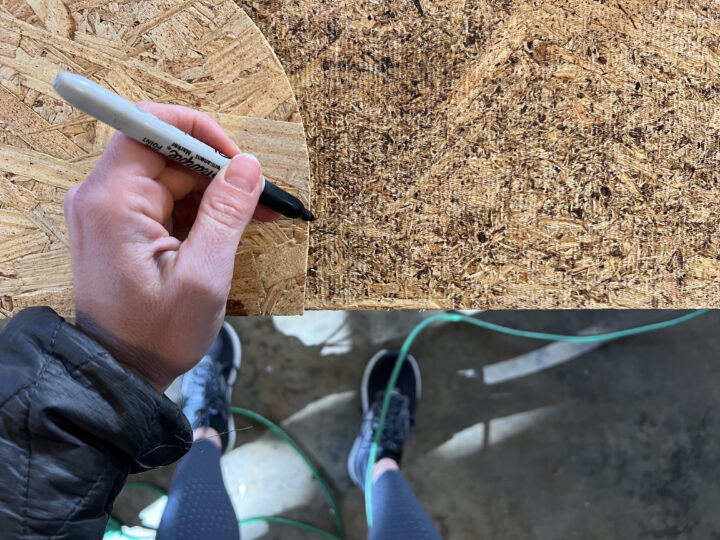
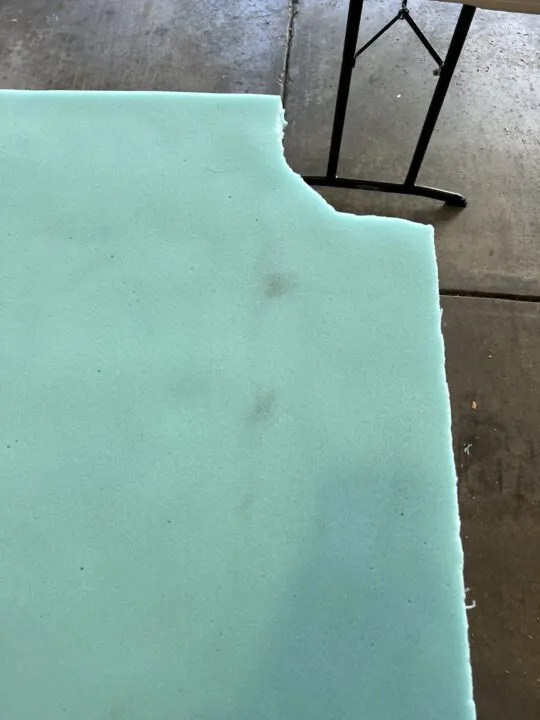
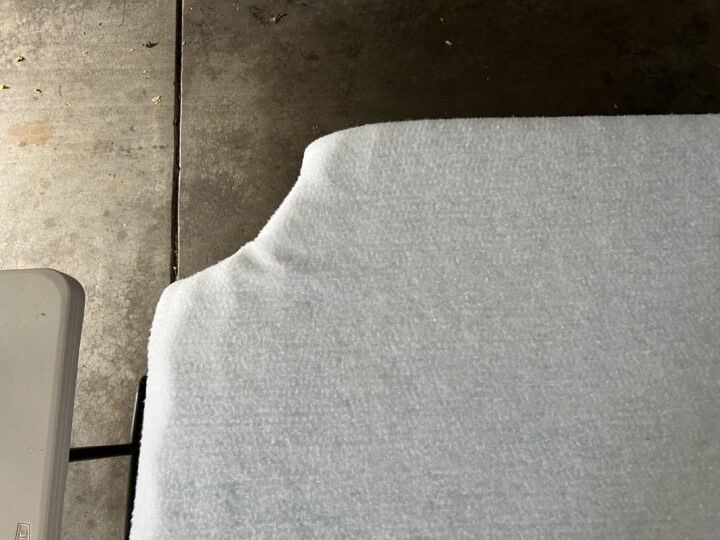
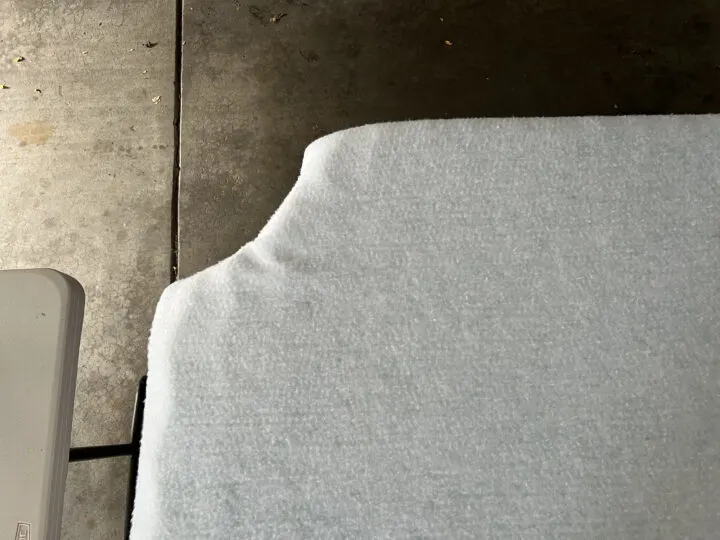
The Belgrave headboard shape includes a scallop cut on the top corners of the headboard. Using a mixing bowl from our kitchen, I traced a half circle with a black Sharpie.
As I got to the edge of the plywood, I straightened the semi-circle so that the corners looked like 90-degree angles.

I cut the first corner of the headboard using a jigsaw. Next, I used that corner scrap to trace the same scallop on the other side of the board. This ensures that the scallops on each corner are even.
3 | Prep the Base of the Headboard for Buttons
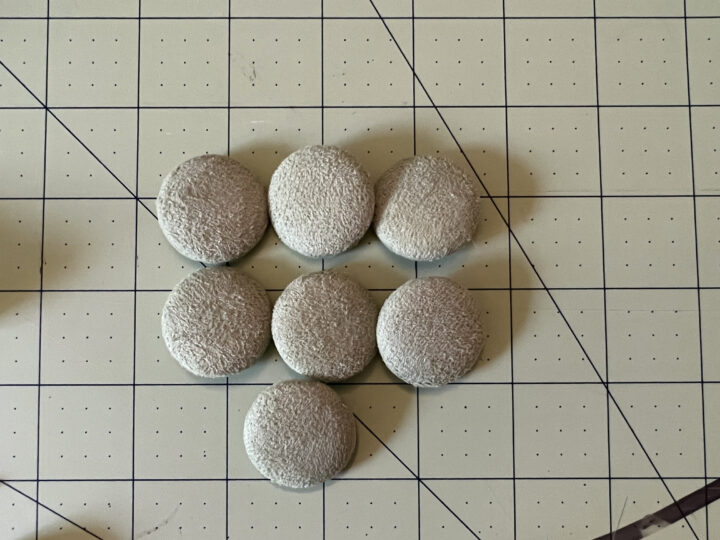
To avoid the upholstered headboard looking like the green monster, I planned for 7 tufted buttons on the board. Three buttons on the top row and four on the second row.
Determining Where the Two Rows of Buttons Will Sit
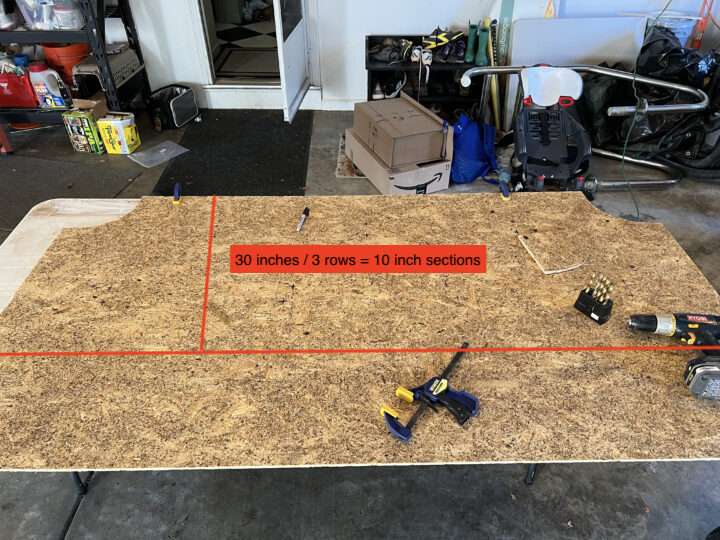
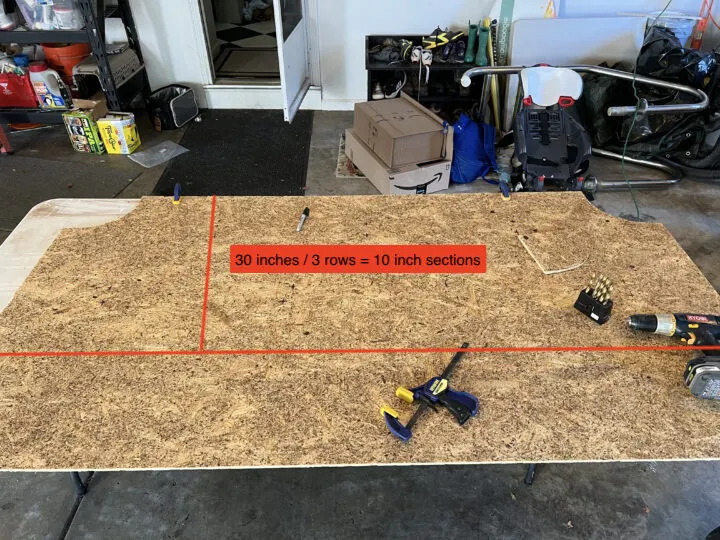
First, I marked where the top of the mattress would hit the headboard.
41 inches – 12 inches (mattress) = 30 inches of the visible headboard
Next, I measured from the top of the mattress to the top of the headboard and divided it by 3.
30 inches / 3 = 10 inches


This creates three horizontal sections on the headboard divided by 2 lines. The two dividing lines are where the buttons will sit horizontally.
The top row of buttons will sit 10 inches below the top of the headboard. The second row will be 10 inches below or 20 inches from the top of the headboard.
Placement for Top Row of Tufted Buttons

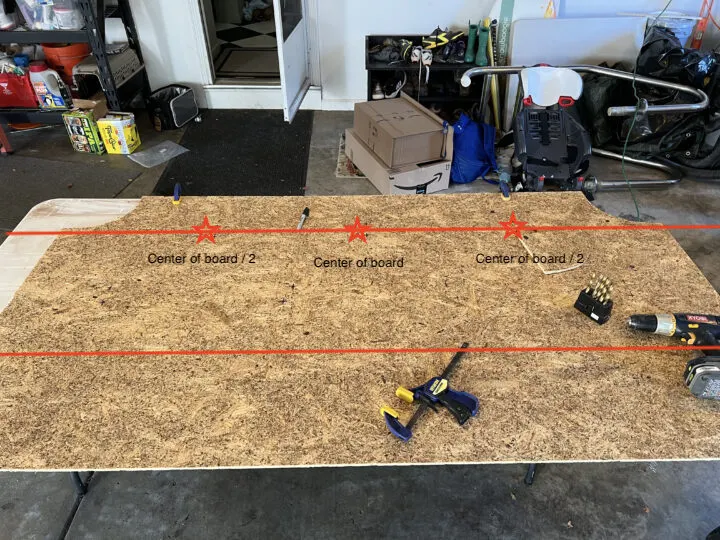
To determine the placement of the top three buttons, I divided the width of the headboard by two to find the center and location of the middle button.
75 inches width / 2 = 37.5 inches (center of the board)
I divided 37.5 inches by 2 again to find the distance from the center button to the buttons on its left and right.
37.5 inches / 2 = 18.75 inches (center to the button on the left and right)
Placement for Bottom Row of Tufted Buttons
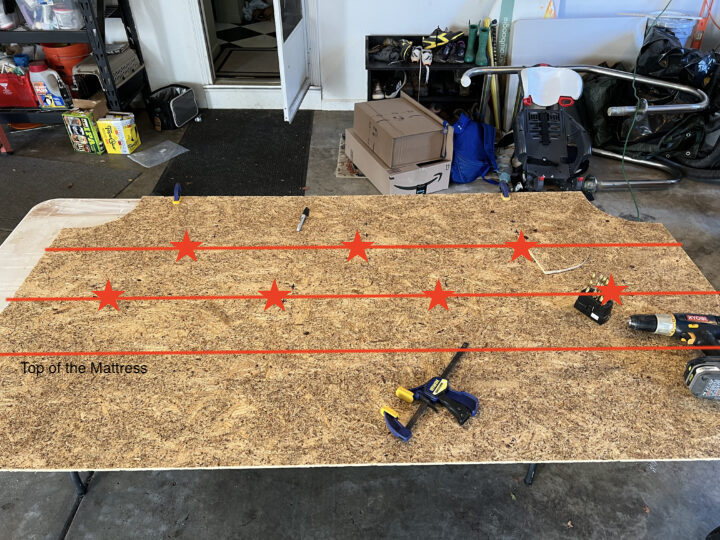

For the bottom row of 4 buttons, I knew that the distance between each button would be consistent at 18.75 inches. The buttons on the second row would be centered between the buttons on the top row.
Starting at the center mark of the headboard, I divided 18.75 inches by 2 to find the placement of the first buttons.
18.75 inches / 2 = 9.4 inches from the center of the headboard
Next, I measured 18.75” from each of those markings from the left and the right of the center of the headboard.
Drill Holes into the Plywood
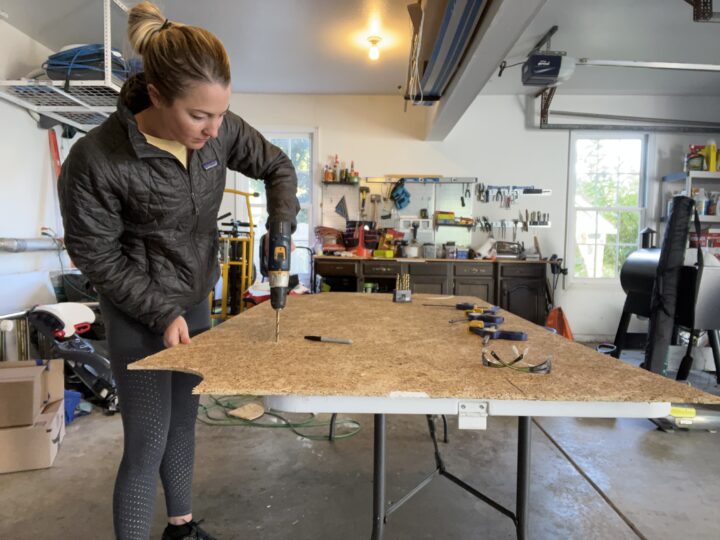
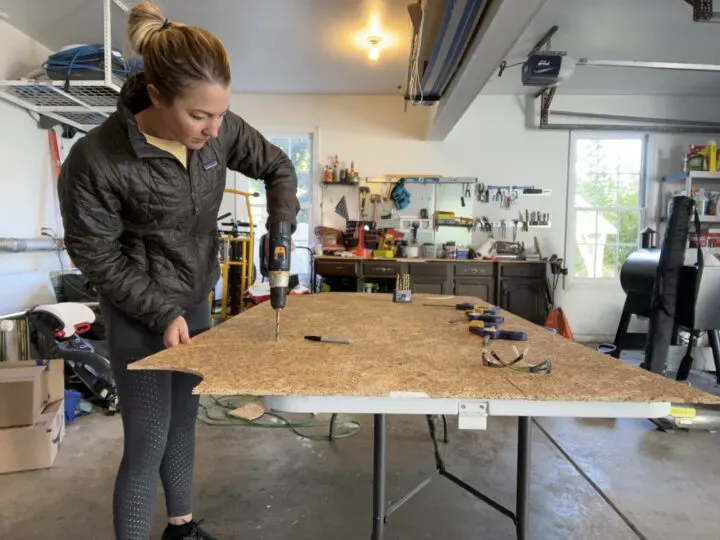
Using a drill, I made holes at each button location that were large enough to string a button through.
4 | Attach Memory Foam to the Headboard Base

Based on my research, I decided that the headboard needed 3 inches of memory foam.
This would add cushion and be thick enough to not look like a cheap DIY project. It is the focal point of the guest bedroom and I did not want a thin, flimsy headboard to ruin the look.
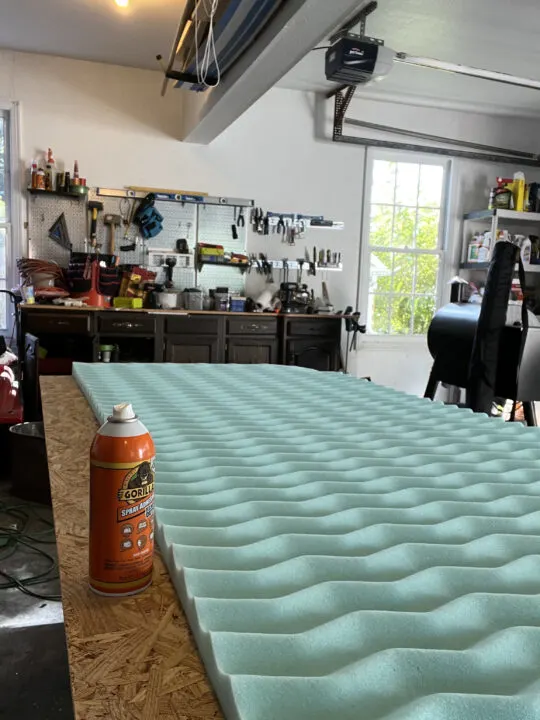
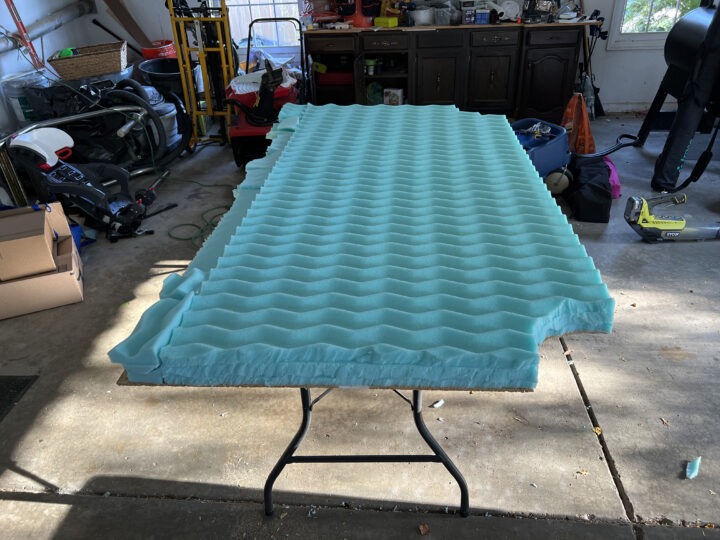
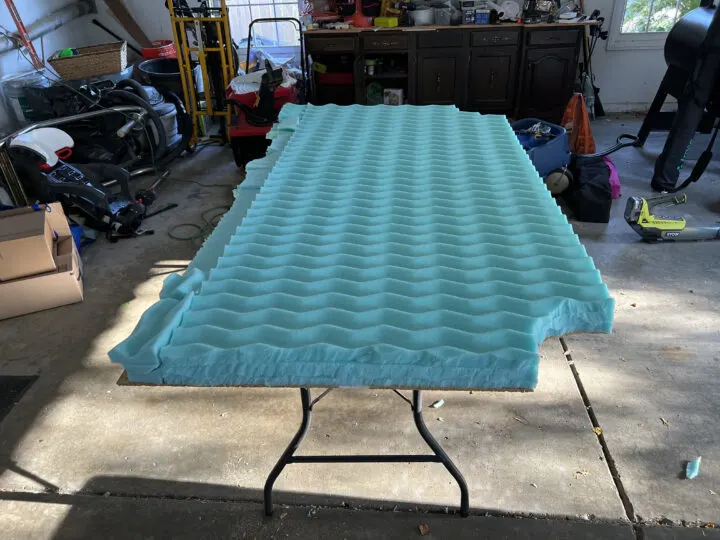
Because my headboard design is so large, it was difficult to find 3” foam that was under $100. In an effort to save money, I improvised and ended up using 1.5” mattress foam for XL twin beds.
To secure the foam to the plywood, I used gorilla glue spray adhesive. I placed the foam on the plywood, lifted one side of the foam, sprayed the plywood and foam, then pressed them together.
Once one side was secure, I rolled the foam back and sprayed it, and pressed it in small sections until it was completely attached.
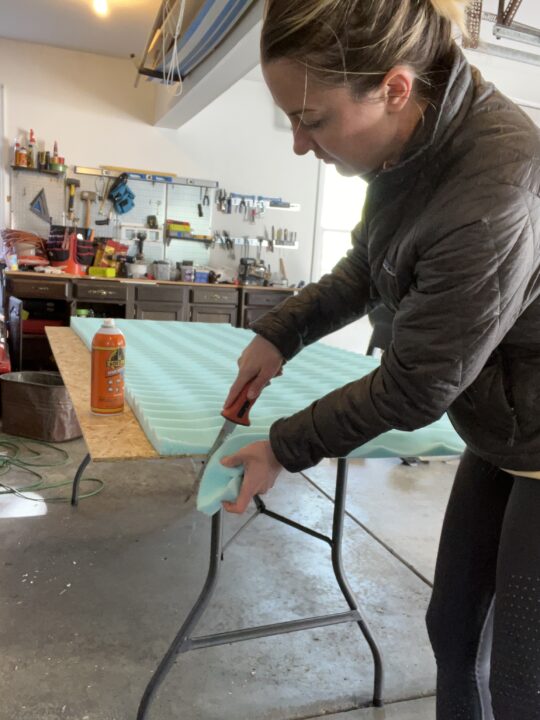
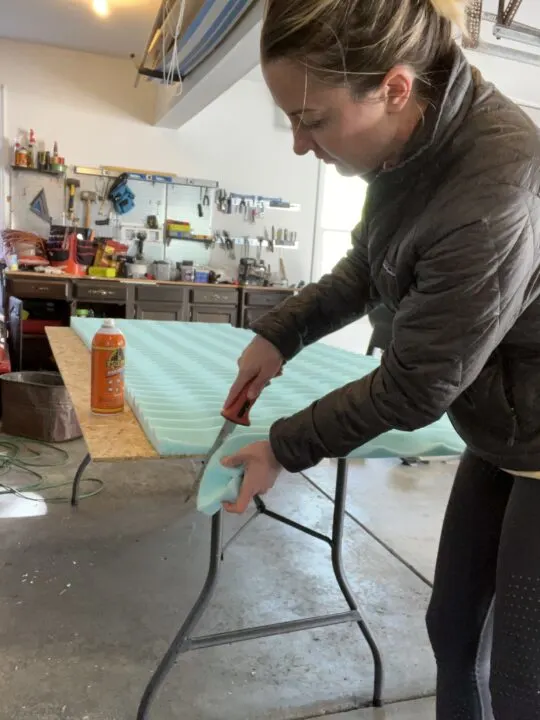
I used three foam mattress toppers to get the desired thickness since two foam toppers fit like a puzzle piece and remained 1.5″ thick. After attaching each foam topper, I would cut the excess off the end of the headboard and around the Belgrave scallop.

I used the remnant memory foam to fill the small section of plywood exposed at the bottom of the headboard. I wasn’t too concerned with getting it perfect because it is hidden by the mattress.
5 | Add Batting to the Headboard

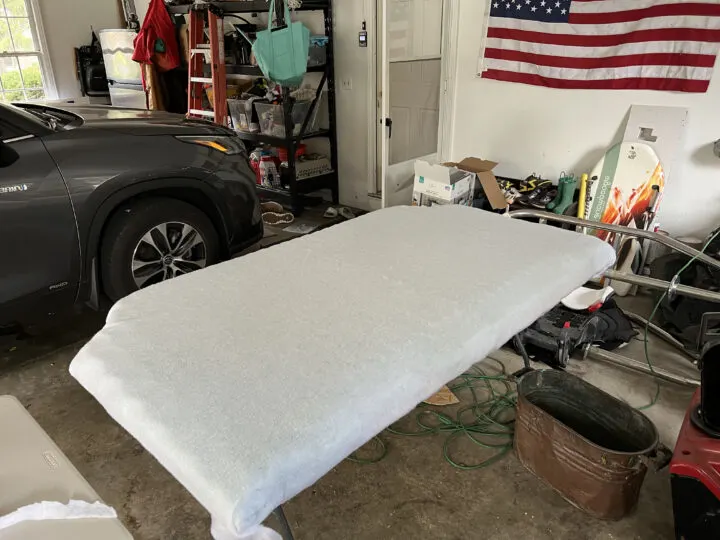
With 3 yards of batting (same amount as the fabric) I was able to double up the layer of batting for extra cushion.

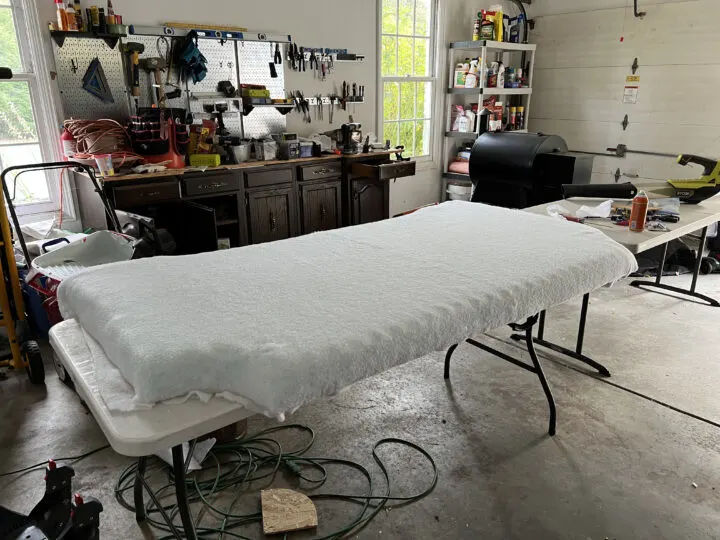
I started at the top of the headboard, wrapped the batting around the plywood, and stapled it to the plywood. Once the first layer was secured on the underside of the headboard, I attached the second layer.
6 | Staple Finishing Fabric to the Headboard

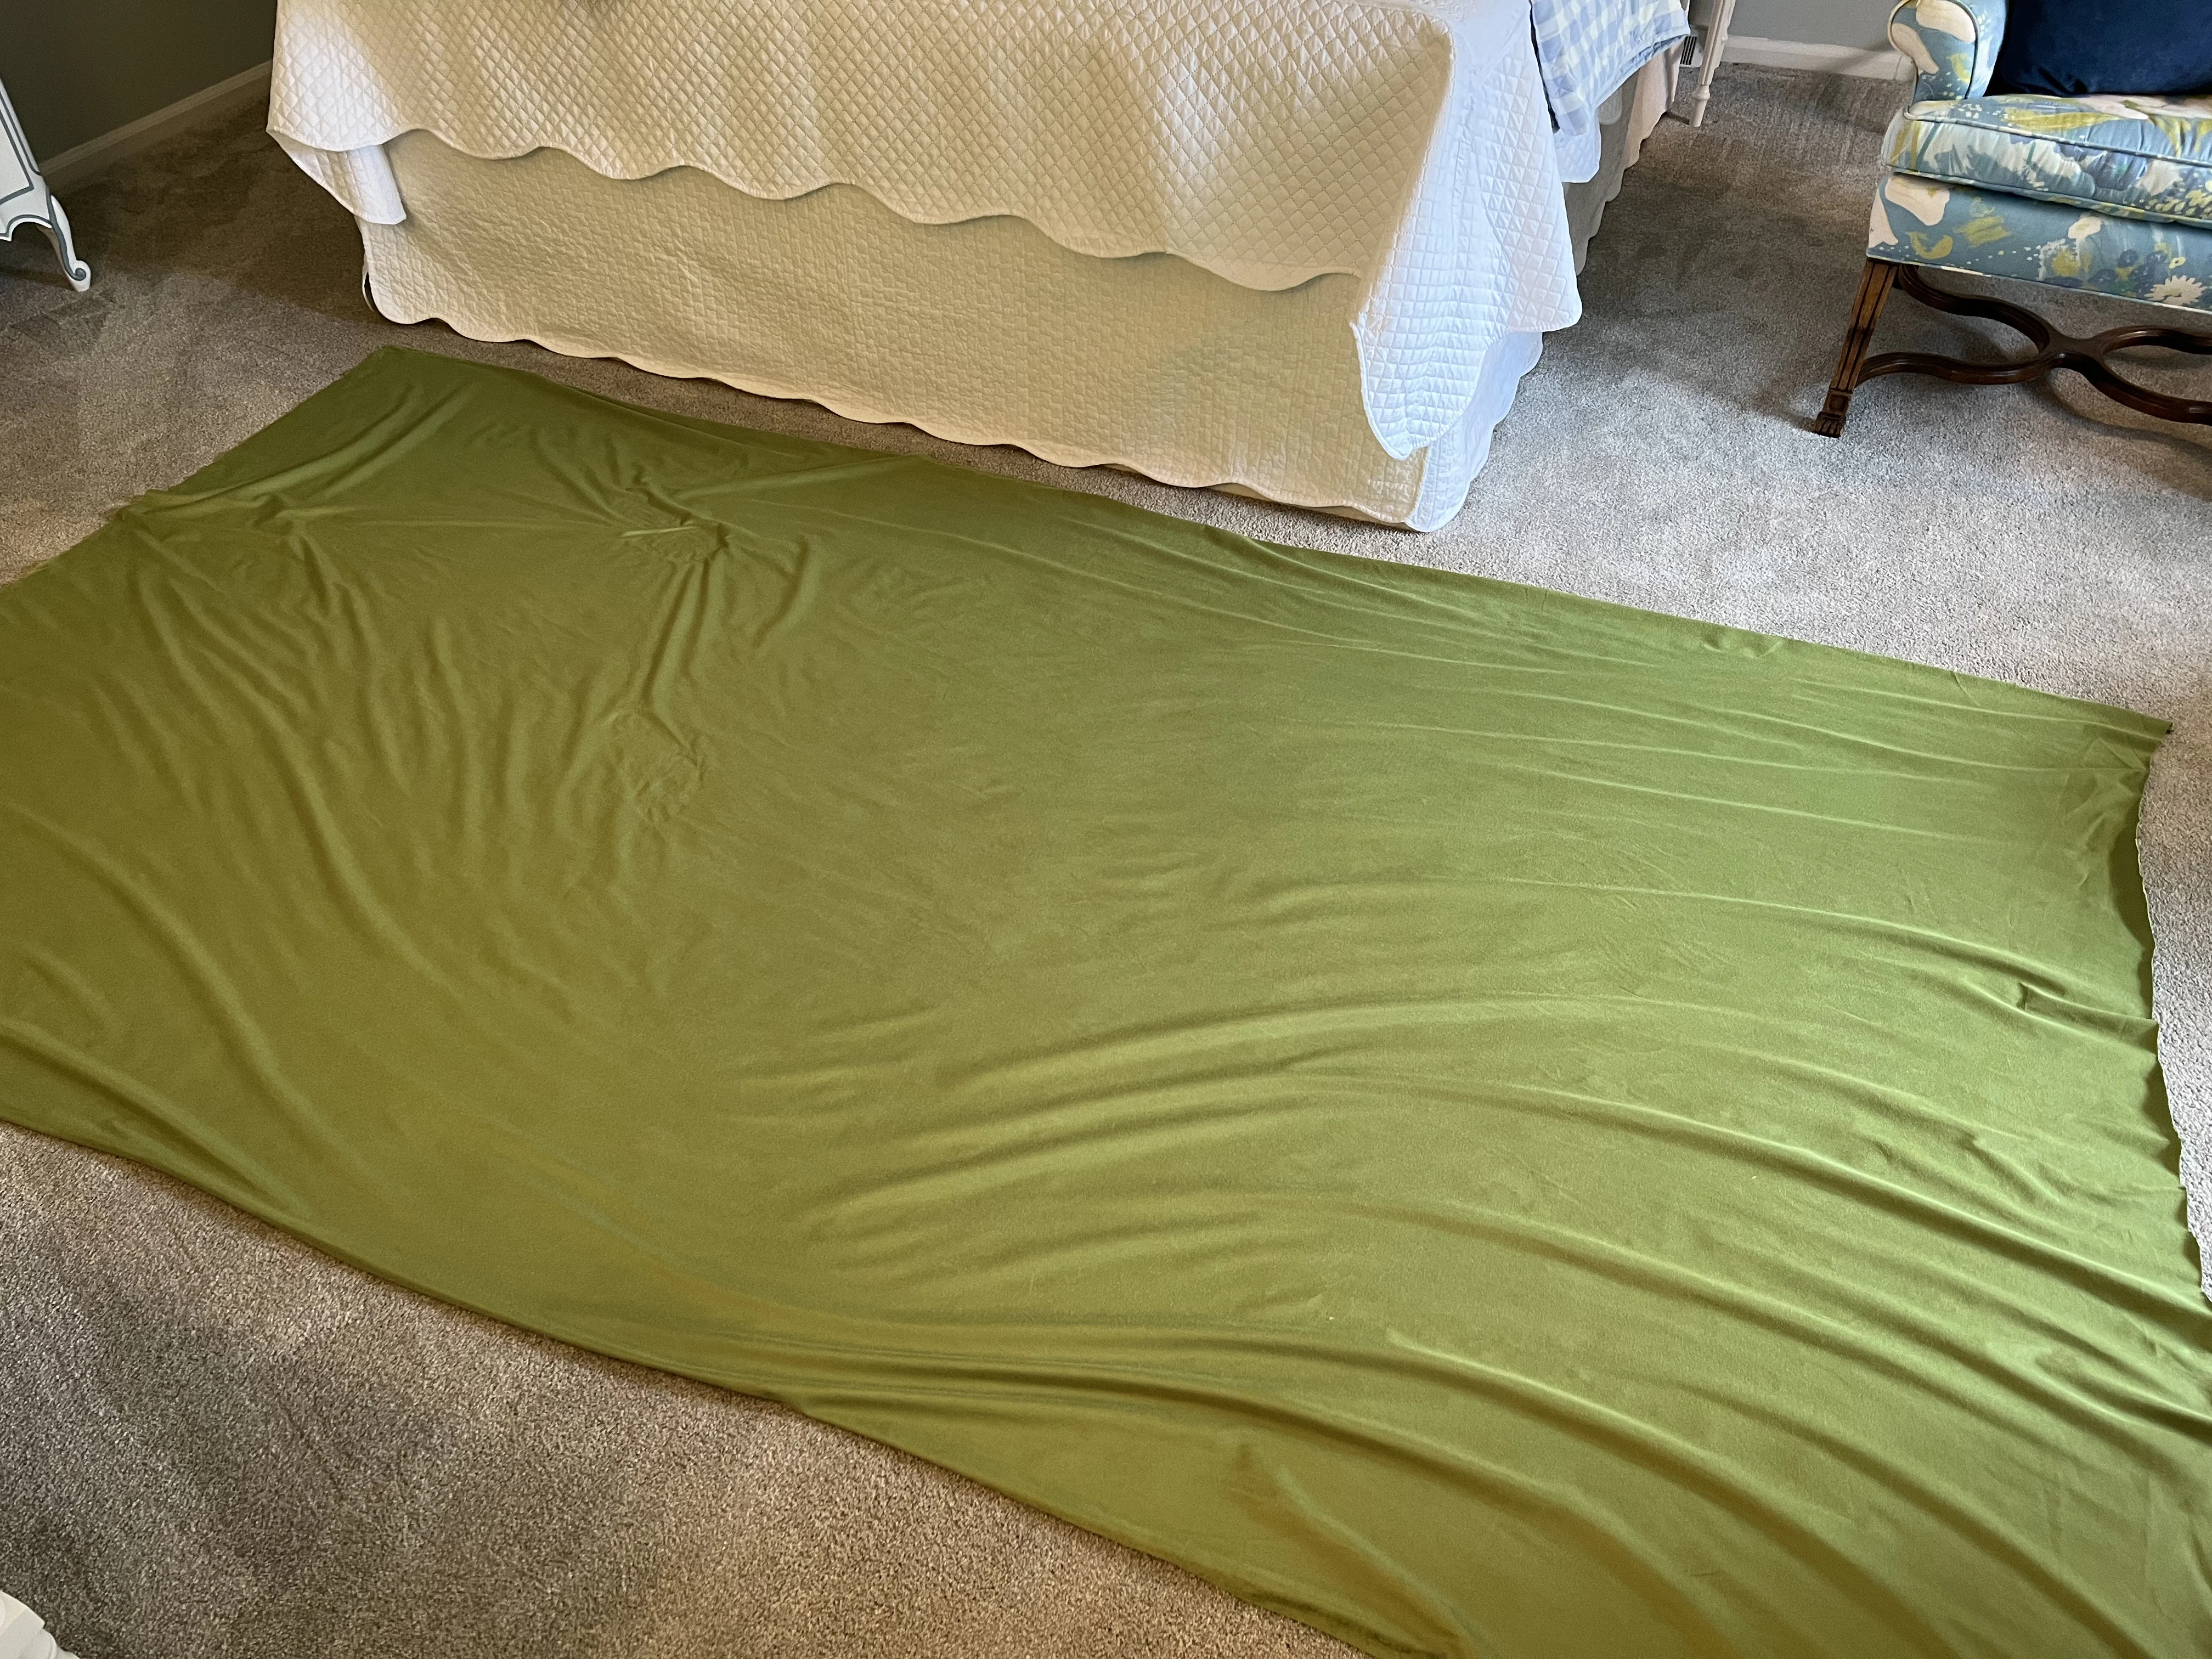
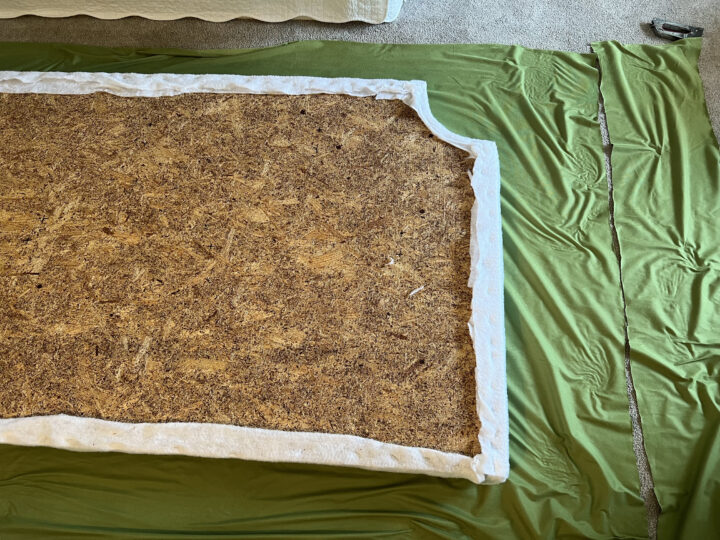
Before bringing the headboard inside, I quickly steamed the green fabric. I laid the fabric on the ground with the unfinished side facing up.
We carried the headboard inside and placed it face down on the fabric.

Once inside, I added a few more staples to the batting since it was a bit awkward stapling upside down in the garage.


The first area I began to staple the fabric was the scalloped corners. I wanted the fabric as smooth as possible on the front of the upholstered headboard. I decided to start stapling at the curves to prevent rouching.

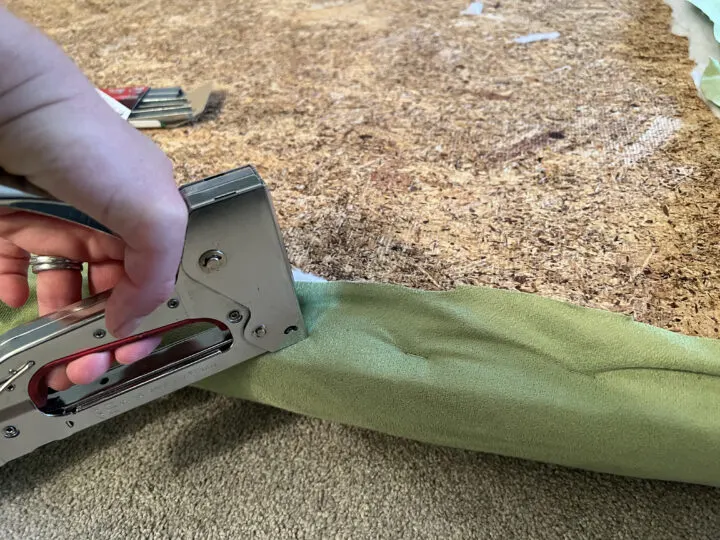
Next, I stapled the top center of the fabric. I repeated this process on the bottom center of the fabric, and both sides so that the fabric. This made it evenly taut across the headboard. I continued around the headboard pulling the fabric taut and attaching it to the plywood with a staple.
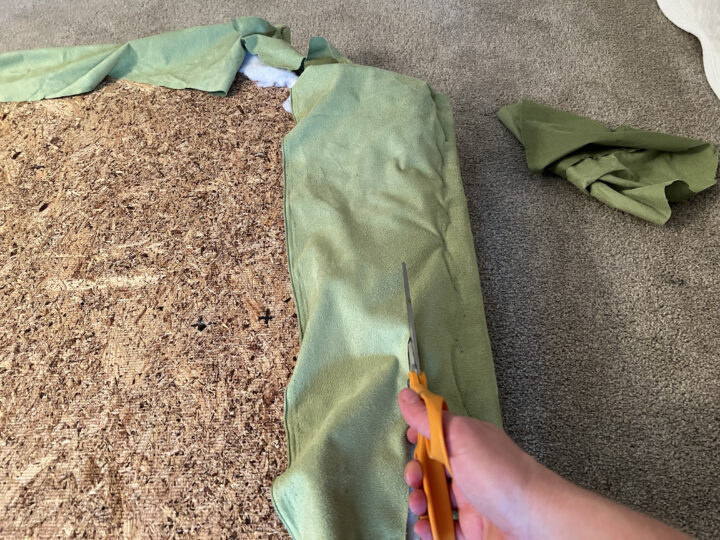

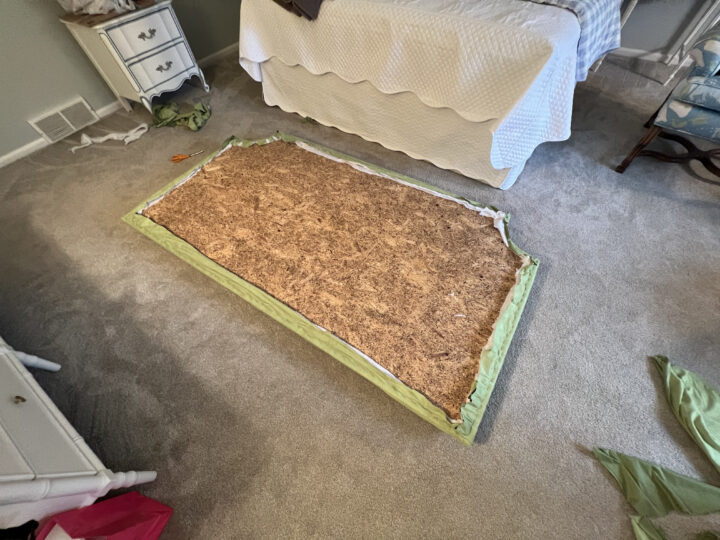
Finally, I removed the excess fabric from the back of the headboard.


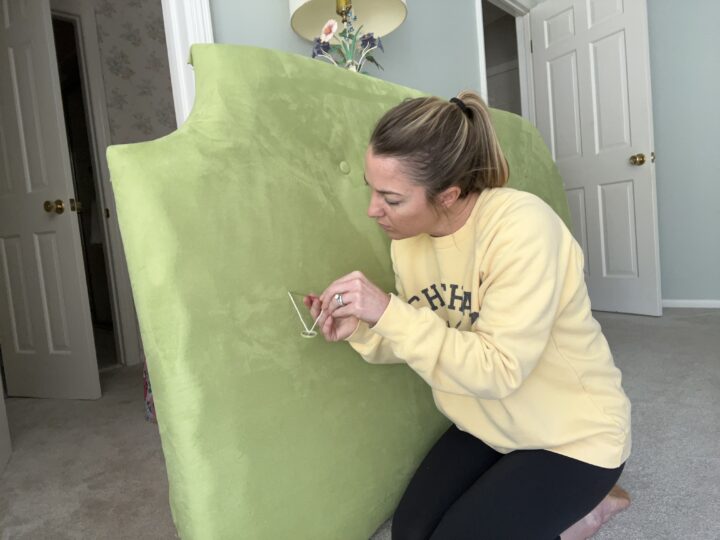
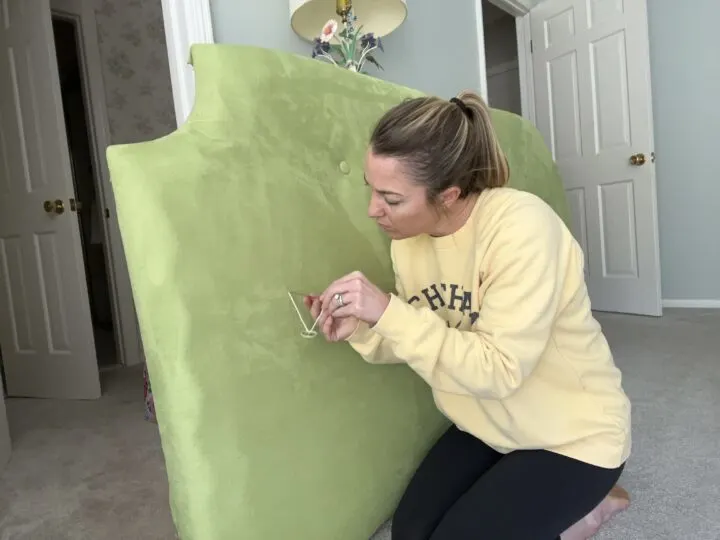
7 | Create & Attach Fabric Buttons to Upholstered Headboard
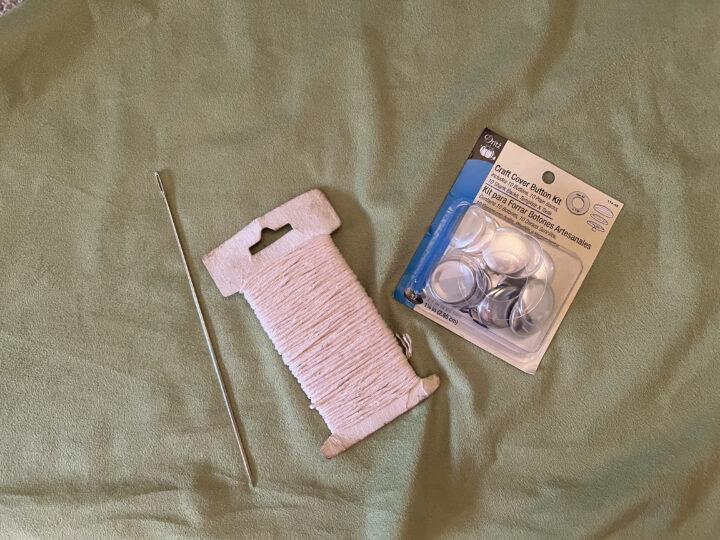
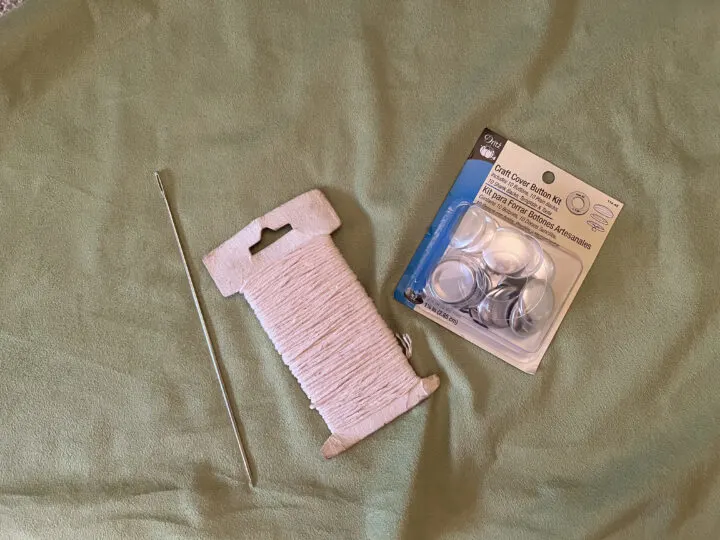
I found a button kit at Joann Fabrics and easily made 7 fabric buttons using the remnant headboard fabric. You will need to buy (or in my case borrow) a large needle to push through the 3″ thick headboard.

Adding tufted buttons to an upholstered headboard is a really easy DIY. To attach the buttons to the headboard, I cut a long piece of string and stapled one end of it near the first hole drilled on the back. I pushed the needle from the back of the headboard (through the drilled hole) through the fabric in the front as straight as possible and threaded the button.
Then I threaded the needle back through the drilled hole in the back of the headboard. I pulled the strings tight so the button was slightly indented on the front.

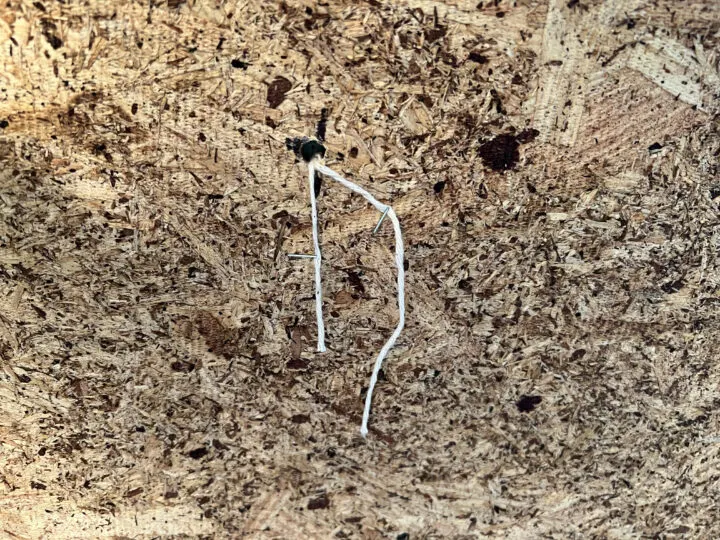
I secured the other side of the string with another staple to the plywood. Follow the same process with the remaining buttons.
8 | Install French Cleats on the Wall & Headboard

The final step of this upholstered headboard DIY is hanging it on the wall! I purchased two French cleats to attach to each side of the headboard because of the size.
I definitely think this was the best route to go to secure the headboard to the wall, but it was a little tricky getting everything to align properly. If you decide to use French cleats for your DIY headboard, my recommendation is to read their directions!

I found that a long level (48″) helpful when attaching the cleats to the headboard. The level helped with the placement on the wall as well. I had to make a few adjustments and have lots of patience to get the headboard perfectly straight! 🙂
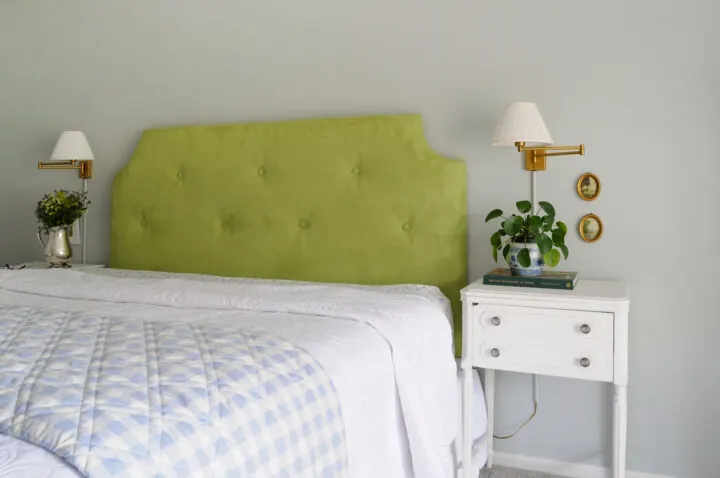
DIY Upholstered Headboard with Buttons Reveal
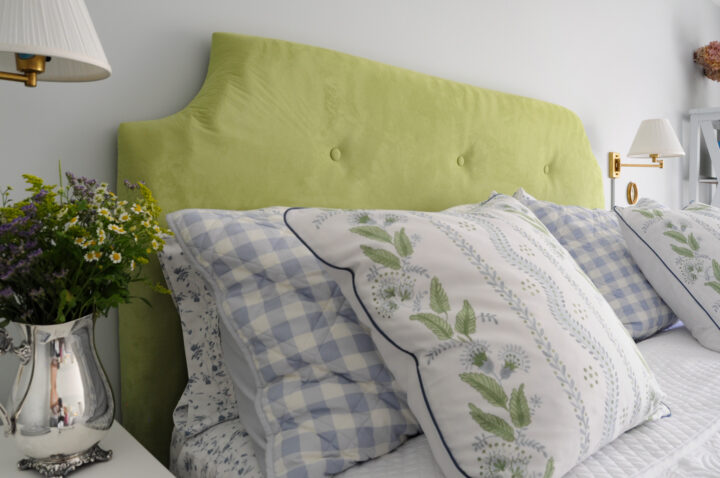
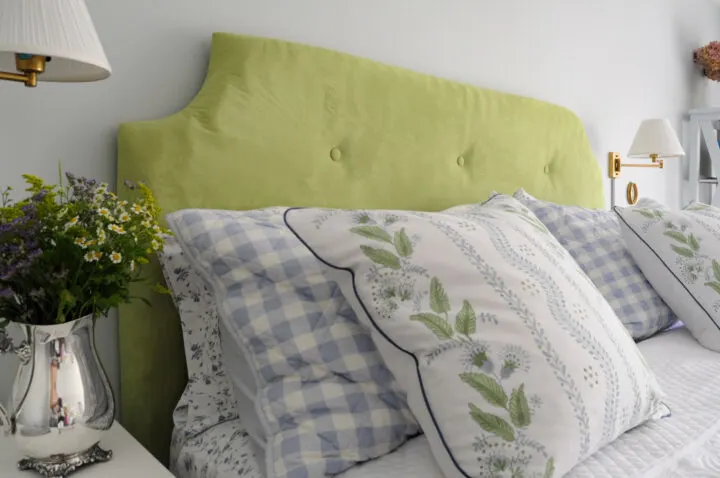
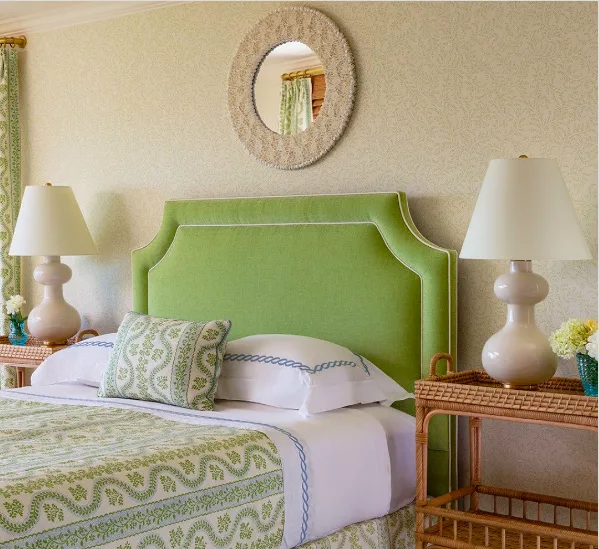
I am so happy that I pushed myself out of my comfort zone and went with the bright green fabric. It looks beautiful with the blue checkered comforter and Danika Herrick fabric pillows on the bed.
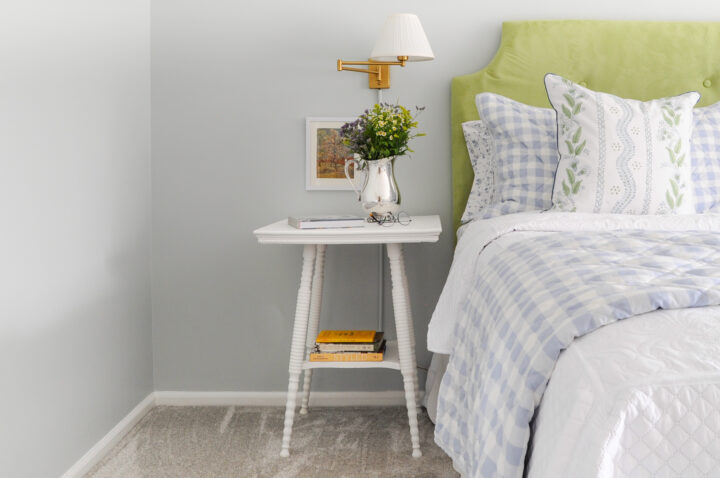

This bed is the star of the show in our guest bedroom. I hope this easy, upholstered headboard with tufted buttons DIY inspires you to create one of your own!

Whenever I am able to reuse a piece of furniture, I am a happy camper. I am still amazed at how different this platform bed looks when it has a headboard and a bed skirt!
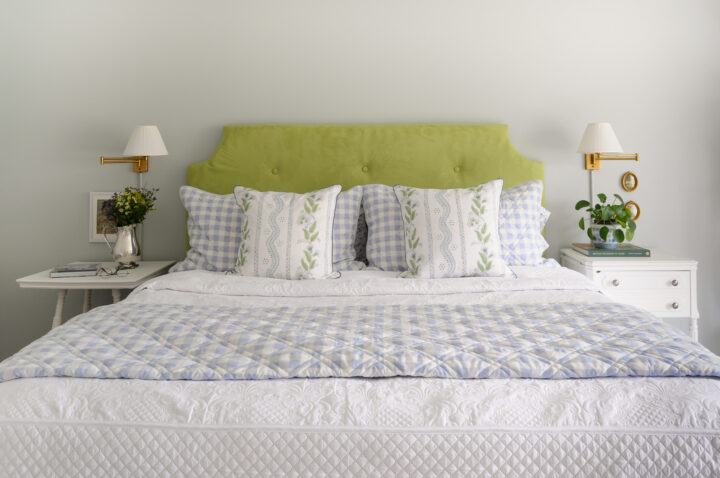

Along with saving money by reusing our old bed, I spent less than $200 building this one-of-a-kind headboard that I love.

Congratulations! You have successfully created a tufted headboard that looks expensive and professionally made.
Similar Content You Will Love
- Easy IKEA Hemnes Dresser Hack to Try at Home
- Grandmillennial Girls Bedroom Reveal | ORC
- Subway Tile Backsplash DIY | Beginners Guide
- Exciting Moody Blue Master Bedroom Reveal
- Bentwood Chair Makeover | Easy DIY
- DIY Picture Ledge for Beginner’s
- Old Sheet Music Cabinet Makeover | DIY
- 25+ Easy Outdoor DIY Projects to Try This Year
- How to Paint a Dated Rock Fireplace | DIY
- The Best Budget-Friendly Drapes for a High-End Designer Look
Benefits of a Tufted Headboard
A tufted headboard offers several benefits beyond just being a stylish statement piece in your bedroom. First, it adds a touch of luxury and sophistication to any space. Additionally, a tufted headboard provides extra comfort and support for your back when sitting up in bed, making it perfect for reading or watching TV.
Not only is a tufted headboard visually appealing, but it also helps to create a cozy and inviting atmosphere in your bedroom. The soft fabric and padded surface create a warm and welcoming environment, making it the perfect place to relax and unwind after a long day.
Lastly, a tufted headboard is a versatile choice that can complement a variety of interior styles. Whether your bedroom has a modern, traditional, or eclectic design, a tufted headboard can seamlessly blend in and enhance the overall aesthetic.
With the countless fabric options available, you can choose a color and texture that suits your personal style and complements the existing decor.