
Last Updated on June 8, 2023 by lindseymahoney
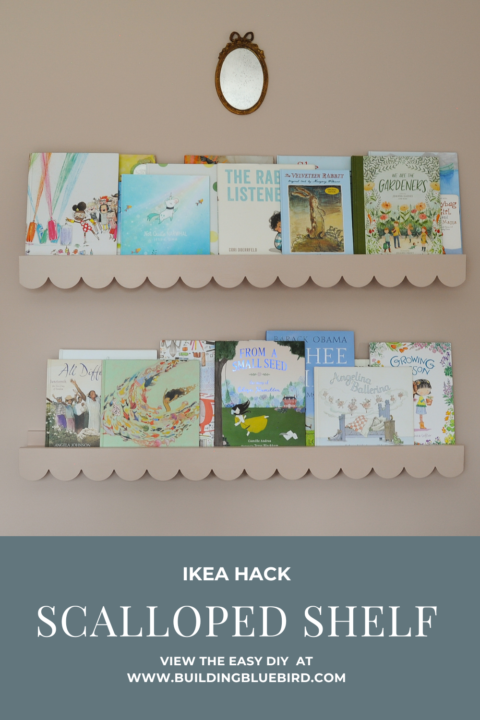
Creating this DIY scalloped edge shelf is such a fun and easy IKEA hack! Adding scallop wood trim to home decor is a quick way to add instant charm to any area of your home. While planning my daughter’s bedroom makeover, I decided to add this darling scallop trim to the edge of her floating shelves and the results are fabulous!

I have owned this pair of IKEA RIBBA picture ledges (similar) for a decade and continue to love their functionality. Here they are in her bedroom before the makeover.
Table of Contents
- Floating Shelves Before
- How to Make a Scalloped Edge Shelf
- 1 | Measure the Length of the Shelf
- 2 | Measure & Cut Scallop Wood Trim
- 3 | Glue Scalloped Wood Trim to the Shelf Edge
- 4 | Sand the Shelf & Wood Trim
- 5 | Apply Paint Primer to the Shelves
- 6 | Paint the New Scallop Edge & Shelf
- 7 | Apply Clear Laquer to the Shelf & Trim
- Scalloped Edge Shelf IKEA Hack | Reveal
- More Content You Will Love
Floating Shelves Before
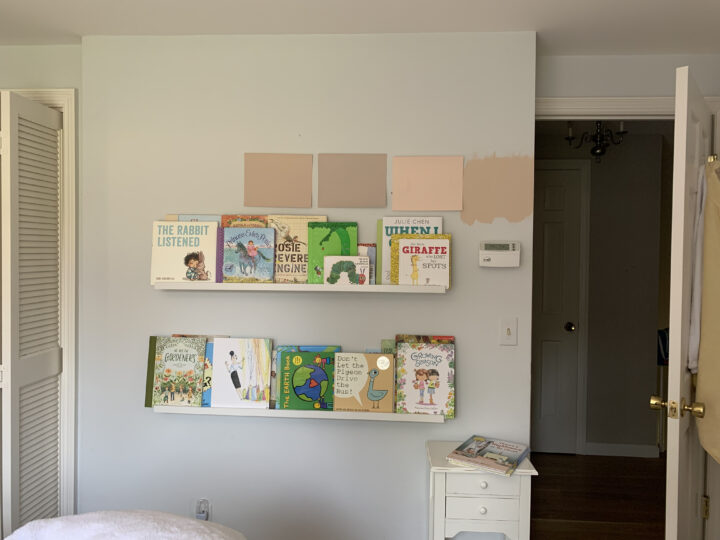

This easy DIY gave the old IKEA shelves so much character! The cottagecore design trend is filled with beautiful scalloped furniture and I am excited to incorporate it into my daughter’s bedroom.
Today I am sharing a tutorial on how to easily make a scalloped hanging shelf using an IKEA picture ledge. To be clear, this can be replicated on any shelving using these simple steps.
Let’s get started!
How to Make a Scalloped Edge Shelf
[Affiliate links are included in this post. When you purchase through these links I receive a small commission at no additional cost to you, thanks for supporting Building Bluebird!]
Project Materials Used

- IKEA RIBBA Picture Ledge (similar)
- MDF Scalloped Wood Trim
- Sanding Block
- Wood Glue
- Frogtape
- Clamps
- Extreme Bonding Primer (similar)
- Paint – I used Likeable Sand to match the wall color
- Clear Laquer (Similar)
- Paintbrush
- Measuring Tape

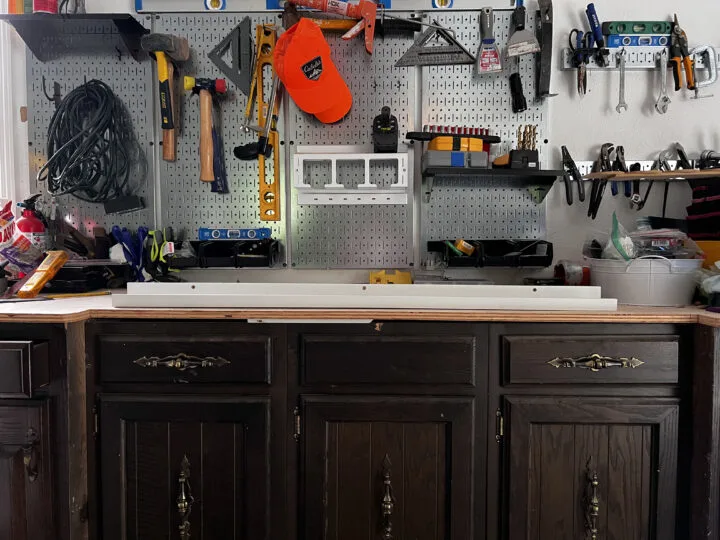
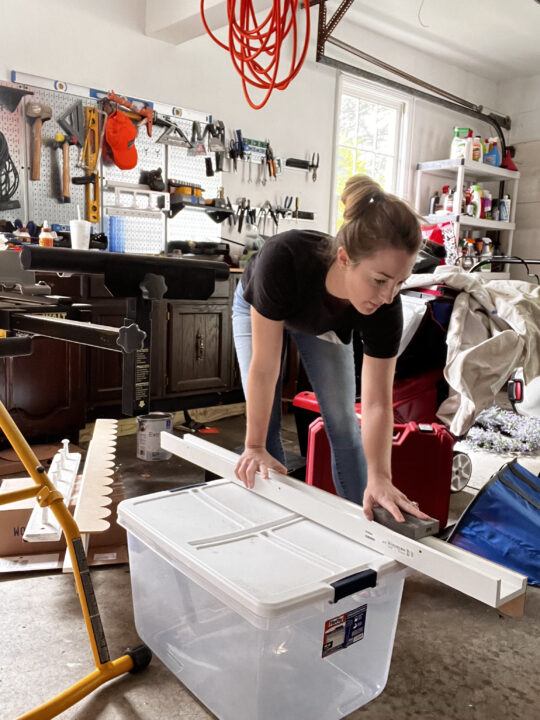
1 | Measure the Length of the Shelf

First, measure the front of the shelf with a tape measurer. The front edge of the shelf is where the MDF scalloped wood trim will be attached. I purchased pre-cut MDF trim from Etsy and it worked perfectly.
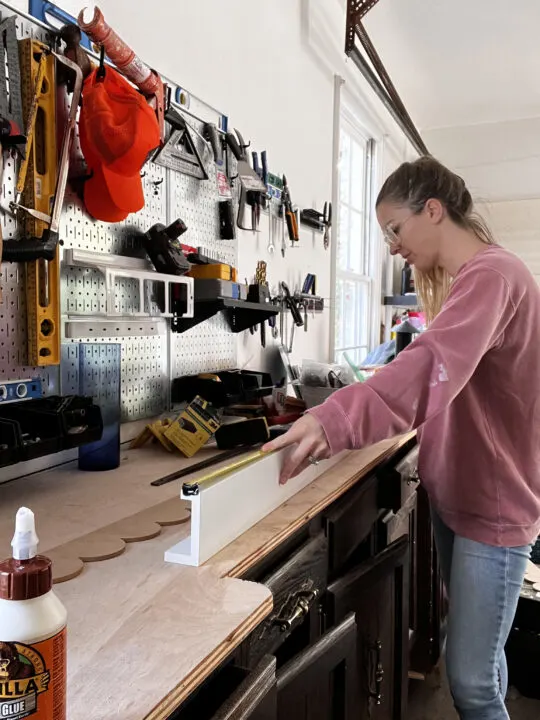
2 | Measure & Cut Scallop Wood Trim

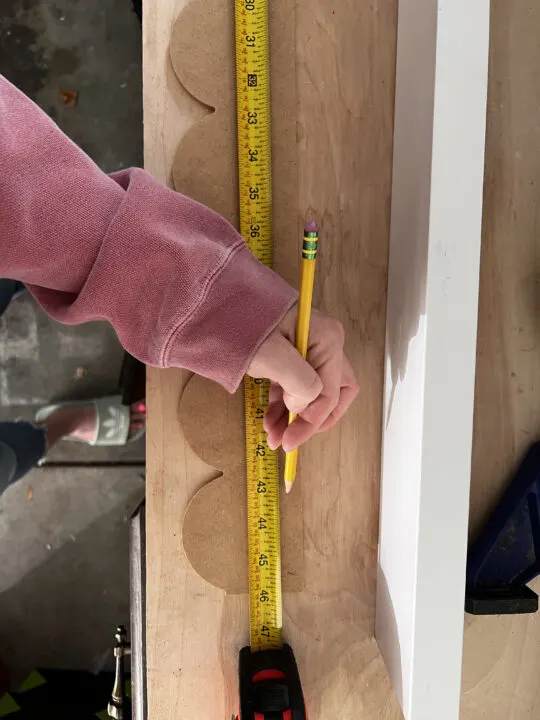
Measure the same length of the shelf and mark it on the wood trim. Be aware of where the scallops are cut on the ends and do your best to mirror the location so it doesn’t look wonky.

With my first attempt at cutting the trim, I measured the shelf distance from one finished side of the MDF and cut it to length on the other side. You can see that the scalloped trim looks lopsided with this process.The left side has a full scallop and the right side cuts off a quarter of the full scallop.
I started over with a new trim piece and cut both sides of the trim so the scallops became mirror images of each other giving it balance.
Although this project is DIY’ed, you never want it to look that way!
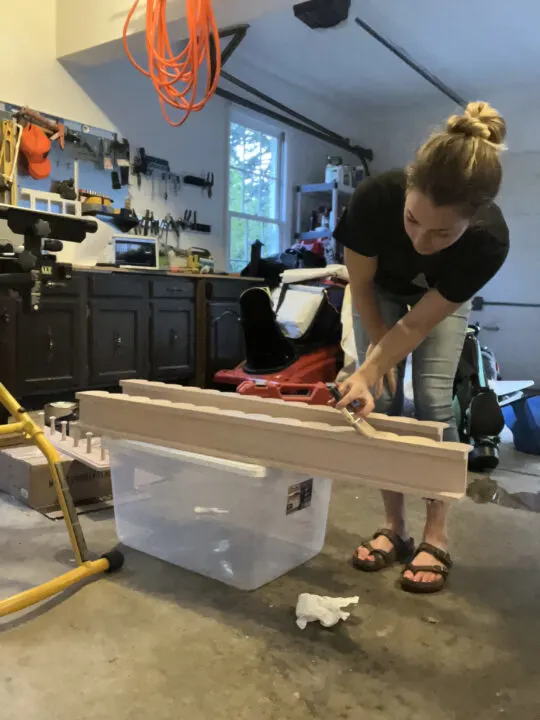
3 | Glue Scalloped Wood Trim to the Shelf Edge

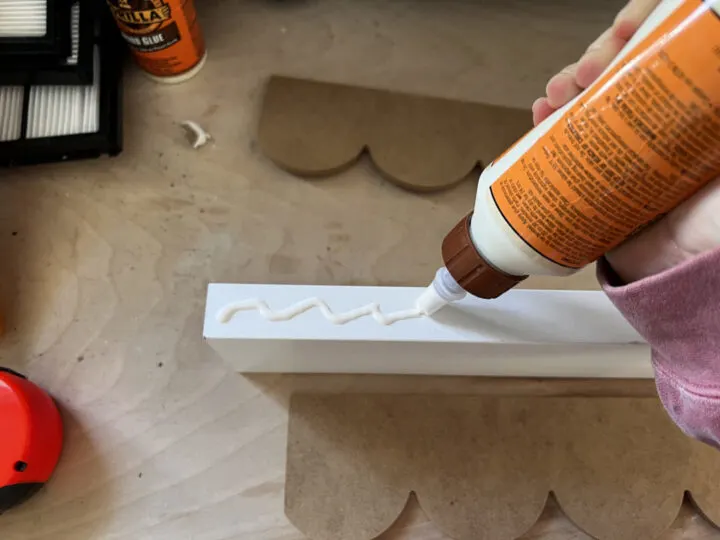
Lay the shelf ledge on its back and apply wood glue to the front lip.
I like to use tape and clamps (similar) to attach wood trim and keep it in place.
First I taped one side of the trim, then I taped the other side. I added two clamps to the center and taped additional spots to keep the trim flush with the shelf.

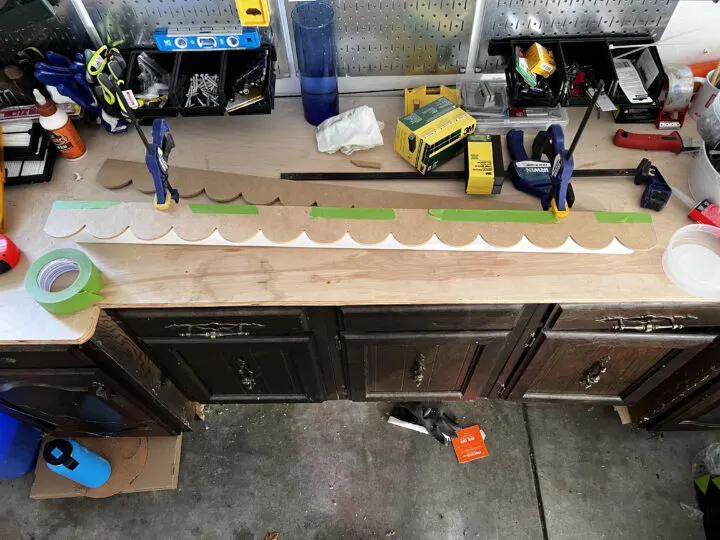
Let the glue dry for at least 4-6 hours and then remove the tape and clamps.
4 | Sand the Shelf & Wood Trim

Lightly sand the entire shelf, including the new trim piece.
The original shelf has a bit of a sheen to it, so I wanted to rough up the surface for the primer to adhere.
5 | Apply Paint Primer to the Shelves

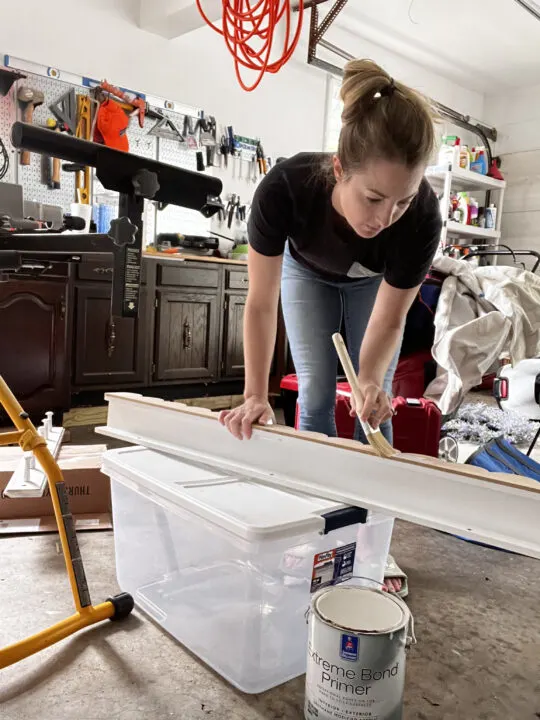
Using leftover primer from our mudroom makeover, I applied a quick coat of extreme bond primer to the entire shelf.
This primer is made specifically for glossier surfaces, so I knew it would work well on the IKEA shelf material.

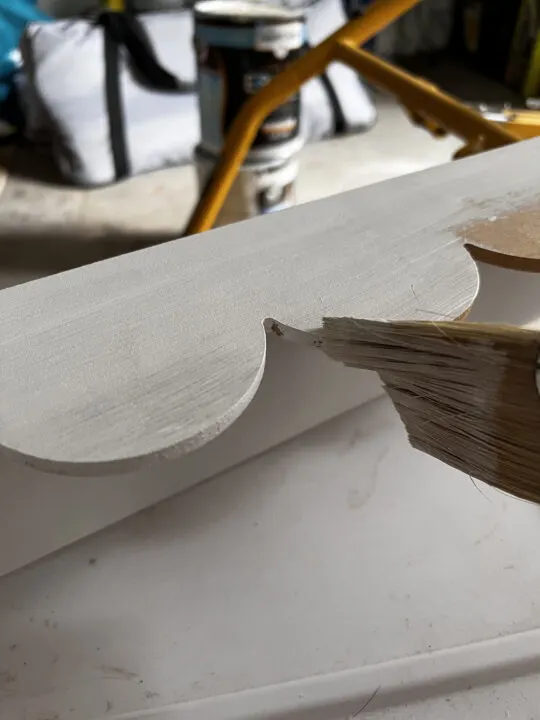
Take your time around the scallops to prevent dripping and pooling paint.
If you do get any drips that dried, use a sanding block to remove and repaint that area of the shelf.
6 | Paint the New Scallop Edge & Shelf
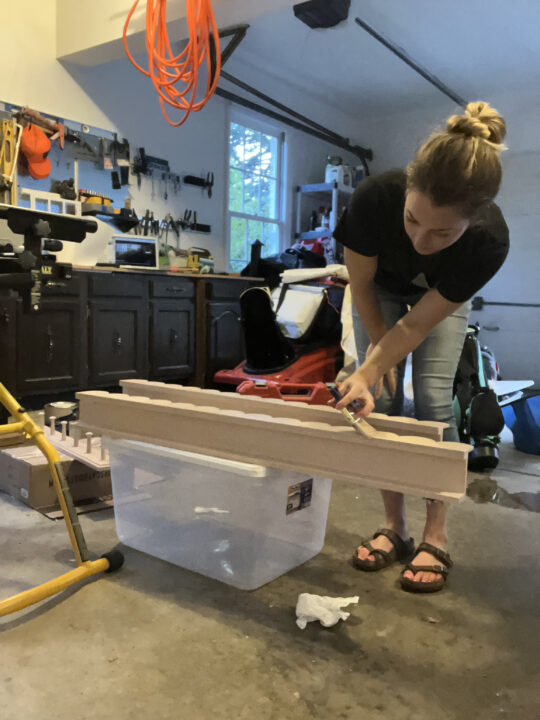
Once the primer has dried, apply whatever paint color you choose.
I decided to paint the shelves the same mauve color as the bedroom walls, but any color works. I applied two coats of paint for full coverage.
7 | Apply Clear Laquer to the Shelf & Trim
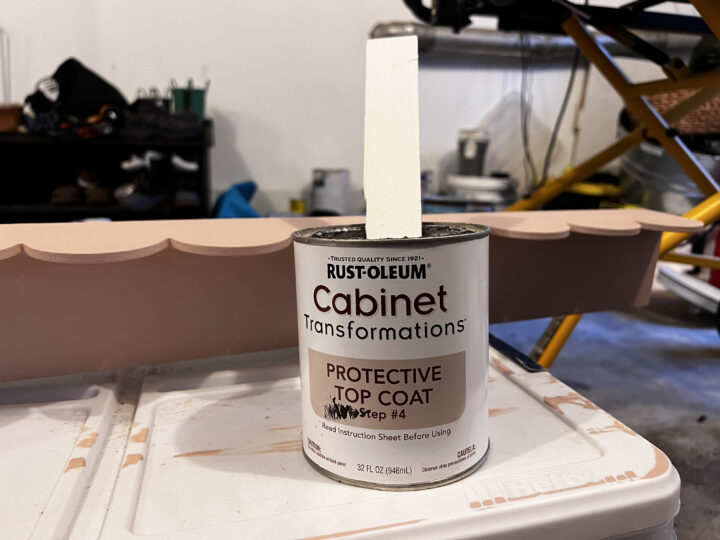
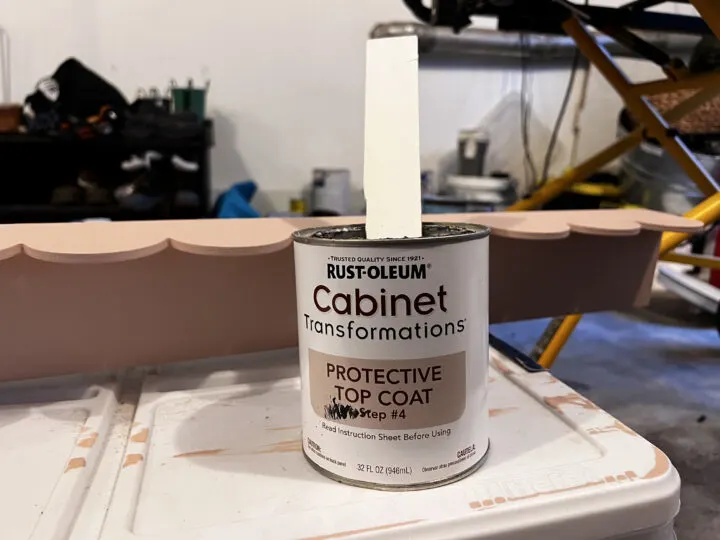
Even though I applied the extreme bond primer, I had concerns about the shelving paint chipping.
We use these shelves to display and store books, so they need to withstand lots of wear and tear. I used the same pink paint that I used on the walls, which is made specifically for drywall.
If I purchased the paint for the shelf separately, I would have bought a product made specifically for furniture or trim and doors.
Last year I completed a fun IKEA hack on our Hemnes dresser and used a Rust-Oleum Furniture Kit to paint it gray. I had plenty of the clear topcoat left over and decided to add a single coat to the shelves for maximum durability.
This comes with the kit and is a matte sheen, but any clear lacquer should work just the same.
*Check out the complete tutorial for how to paint IKEA furniture with laminate wood!
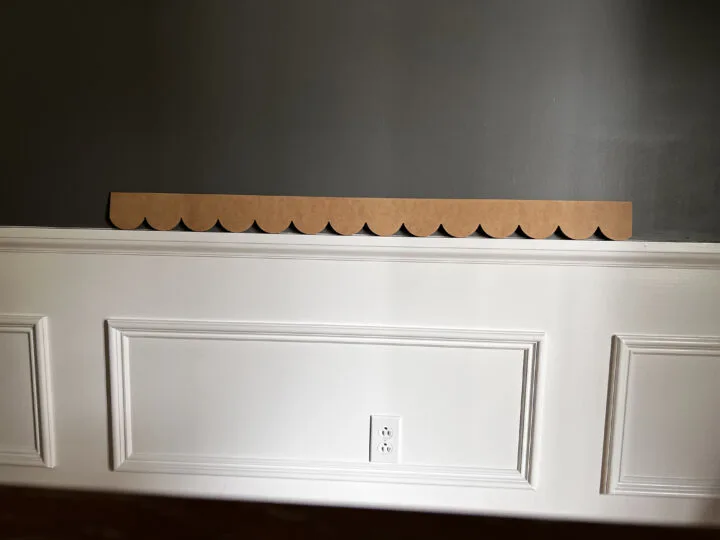
Scalloped Edge Shelf IKEA Hack | Reveal
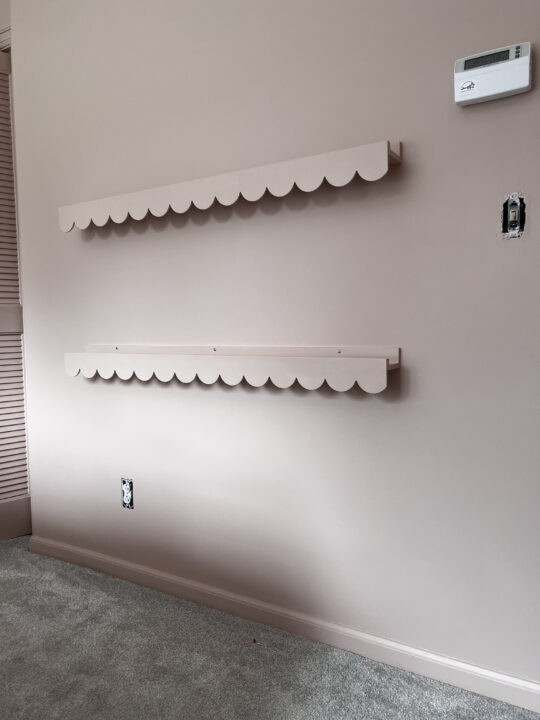
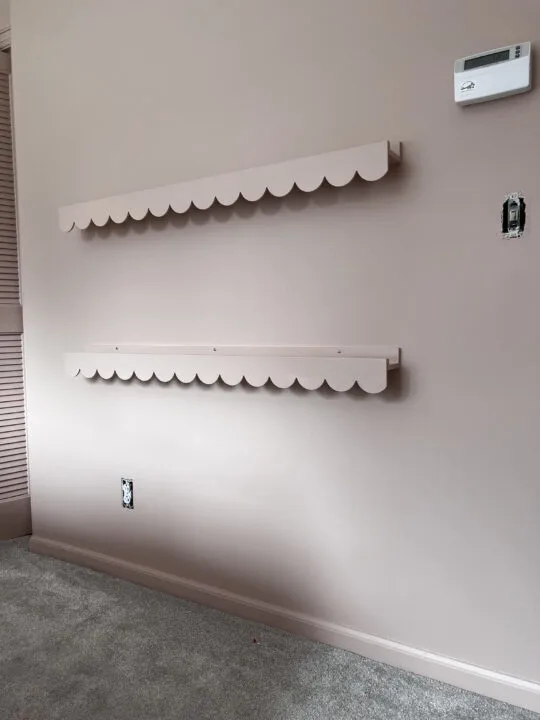
When the shelves are dry, hang them on the wall and enjoy!
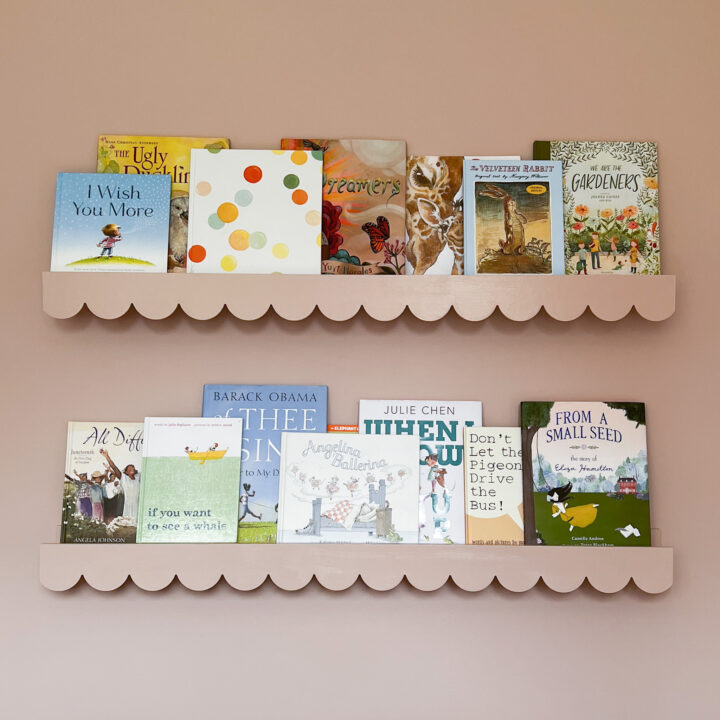

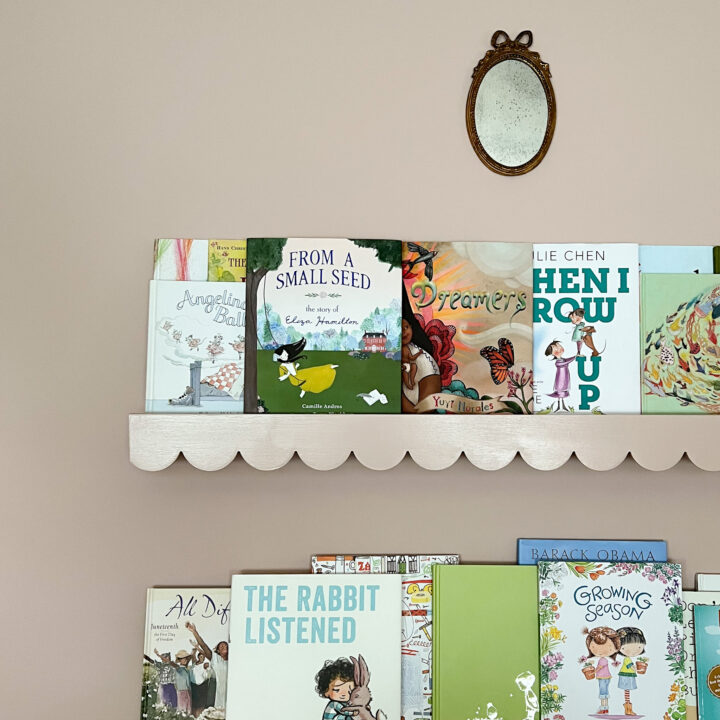
I love the look of the shelf color matching the walls. The shadow detail below allows the scallops to stand out without being too flashy.
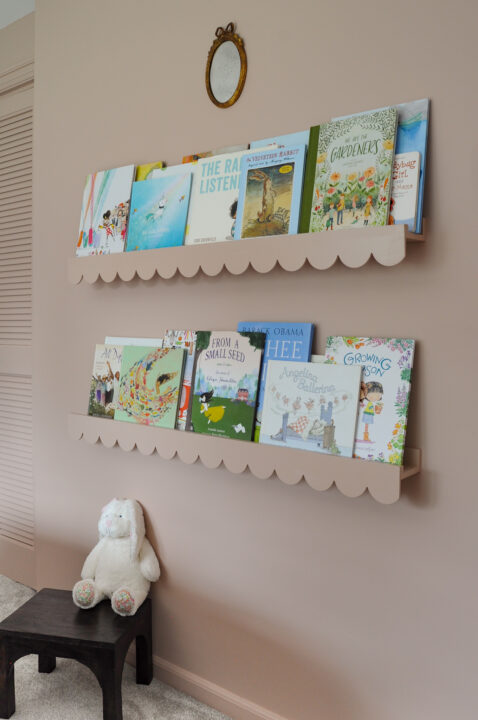

My daughter’s grandmillennial bedroom makeover turned out perfectly – just the right amount of sweet that she can surely grow into.

This project was affordable and an easy DIY, perfect for beginners.
I love how small details like scalloped trim has the ability to add so much charm to any piece of furniture.
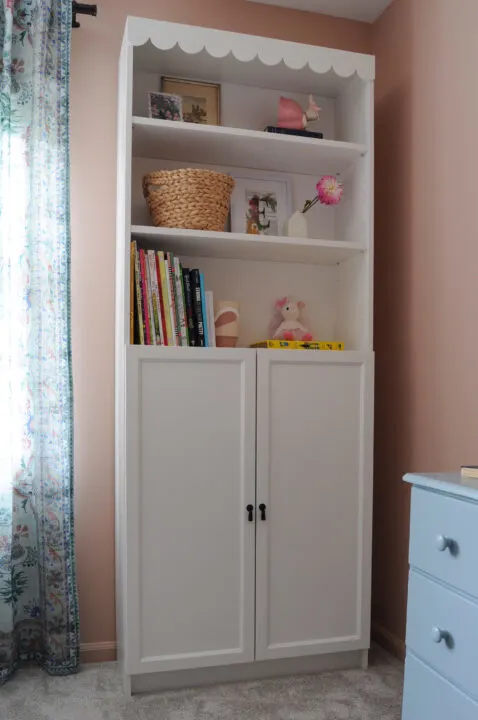
Check out how I added that same scalloped trim detail to an IKEA bookcase!

More Content You Will Love
- Easily Make a Frame Shelf For Your Home | Beginner’s DIY
- 15 Items to Absolutely Buy at Estate Sales
- DIY Upholstered Headboard with Tufted Buttons
- The Best Blue Gray Paint Colors to Try at Home
- How to Paint A Bed Frame | Easy DIY Tutorial
- Color Review | Sherwin Williams Redend Point
- How to Paint an Old Cabinet the Perfect Green | DIY
- The Best Mushroom Paint Colors for Your Home
Ikea Hack : L’étagère vague Bekvam | My Blog Deco
Friday 23rd of June 2023
[…] 1. Étagère vague DIY par Make It Love It2. Étagère bibliothèque vague Ikea Hack par Building Bluebird […]