
Last Updated on January 12, 2021 by lindseymahoney
We are in the final weeks of the One Room Challenge and I am FEELING it! Last week was heavy and to be honest, the Challenge felt a little trivial. I am grateful that we were able to take Week 5 to reflect on how we can do better as a design community to improve the systemic racism within our industry and in our country.
In the last two weeks, I decided to make a major design pivot. This design change allowed me to put a renewed focus on incorporating affordable DIY projects in the space.


Also, if you are finding my blog for the first time through the One Room Challenge, welcome! My current focus is updating our 1967 home we have lovingly named the Cape Cottage. If you love affordable DIY’s, sustainable living tips, and beautiful before and after reveals, this is the place for you!
Catch up on Week 1, Week 2, Week 3, and Week 4 of the Spring One Room Challenge.
ORC Design Pivot
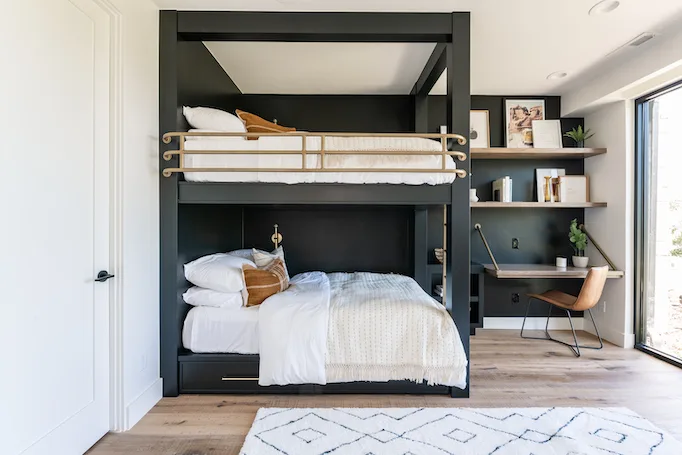
For the big design pivot, I decided to scrap the DIY bunk bed project! I have wanted to do a bunk bed project for years, but it is going to have to be in another space. I think I have repinned the bunk bed image below like 10 times. Who wouldn’t want to create this in their child’s bedroom?!

Here are a few reasons why I decided to go in a different direction:
Time
Like many smart participants, I should have started this project before the challenge began. We hit the halfway mark of this challenge and I hadn’t even started the bunk bed. The deadline was stressing me out and I did not want to rush through a project that my son would be sleeping on and under for years to come.
Money
I have expensive taste! As I started to price out the materials for the bed, it quickly began to add up. Cramming this big project into the 4 remaining weeks would also require a lot of my time. You know the saying – time is money! This time would be taken away from my job as a realtor, other home projects, and my family.
Weight
The bunk bed was going to be hefty! I didn’t want all of the extra weight over our kitchen. Additional weight and the inevitable vibration of kids jumping off the bed increases the risk of cracking drywall on the ceiling.
Perspective
I had to ask myself, “Who am I creating this bunk bed for – me or Thomas?”. Because the truth is, Thomas didn’t care what his bunk bed looked like! In this online space of talented designers, it is easy to compare yourself to their amazing projects. Every once and a while I have to check in to make sure I am not just trying to one-up myself. DIY and home design are supposed to be fun and not stress you out to the max. The purpose of this makeover is to create a functional and inspiring space for my son. To create a beautiful room where he can make memories and grow into a little man.
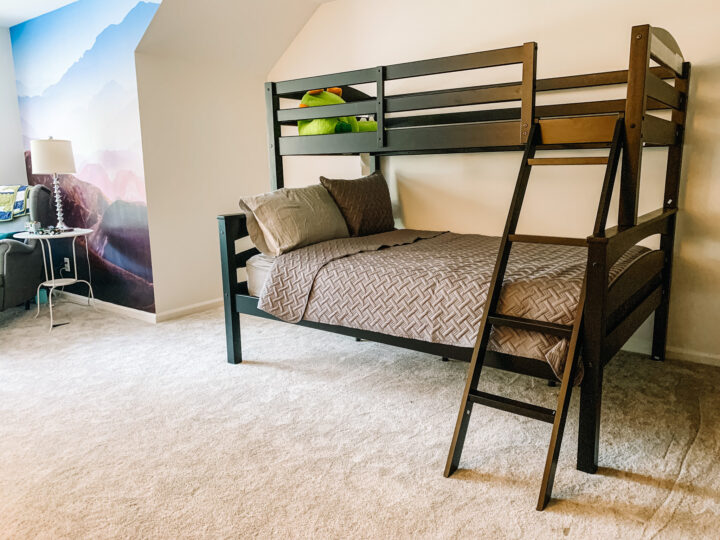
SO! Once I made the decision to scrap the bunk bed plans, I found a nice option on Amazon and added it to my cart! Is it my dream design? Nope. Do I wish there was more headspace in the lower bunk? Yep. But Thomas doesn’t care about any of that, he is just pumped to have his very own bunk bed and is already planning his sleepovers!
Here is the bed after I got it assembled. Once we get the beds made up and a mattress on the top bunk, this bed will look really nice. I also need to spend some time with my Goo Gone spray to remove all of the stickers.

DIY Projects
This design pivot gave space in my brain to start focusing on DIY projects in his room. I love finding different ways to upcycle old furniture and decor. Here are a few that I tackled in his bedroom:
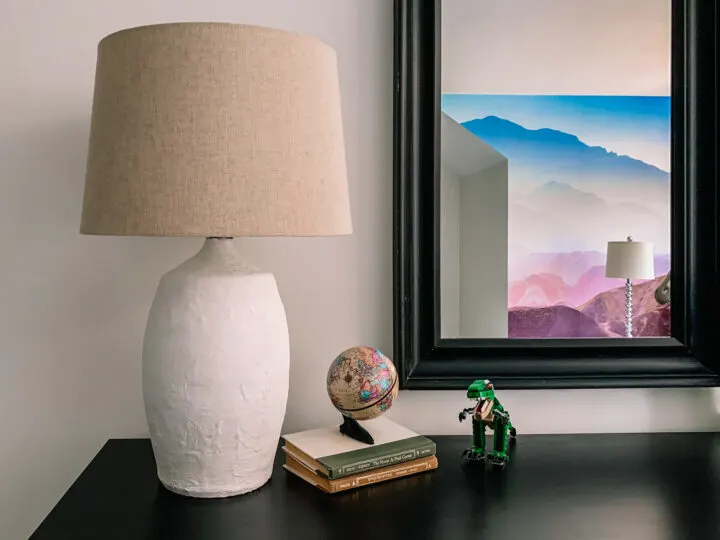
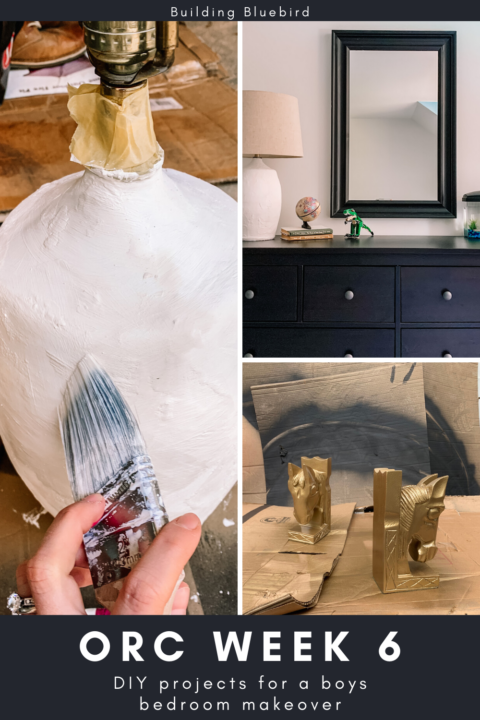
DIY Plaster Lamp
This project was so fun and I am obsessed with how it turned out! I kind of want to plaster every lamp now. This lamp was purchased at a thrift store for just $15 – woop woop! I bought the plaster from my local hardware store for less than $10.
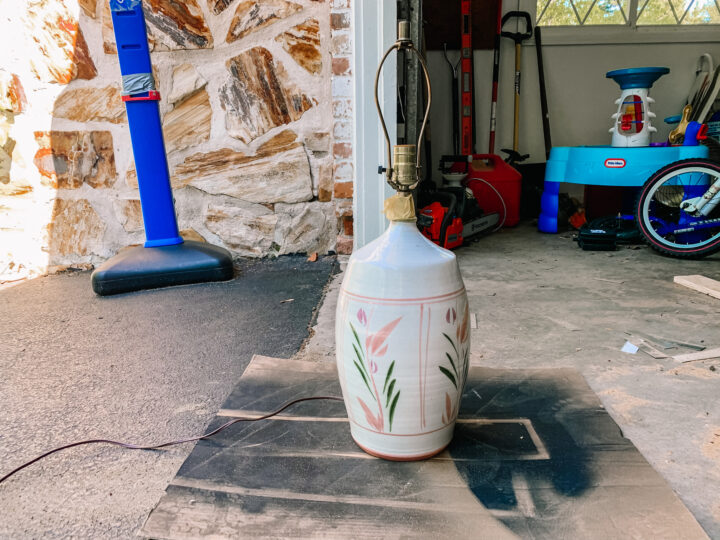

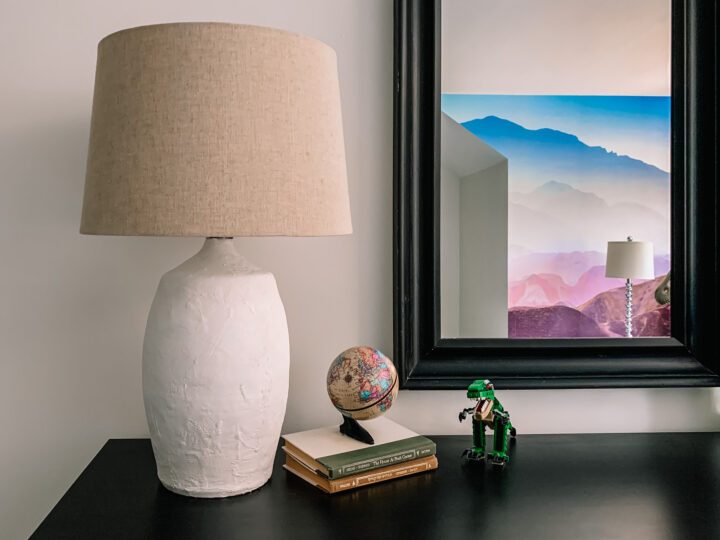
I finished this easy project in only a few hours. The lampshade came from a lamp that I already own and plan on replacing in the near future. For less than $30 I got a custom lamp that fits the modern design of the bedroom. Side note: How fun does the reflection of the mural look in the mirror?!
Reusing Furniture
My original plan was to replace this IKEA mirror with a gold-framed mirror. I have had this dark brown mirror for about 10 years and there were a handful of scratches and chips on it. After we assembled the HEMNES dresser, I realized it was the same color and looked really nice paired together. More importantly, I already owned it! I hung the mirror and used a black Sharpie to hide the scuffs and scratches and it looks like new!
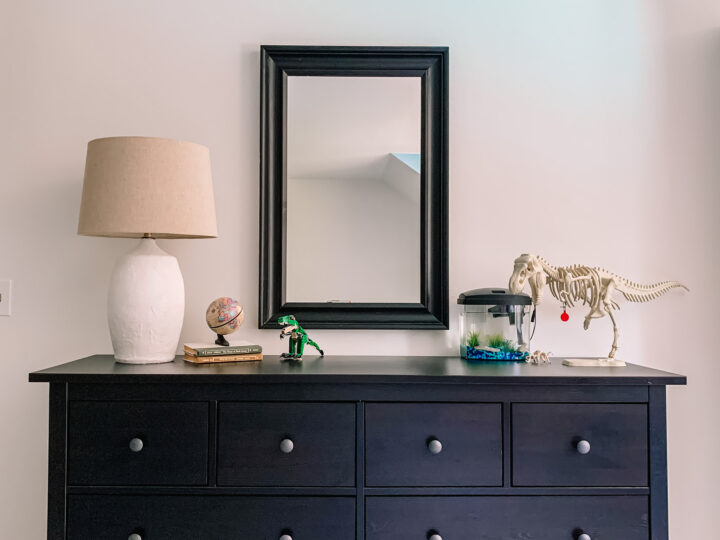

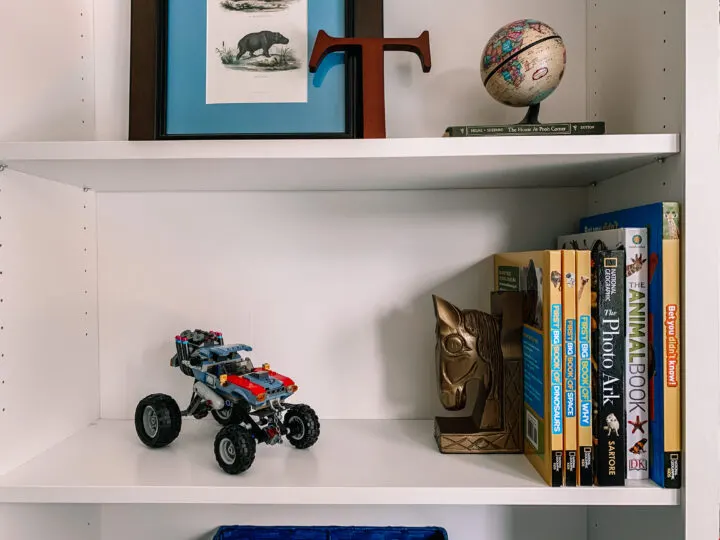
Painted Horse Head Bookends
I found these bookends at the same thrift store as the lamp and picked them up for $15.

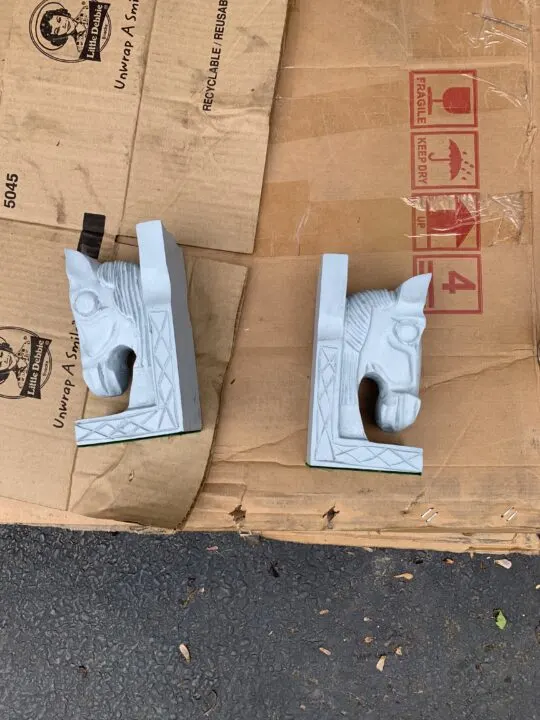
Thomas loves animals and I thought this would be a great addition to his new bookshelf. The original bookends were blue so I used my handy dandy Rust-Oleum and spray painted them gold.

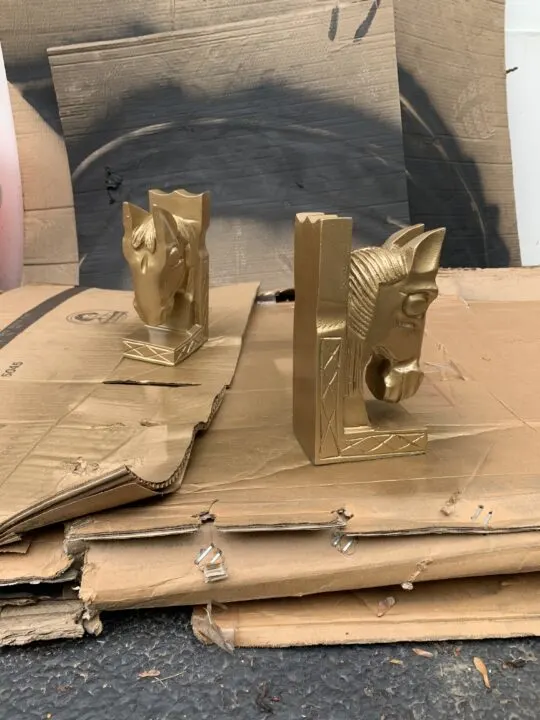
It is one more added touch of my little boys fun personality.

Thanks for following along on all of the twists and turns of this bedroom makeover. I love sharing it with all of you! Tune in next week to see how the desk nook turns out! Don’t forget to check out the progress from all of the other OCR participants on the One Room Challenge blog!
Want to save this tutorial to reference once you start your next project? I’ve got you covered! Use the pin below to easily find your way back to this tutorial.

Amie Druehl
Thursday 11th of June 2020
Hi! The plaster lamp is genius! It looks fabulous! What a fun space for your little one. Looks forward to seeing this space come together!
lindseymahoney
Thursday 11th of June 2020
Thanks so much! I can't believe there are only 2 weeks left!