
Last Updated on August 1, 2024 by lindseymahoney
Last year I updated our unfinished basement but ran out of steam before painting the stairs black.
After a few months of walking down the old staircase, I knew it was time to finish the last basement project on my list! I decided to do a zero-dollar makeover using paint we already owned and artwork sitting in my storage closet.
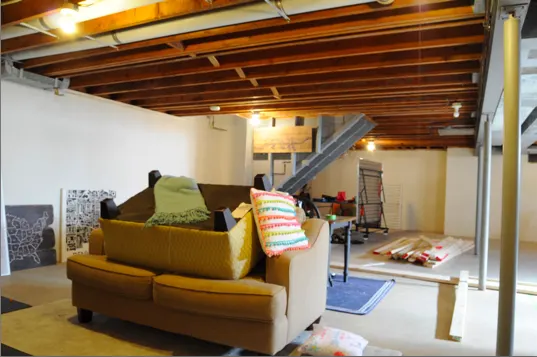
Here is what our basement looked like before the makeover:

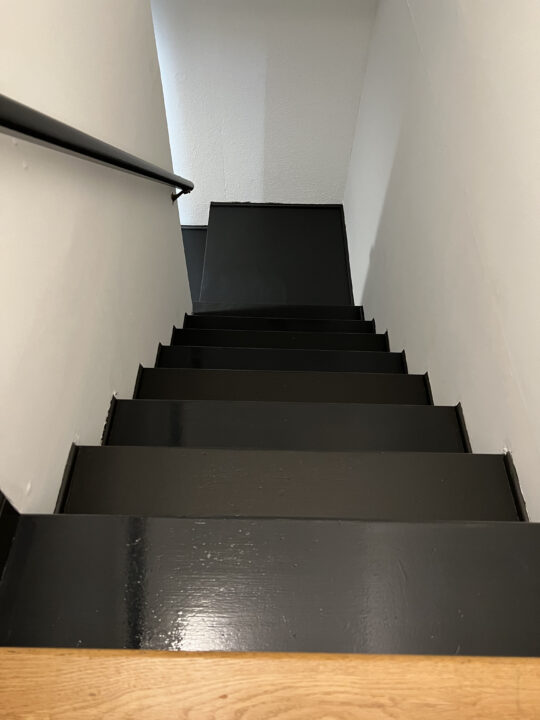
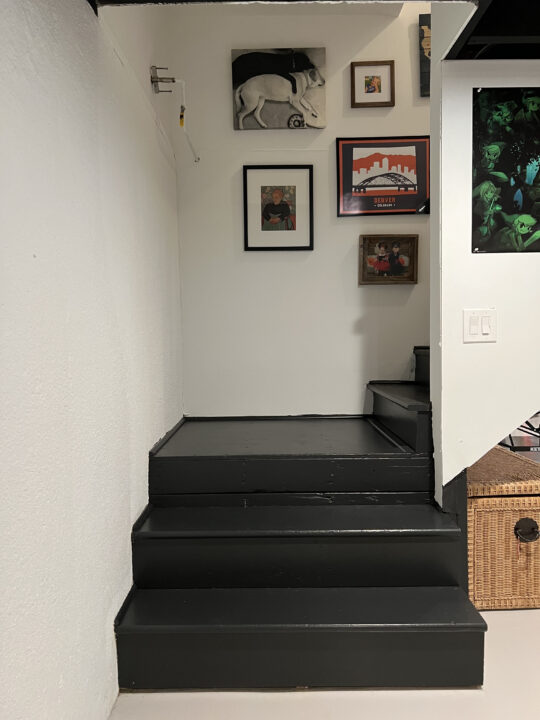
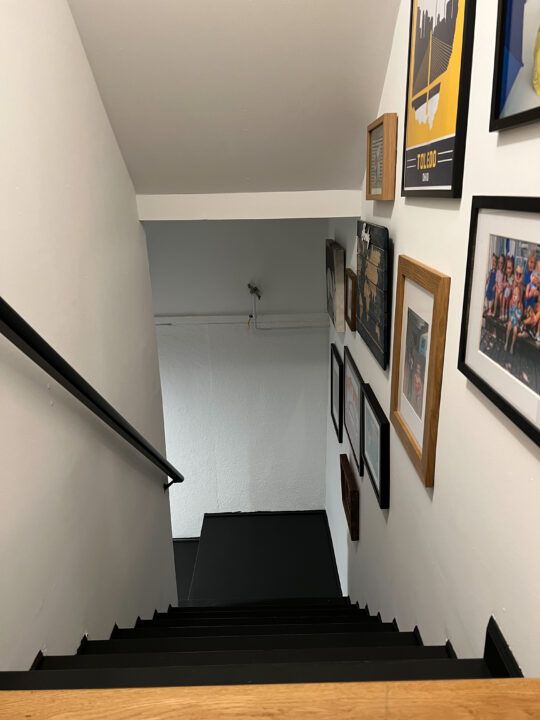
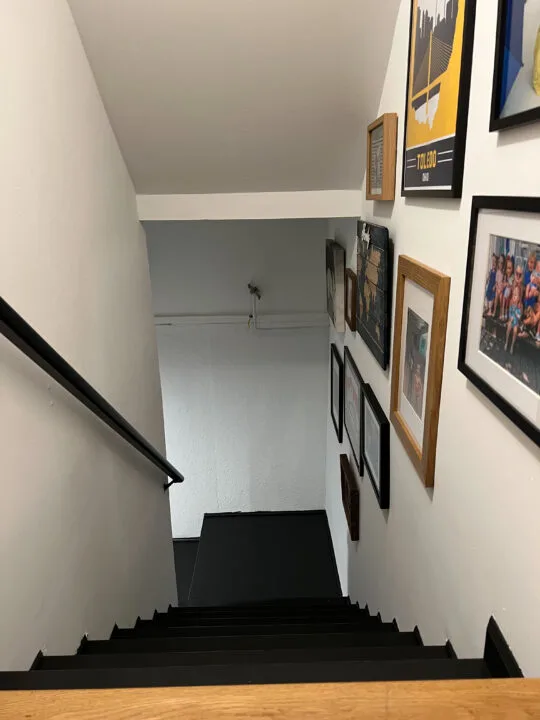
And here is that same view after the basement makeover. You can see the unfinished stairs (and unpainted wood) in this image.

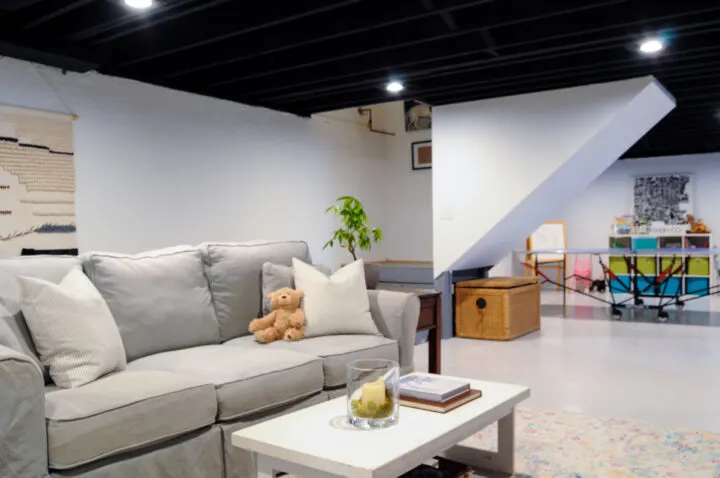
Table of Contents
- Basement Stairs Before
- The Best Paint Product For Your Basement Stairs
- How to Paint Basement Stairs Black
- Project Source List
- 1 | Paint the Staircase Walls & Ceiling
- 2 | Clean the Stairs
- 3 | Trim the Edge of the Stairs with Paint
- 4 | Paint the Stairs Black Using a Roller
- 5 | Apply the Clear Matte Top Coat
- 6 | Hang the Gallery Wall
- Black Painted Stairs | Basement Staircase Makeover Reveal
- More Budget-Friendly DIYs You Will Love
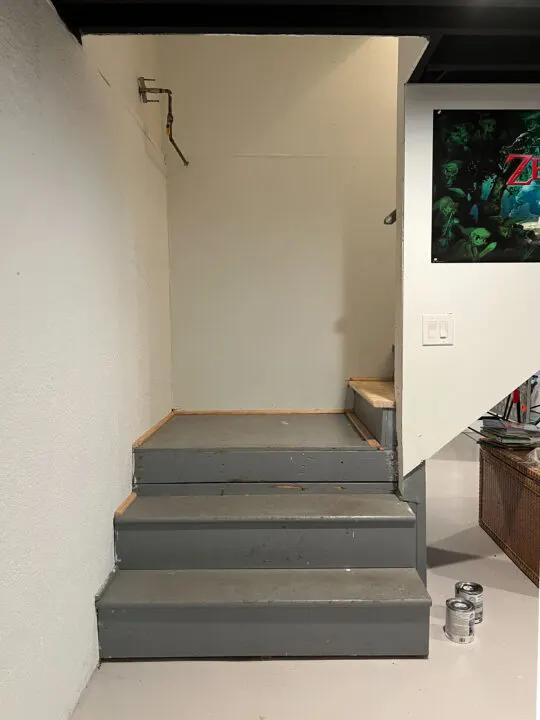
Basement Stairs Before
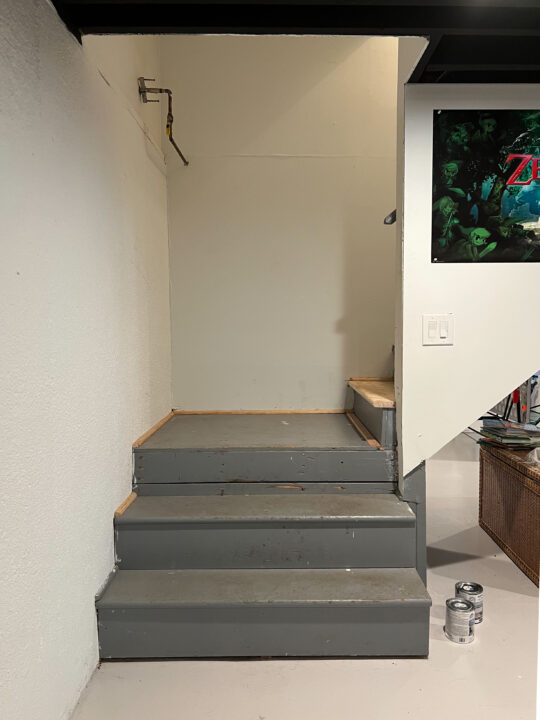
When we brought the furniture back into the basement, the couch became stuck in the stairwell and we had to remove a few stairs to get the couch into the space. The stairwell has always had drywall, but it was in desperate need of a paint job.

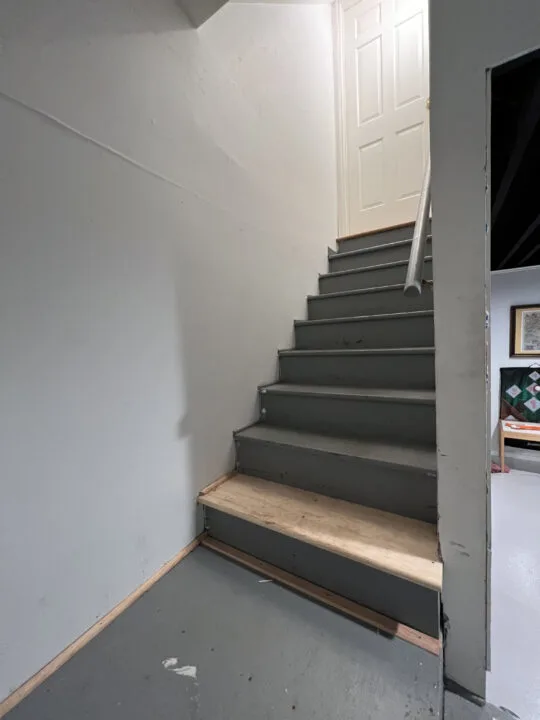
The original basement stairs were wood and with old gray paint. The whole staircase needed a good cleaning and a fresh coat of paint. Of few of the stairs needed some quick repairs using wood filler, a putty knife, and a sanding block.
The Best Paint Product For Your Basement Stairs
I can only speak to the products that I have used, but I am a huge fan of the Rust-Oleum HOME floor paint product. The paint kit can be found at Home Depot and includes a simple two-step process.
It includes a base coat mixed to your chosen paint color and a clear topcoat for a durable finish. It is easy, to apply, easy to clean, and holds up well to heavy foot traffic. We have small children and two dogs running up and down the basement stairs all day and the paint has held up beautifully.
I have used this affordable product to paint our basement concrete floors as well as our old linoleum floors in our laundry room and highly recommend these products.
How to Paint Basement Stairs Black
[Affiliate links included in this blog post, thanks for supporting Building Bluebird! For a complete list of project sources, scroll to the bottom of the post.]
Project Source List
- Spackle
- Putty Knife
- Krud Kutter
- Black Base Floor Paint
- Matte Topcoat Floor Paint
- Paintbrush
- Paint Roller

Using materials that we already owned, I was determined to give our basement staircase a fresh and modern look without spending money.
Our updated basement has a clean and crisp look with black ceilings, white walls, and light gray floors.
The plan for the staircase was a fresh coat of white paint on the walls and clean, black stairs. This simple color palette works perfectly with the style of the basement makeover.
To add some personality to the space, I created a gallery wall with frames and photos in storage.
1 | Paint the Staircase Walls & Ceiling
If you are planning on painting the ceiling and walls, tackle this before painting the stairs. If you don’t need to paint the walls and ceiling, skip to step 2.
To prepare the walls for paint, I used spackle to fill any holes in the walls. When the holes were filled, I sanded the area for a smooth finish.
Using a rag and spray cleaner, I wiped down the walls to remove any dust and dirt to ensure the paint adheres properly.
We have a good amount of flat ceiling paint leftover in storage so I decided to use it for the walls. Normally I prefer an eggshell or satin finish on the walls for easier cleaning.
Flat paint sheens are harder to clean compared to the glossier paint sheen options, but it’s just the basement stairwell and it’s free, so I am ok with it!
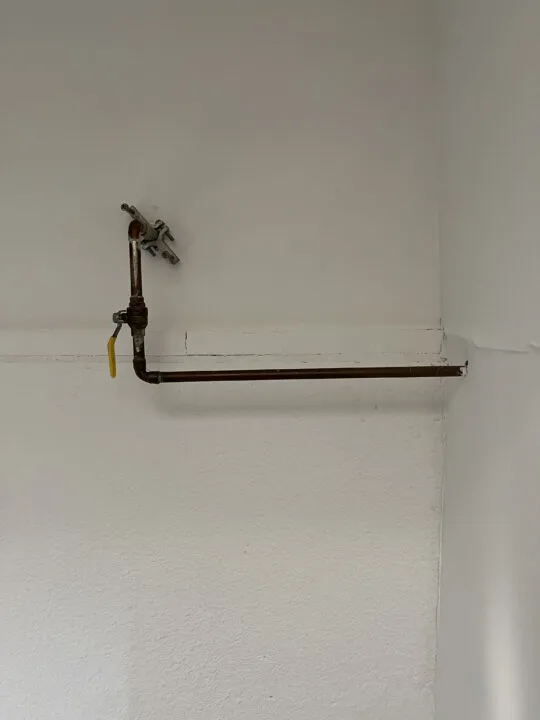
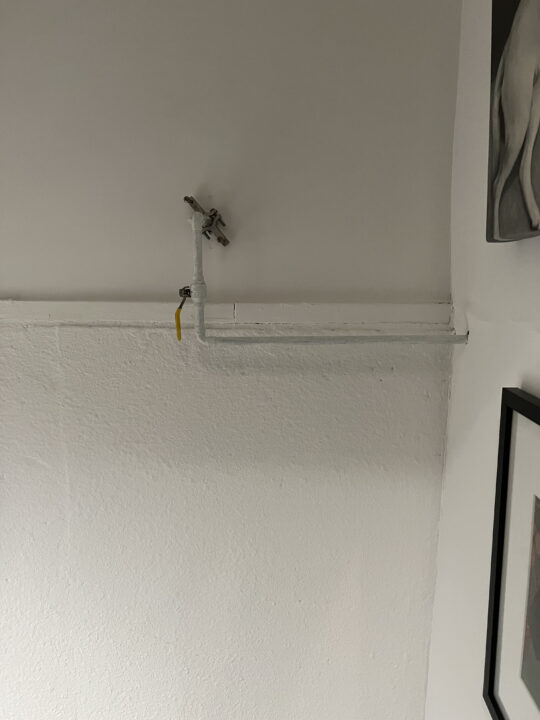
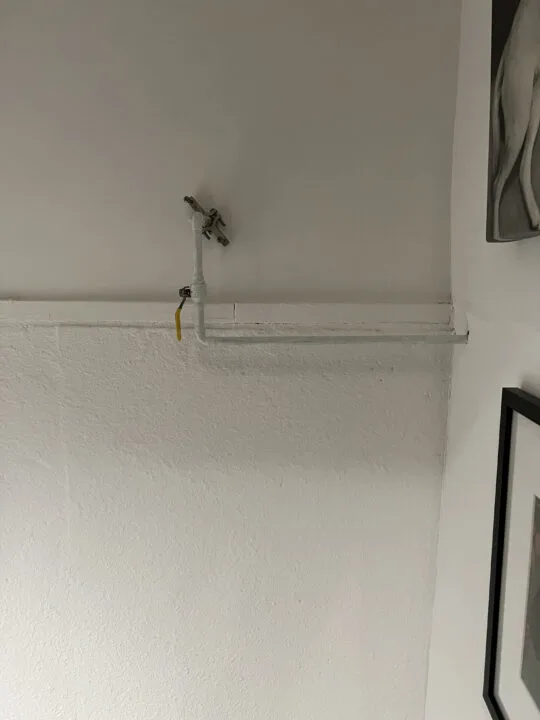
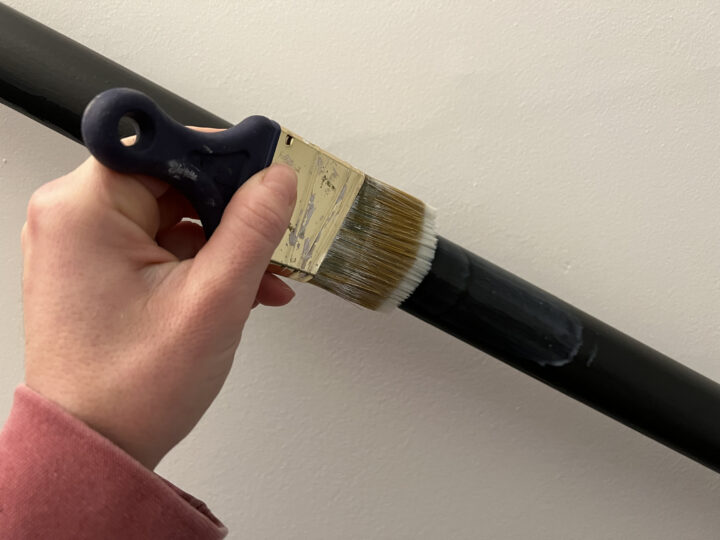
I painted the gas line at the bottom of the stairs to provide a little camouflage. If you paint a gas line, make sure to avoid the levers so that they can turn properly. Here is the gas line before.
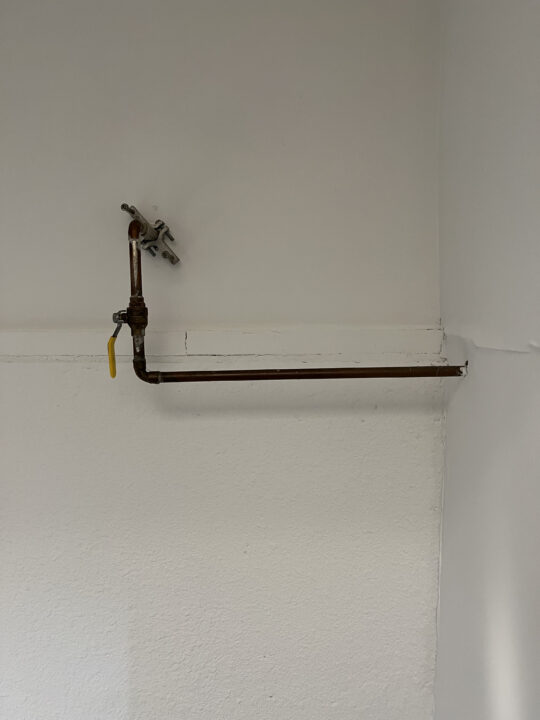
And here it is after being painted. It definitely helps to blend it into the wall a bit more.
2 | Clean the Stairs
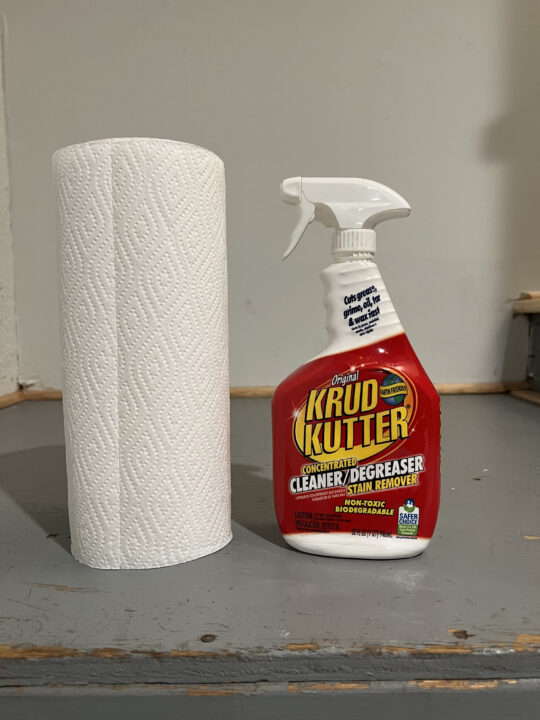

Once the walls are dry, sweep the basement stairs and scrub the floor with cleaner.

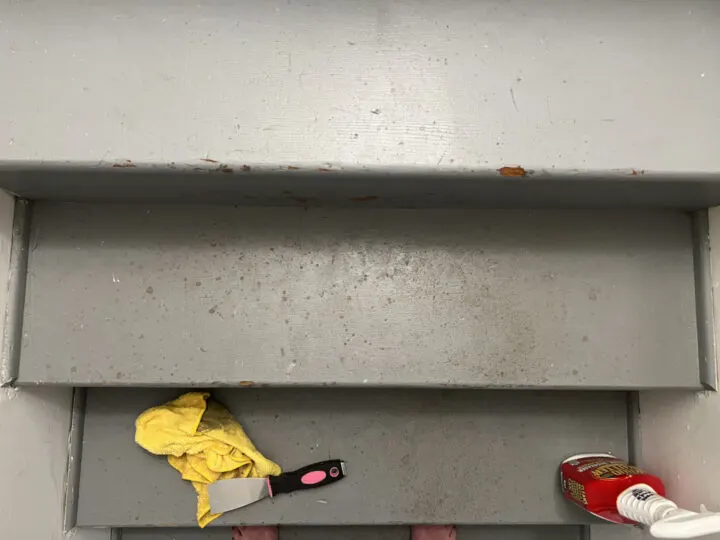
I used a putty knife to scrape off any hard-to-remove dirt and gunk.
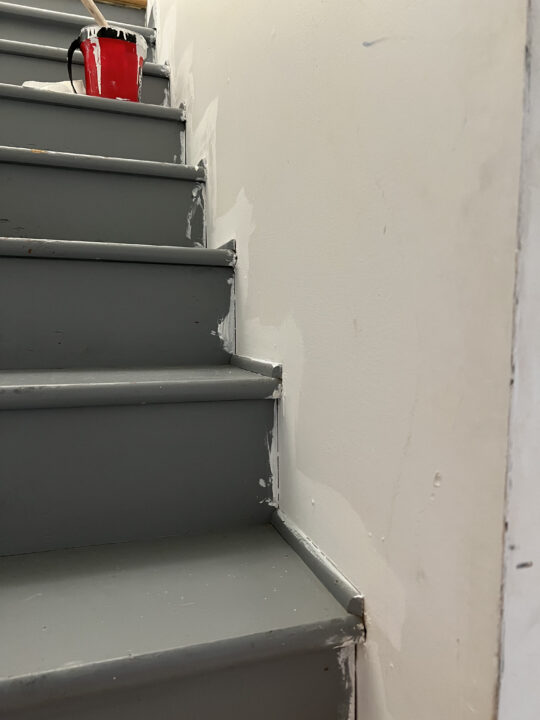
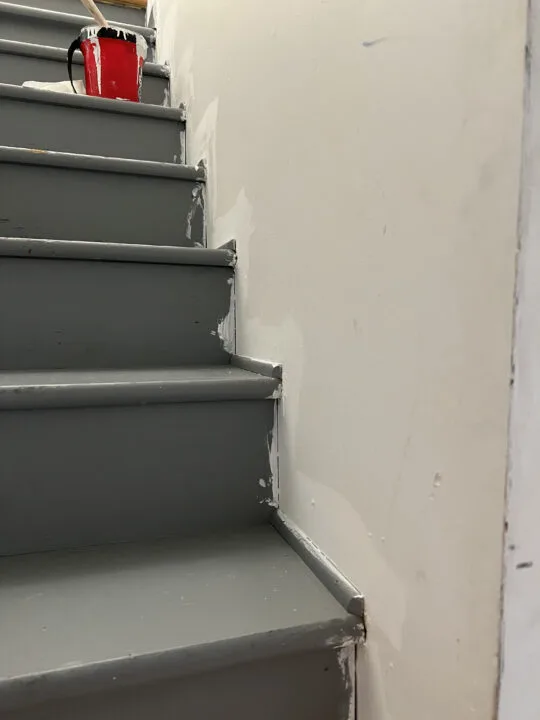
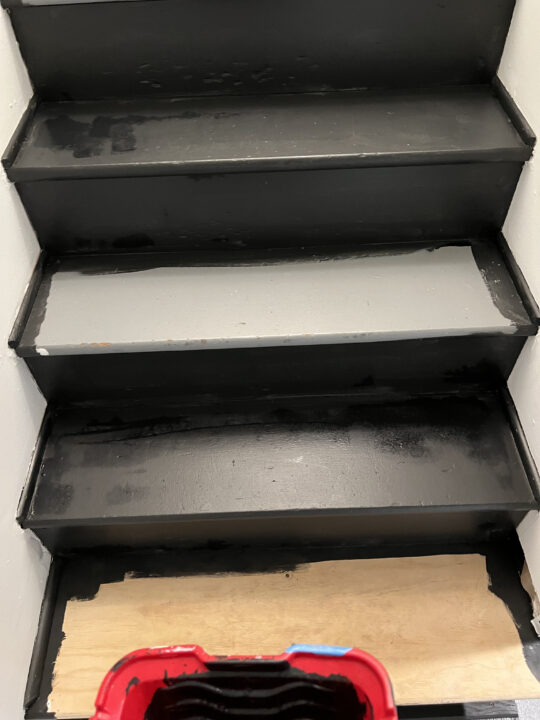
3 | Trim the Edge of the Stairs with Paint
In our storage room, I found leftover black paint that is specifically for floors.
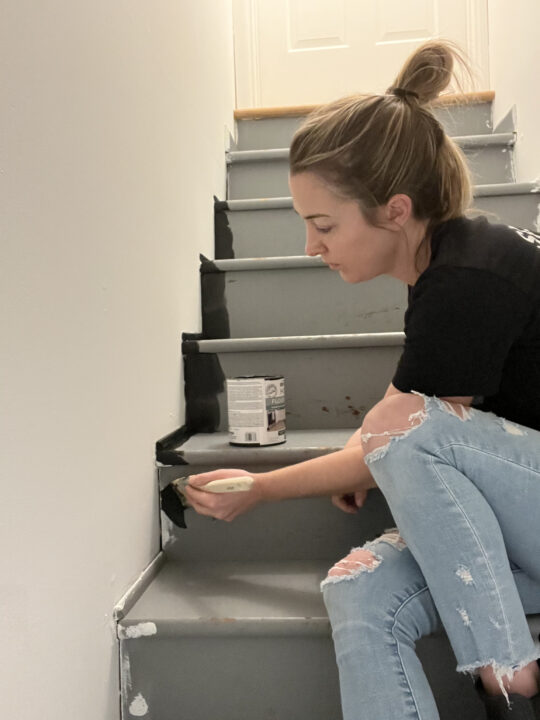
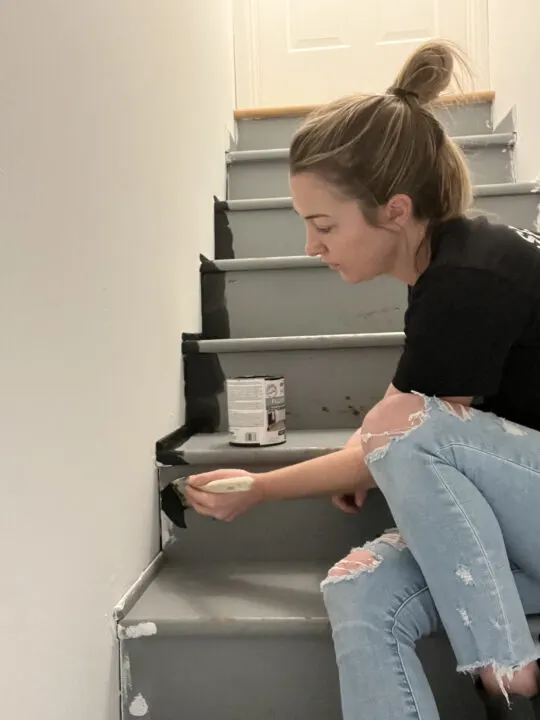
A few years ago I painted our old linoleum in our laundry room in a black and white pattern and had plenty of paint left over!
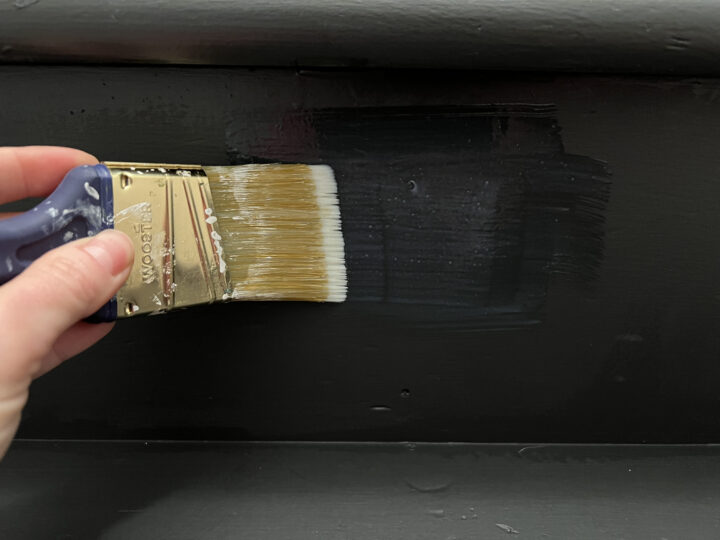
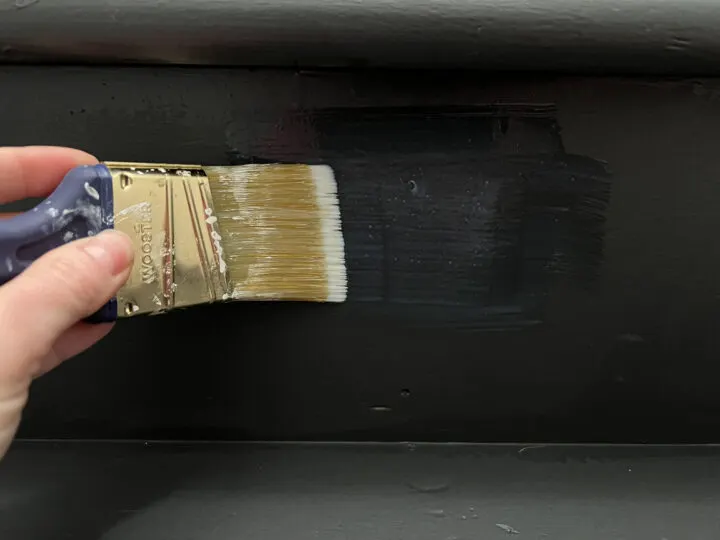
Using an angled paintbrush, I painted the edges of the steps. Once the first coat was dry to the touch, which was basically the time it took me to trim the entire staircase, I went back and gave it a second coat of paint.

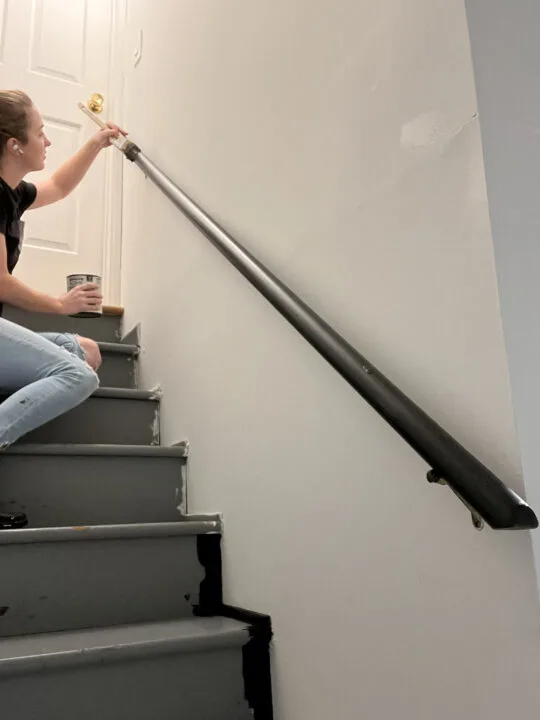
The hand rail for the stairs needed a little love too. I used the paintbrush to give the handrail a fresh coat of black paint. I applied a second coat once the first coat dried.
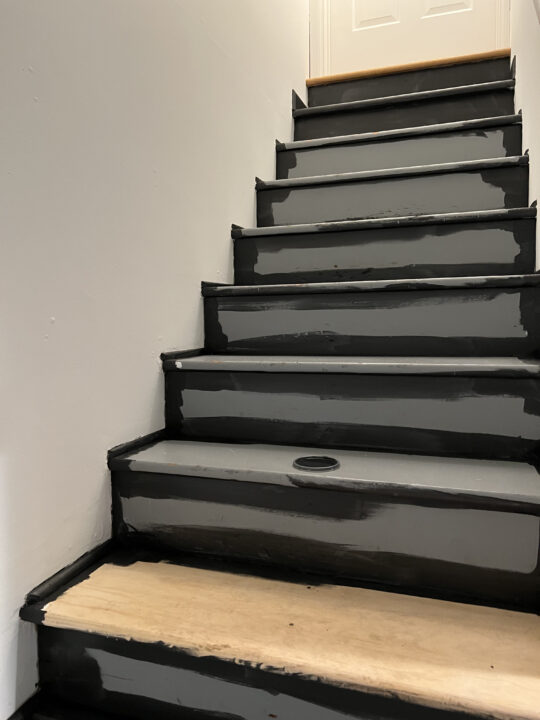
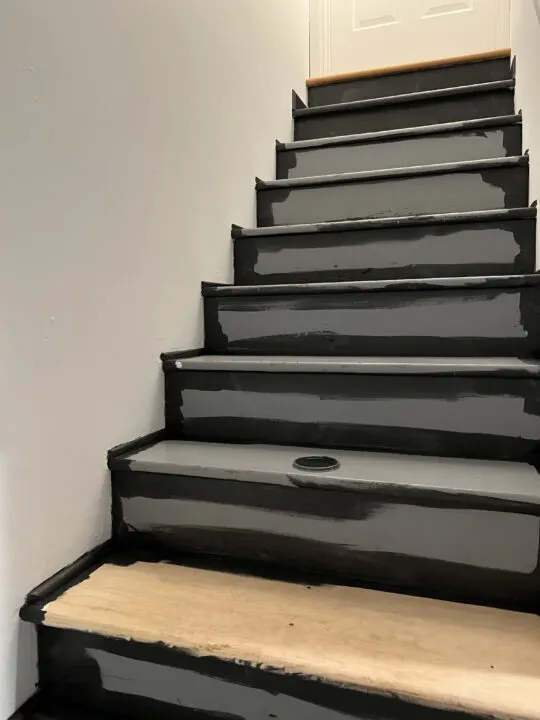
4 | Paint the Stairs Black Using a Roller
For this part of the project, I recommend painting in your socks.

You will have to walk on paint that has not completely cured when painting a second coat. Figuring out the easiest way to paint the stair treads without getting stuck in the basement was a bit of a challenge.
I decided to begin at the top of the staircase and used the roller to paint every stair riser and every other tread.
After 30 minutes, I went back to the top of the staircase and began applying the second coat. I painted a second coat on all of the risers and half of the stair treads.
As I worked my way down the stairs, I also applied the first coat of paint on unpainted treads. I waited another 30 minutes and gently walked on the painted stairs to give the second coat of paint to the remaining treads.
5 | Apply the Clear Matte Top Coat
The product I used for the staircase requires a final clear topcoat to make the floor paint extremely durable.

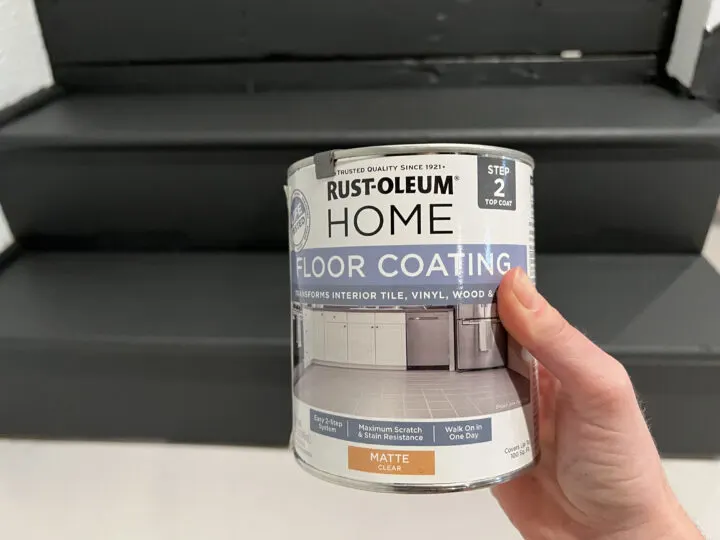
I let the black paint cure for 24 hours and then applied the clear matte topcoat. The matte topcoat only requires a single coat.

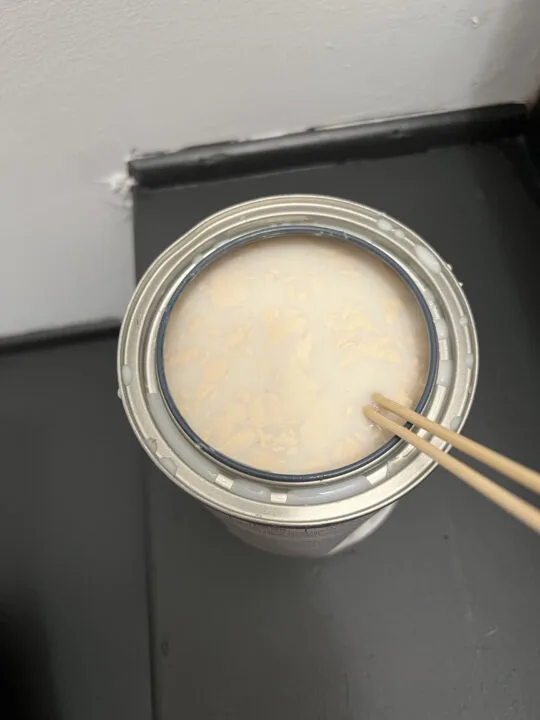
Unfortunately, the clear coat did not age as well as the black paint while sitting in storage. I shook the can vigorously and stirred it as best as I could, but it was still pretty chunky.
Because I couldn’t get rid of the chunks floating in the can, I only used a paintbrush to apply the clear topcoat (no roller).
I couldn’t find a stir stick so I used chopsticks to stir the can before I dipped the paintbrush!
As I said earlier, my goal was to spend zero dollars and use only what we had in our home. I had to get scrappy, ha!

First, I applied the topcoat to the handrail, then I tackled the stairs.
I started at the top of the stairs again and applied the coating evenly.
When I got to the bottom of the stairwell, I let the topcoat dry for 30 minutes. I gently stepped on the recently painted stairs and applied the topcoat to the remaining stairs.

The Rust-Oleum HOME product recommends three days of dry time before allowing foot traffic on the stairs. Because I am a rebel, I walked on it a few hours after painting the topcoat and it held up just as well!
However, I would not recommend wearing shoes or letting dogs scratch up the stairs for those three days.
6 | Hang the Gallery Wall
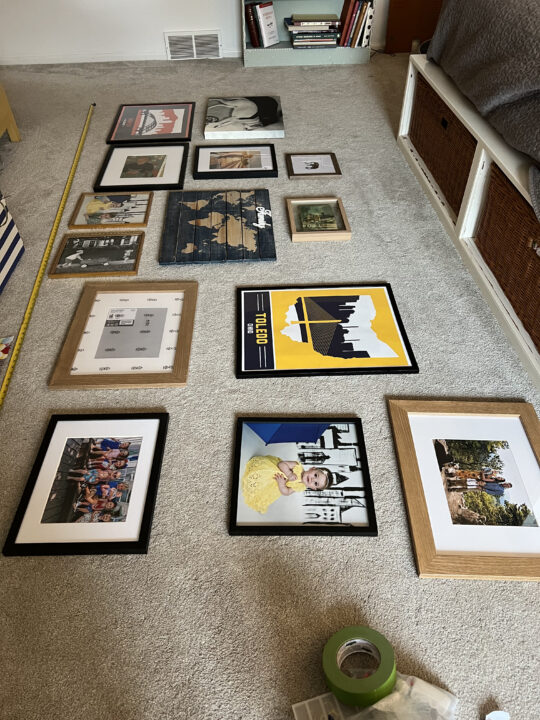

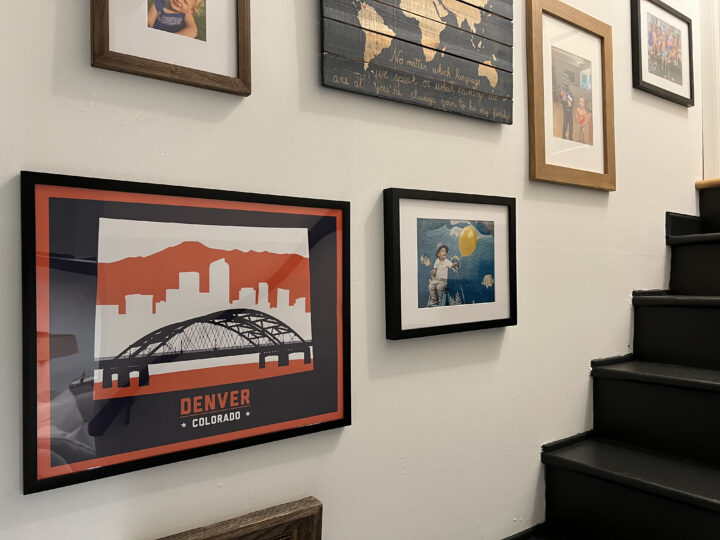
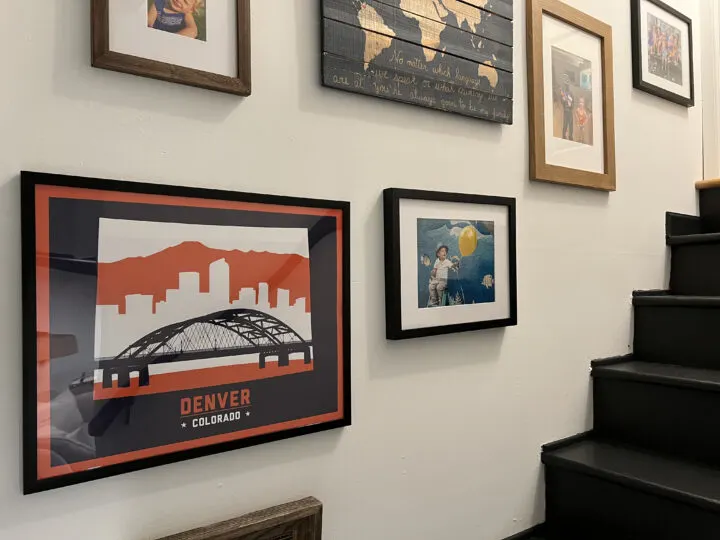
With the entire basement stairway painted, it was time to add the gallery wall.
To create a cohesive look, I tried to only use black and light wood picture frames. I played around with the layout on the floor before hanging the frames on the wall.
I included sweet photos of our kids we already had printed and peppered in a few posters of places that we love.
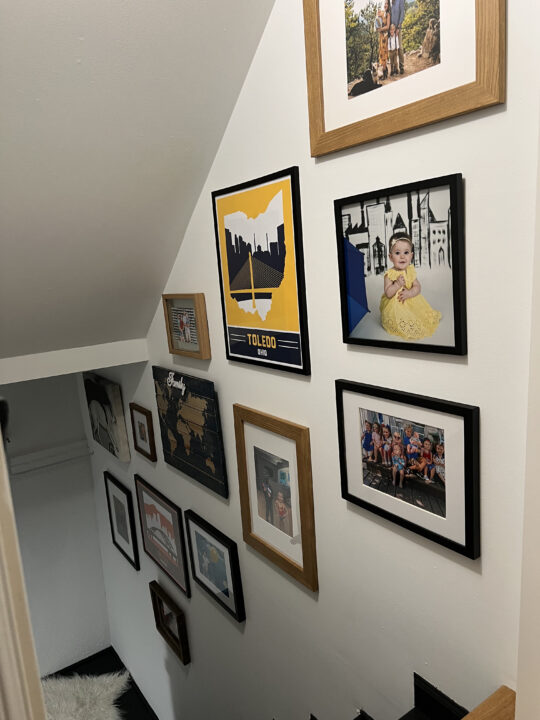
Our friend owns a print shop (D&W Elements) and sent us awesome city prints for Toledo (where we live) and Denver (where we used to live). It all came together perfectly!
Black Painted Stairs | Basement Staircase Makeover Reveal
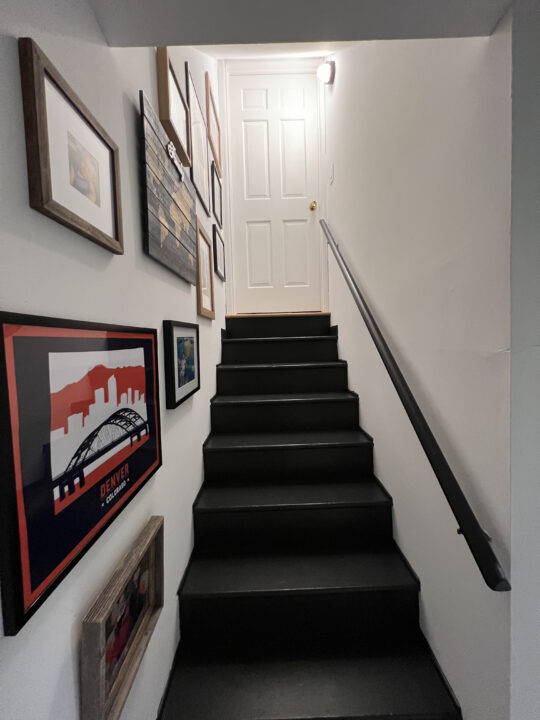

I am so pleased with how this zero-dollar basement stair makeover turned out!

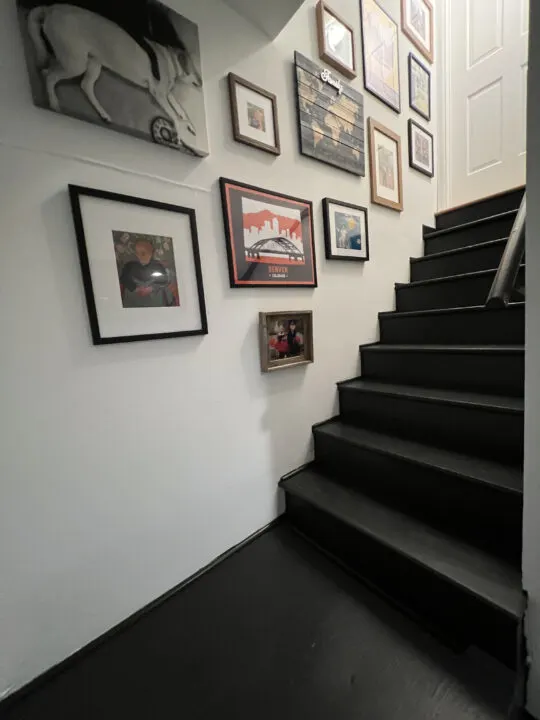
One project that I have added to my list, however, is installing a stair runner. While I love the color choice, I realize now that black basement stairs can be intimidating for some people to walk down.

The black wooden stairs make it difficult for some people to easily see each step, our little dog has trouble with it too! Carpet runners are a great solution to this problem and I am looking forward to tackling the project soon.
I hope you enjoyed hearing about this project as I reused items found in storage to paint our basement steps! This is a pretty easy project to recreate using leftover paint or purchasing floor paint from your local hardware store.
Good luck!
More Budget-Friendly DIYs You Will Love
- How to Camouflage Your Electrical Meter | DIY
- Painted Concrete Basement Floor Update – 3 Years Later
- 9 Decorative Wall Trim & Molding Ideas to Try
- How to Wallpaper Your Staircase Risers | Easy DIY
- 25+ Easy Outdoor DIY Projects to Try This Year
- 8 Ways to Update Your Vintage Tile Bathroom
- DIY Upholstered Headboard with Tufted Buttons
Michele
Tuesday 23rd of December 2025
Nice job it looks great thank you for sharing
lindseymahoney
Thursday 22nd of January 2026
thanks!