
Last Updated on May 8, 2023 by lindseymahoney
Looking to add some personality and style to your stairwell? Wallpapering your stairs is a fantastic way to elevate the look of your home and make a bold statement. This guide will show you how to install wallpaper on your stairs and include expert tips for DIY enthusiasts to achieve professional results.


With our step-by-step instructions and insider advice, you’ll be able to transform your stairwell into a visual masterpiece that will leave your guests in awe. So, grab your tools, unleash your creativity, and let’s bring your staircase to life with the magic of wallpapering!
Choosing the Perfect Wallpaper for Your Stairwell
If you are totally into this removable wallpaper trend right now like me, I highly recommend this product.
Removable wallpaper is a fabulous option for renters or for homeowners who don’t want to make a full commitment to permanent wallpaper in their homes. Brands like Tempaper Designs offer tons of wallpaper designs at affordable prices!
For this project, I teamed up with Tempaper Designs to install removable wallpaper to the stair treads of the servant’s staircase an old Victorian home in the Old West End of Toledo.
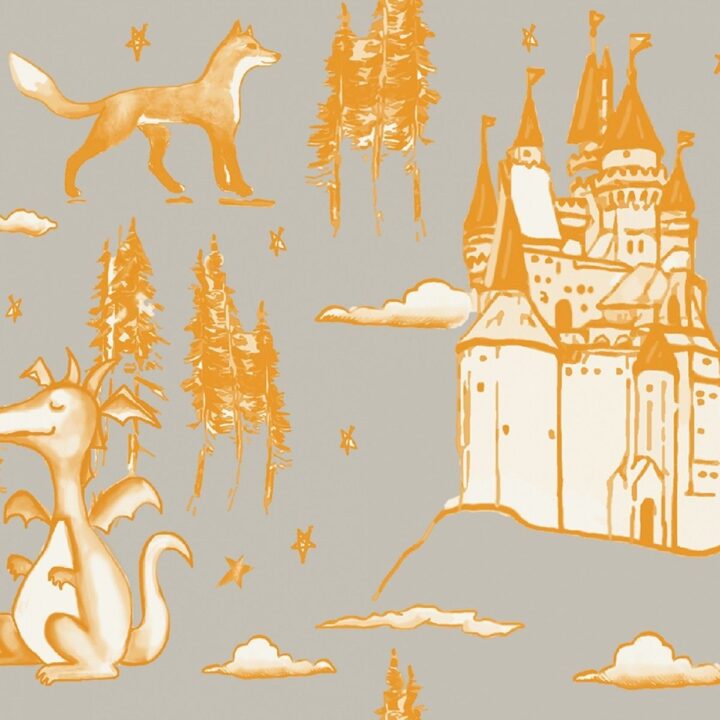

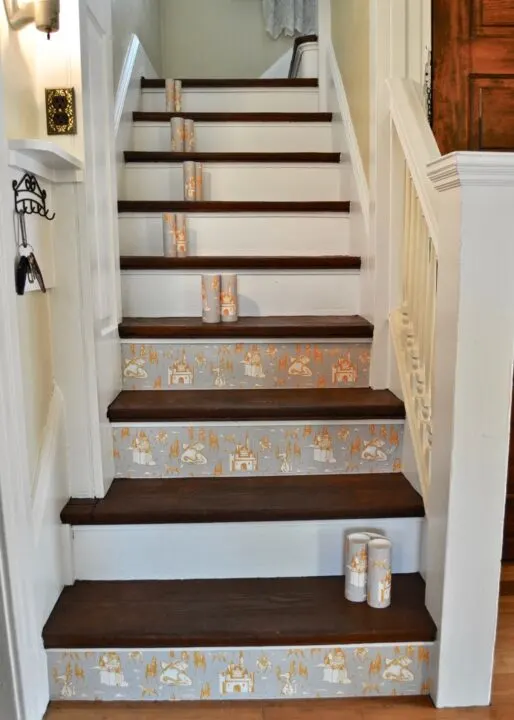
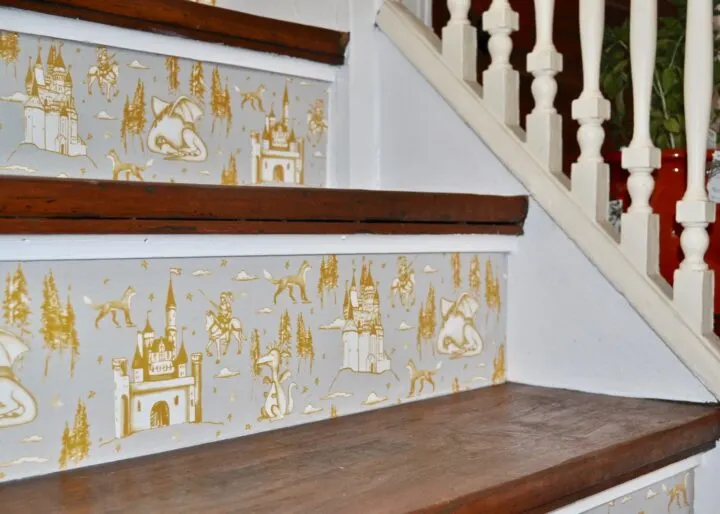
The homeowners looked through all of the pattern options and decided on this whimsical Medieval Toile border wallpaper. Jackie and Jeff, have an eclectic style and their home is filled with unexpected and fun decor.
Step-by-Step Guide to Easily Wallpaper Your Stairs
*While Tempaper Designs gifted the wallpaper for this project, all opinions are mine. Affiliate links are included in this post at no additional cost to the consumer, thanks for supporting Building Bluebird!
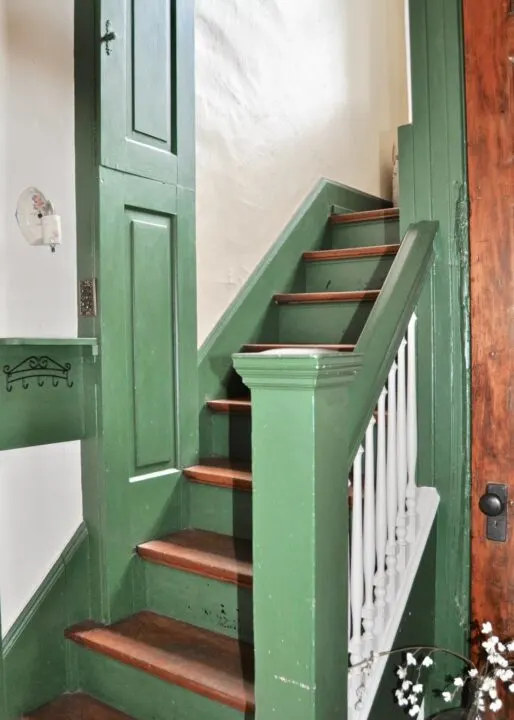
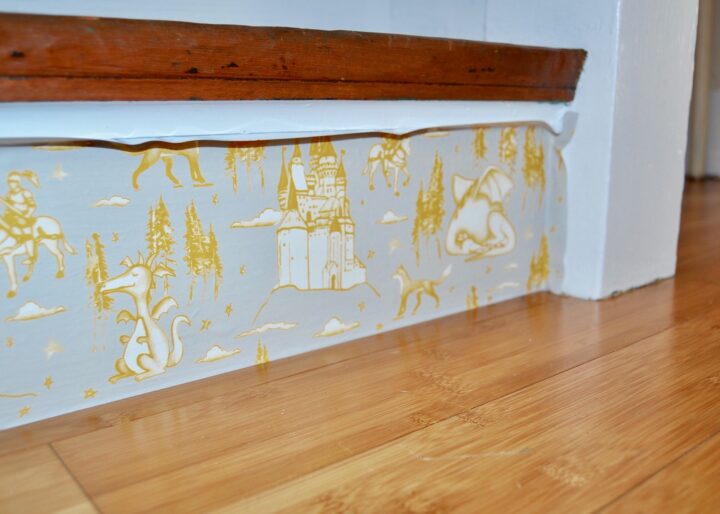
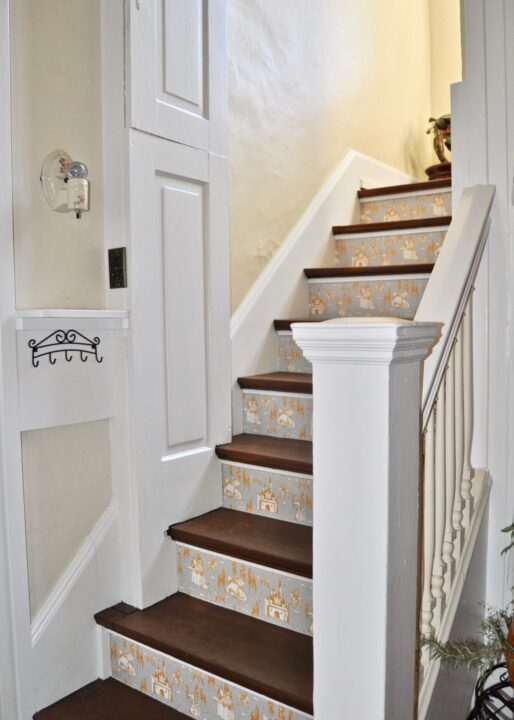
Servant’s Staircase Before
The servant’s stairway had dark green trim paint that the homeowners did not love and hoped to brighten up.

Before we began wallpapering, Jackie and Jeff painted the trim a crisp white to better compliment the design going on the risers and to brighten up the dark hallway.


Tools and Materials for This Removable Wallpaper Project
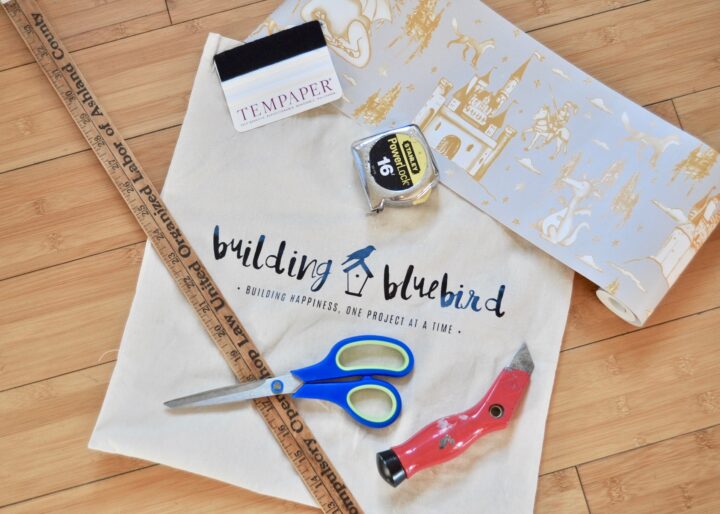
- Tempaper Wallpaper
- Tempaper Squeegee
- Measuring tape
- Utility Knife or Snap Off Exacto Knife
- Ruler (or straight edge)
- Scissors – You can also use a utility knife on a cutting mat

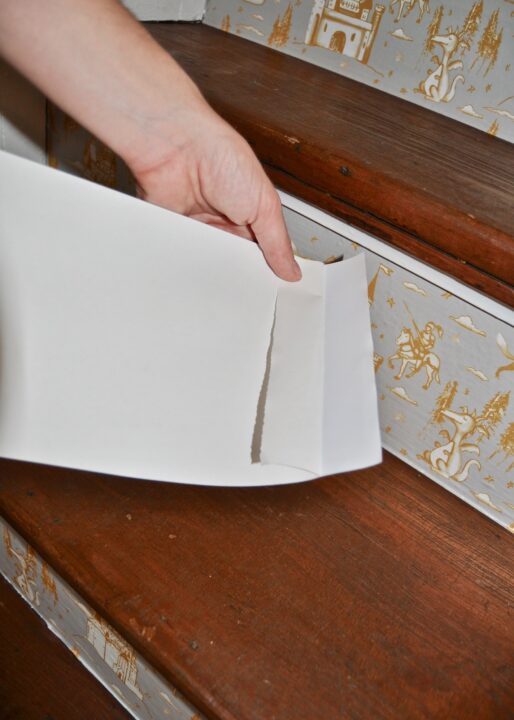
1 | Measure the Risers and Cut Wallpaper

Measure the risers using a measuring tape and add about half an inch to the measurement to account for potential errors.
Jackie measured and cut the paper using a straight edge and scissors while I took the lead on the installation.
2 | Attach Wallpaper to the Stairs

Admittedly, it took me a few tries to find the best process to attach the wallpaper to each stair riser.
I found that the easiest way to install the wallpaper is by peeling off about an inch of the backing and attaching it to the riser.
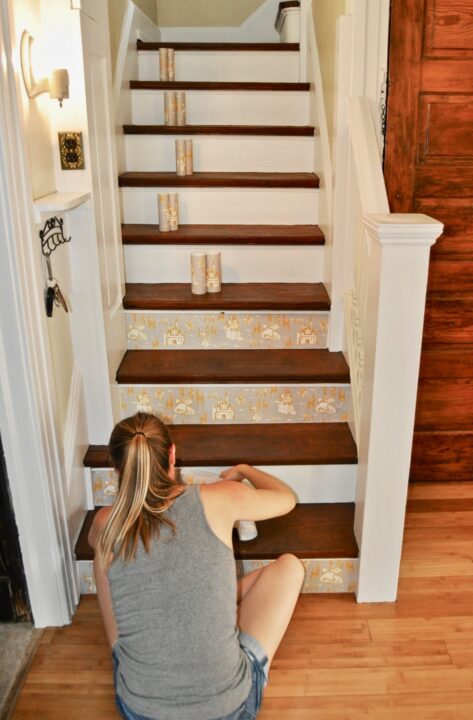

Once one side is attached, slowly work your way across the riser while pulling off the back and smoothing the paper against the riser.
As soon as I figured out this technique, the rest of the risers were a breeze to install.
Removing the backing a little bit at a time really helps to keep each strip of wallpaper wrinkle-free.
3 | Smooth Out the Air Bubbles
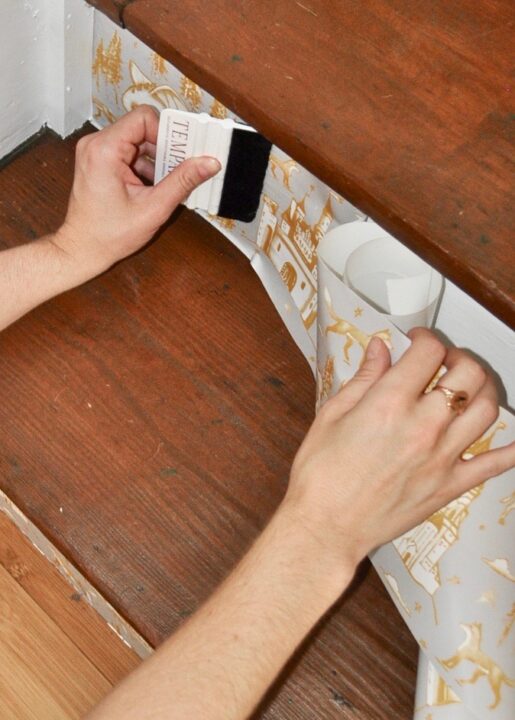

Use the Tempaper squeegee to smooth out bubbles and creases as you pull off the backing and apply the remainder of the paper.
4 | Remove Excess Wallpaper on Stairs

Once the wallpaper is attached, you will cut off the excess wallpaper with the utility knife.
Working with a wallpaper border was a great choice because the height of the border was almost a perfect fit. This saved us a lot of time cutting!
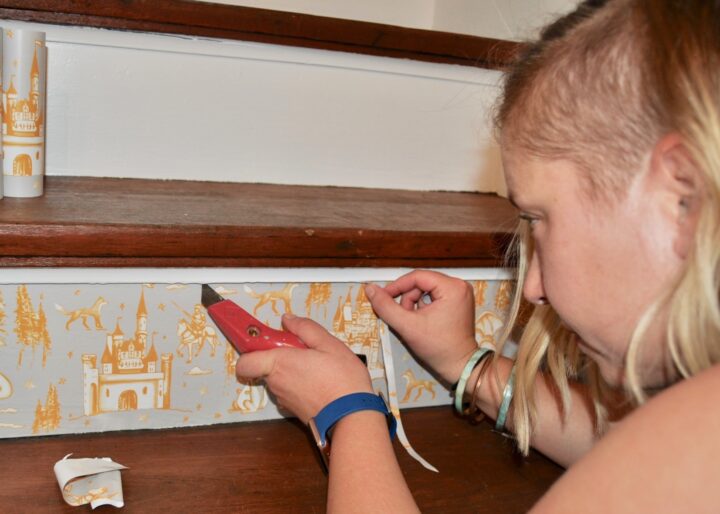
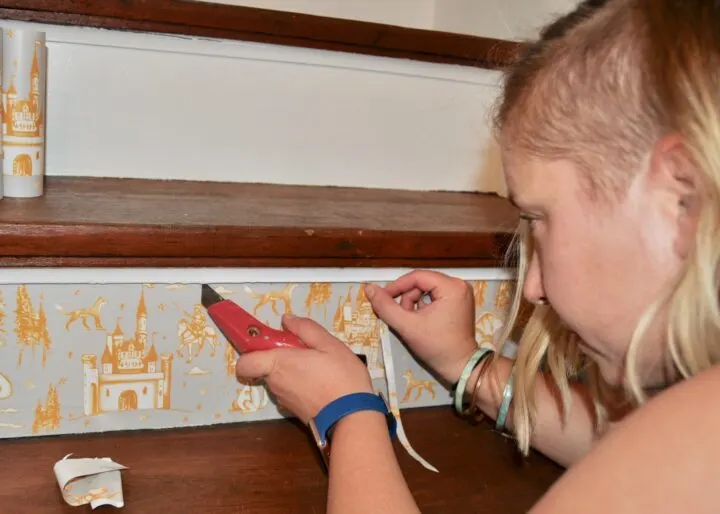
Make sure the utility knife razor is sharp. If it is a little dull, it can be challenging to cut the overhang without pulling on the wallpaper you want to keep in place.
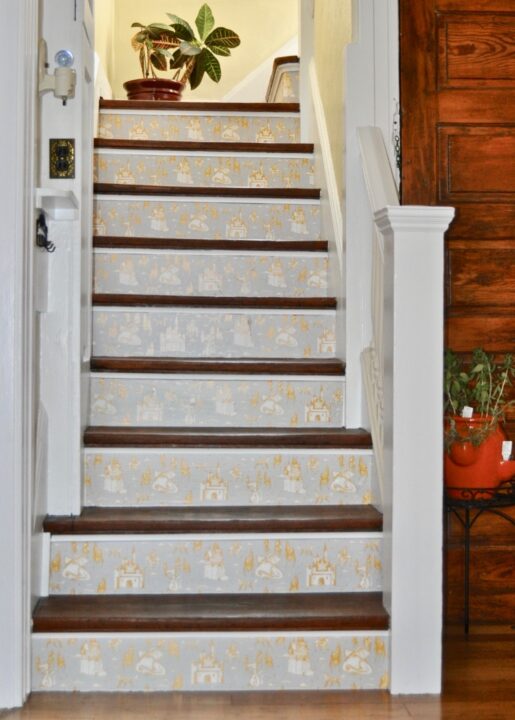
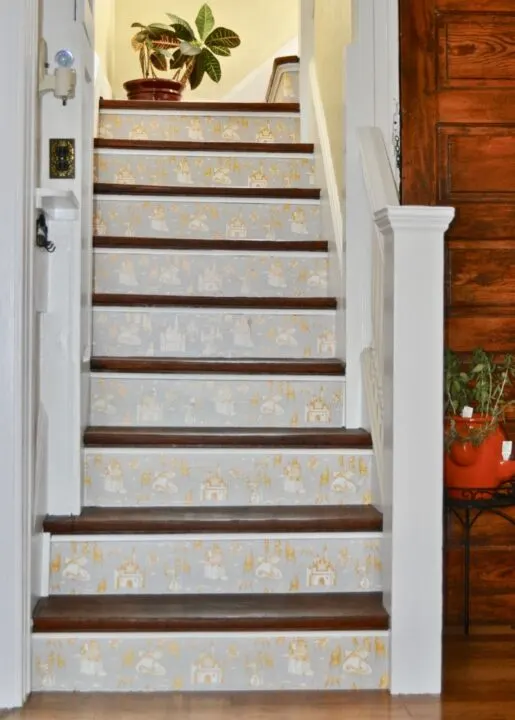
Whimsical Wallpaper Staircase Reveal
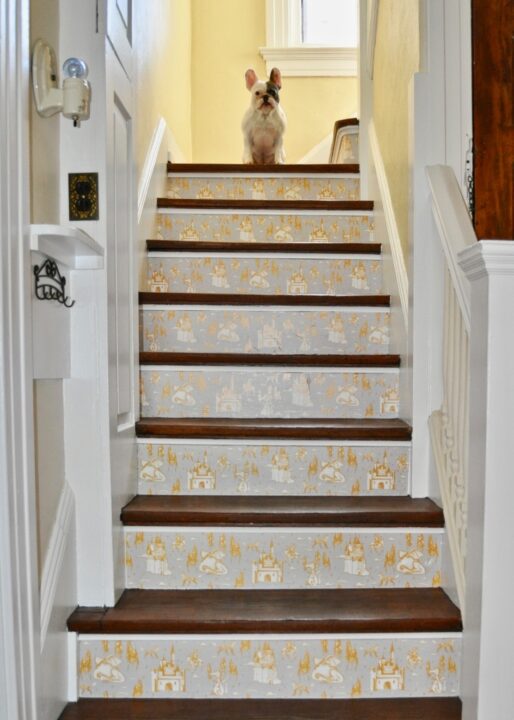


Cheers to your beautiful, one-of-a-kind stairs!

I absolutely love how this staircase turned out and more importantly, the homeowners LOVE their updated stairs too!
Inspirational Ideas for Stairwell Wallpapering
Now that you’re armed with the knowledge and skills to wallpaper your stairs, let’s explore some inspirational ideas to spark your creativity.
1. Geometric Patterns: Opt for bold and modern geometric patterns to create a contemporary and eye-catching stairwell.
2. Nature-Inspired Designs: Bring the outdoors inside with nature-inspired wallpaper, such as floral prints or botanical motifs. This can add a touch of tranquility and freshness to your stairwell.
3. Textured Wallpaper: Consider using textured wallpaper to add depth and interest to your staircase. From faux brick to embossed patterns, textured wallpaper can create a unique and tactile experience.
4. Mural Wallpapers: Make a statement with a mural wallpaper that covers your entire stairwell. Choose a scenic landscape, abstract art, or any other design that reflects your personal style and interests.
5. Ombre Effects: Experiment with ombre wallpaper to create a gradient effect on your stairs. This can add a subtle yet stunning visual element to your stairwell.
Remember, your stairwell is a blank canvas waiting to be transformed. Let your creativity run wild and select a wallpaper design that speaks to your individuality and enhances the overall ambiance of your home.
Maintaining and Cleaning Wallpapered Stairs
Once your stairwell is beautifully wallpapered, it’s essential to maintain and clean it properly to ensure its longevity and continued visual appeal. Here are some tips for maintaining and cleaning your wallpapered stairs:
1. Regularly dust your wallpapered stairs with a soft cloth or a duster. This will help prevent the buildup of dirt and dust particles, keeping the wallpaper looking fresh and vibrant.
2. If you notice any stains or spills, act quickly to clean them. Use a damp cloth or sponge with a mild detergent or cleaning solution specifically designed for wallpaper. Gently blot the stain without rubbing, as rubbing may damage the wallpaper.
3. Avoid using abrasive cleaning tools or harsh chemicals on your wallpapered stairs, as they can cause discoloration or damage to the surface.
4. If you have wallpapered the risers, be cautious when walking up or down the stairs to avoid scuffing or scratching the wallpaper.
By following these maintenance and cleaning tips, you’ll be able to enjoy your beautifully wallpapered stairs for years to come.
Looking for More Affordable DIY Projects?
- How to Hang Pre-Pasted Wallpaper by Yourself
- Update Formica Countertops with Contact Paper
- How to Hang a Wall Mural | Wallpaper Installation DIY
- Paint Your Basement Stairs Black for a Modern Look
- How to Paint Your Old Floors Using Rust-Oleum
- How to Plaster a Lamp Base
- How to Easily Remove Wallpaper with These 6 Steps