
Last Updated on December 27, 2023 by lindseymahoney
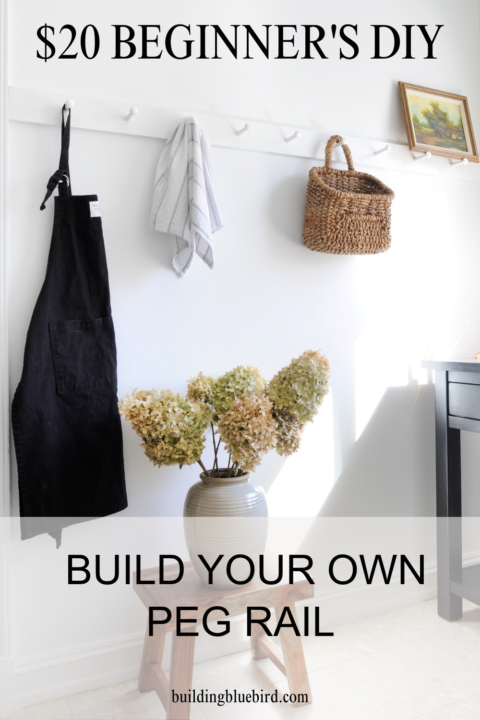

Looking for a fun way to spruce up your home without spending a fortune? A peg rail can be the perfect project for any budget and is a super easy DIY. Shaker peg rails are not only a classic and timeless design, but they are also incredibly functional too! For just $20, I installed a cute peg rail in my brother’s kitchen that fits the style and age of the home and is great for organization.

Learn about the different materials you will need, and step-by-step instructions on how to DIY your own classic peg rail addition to any room in your house.
Table of Contents
- How to Make Your Own DIY Peg Rail
- 1 | Gather Materials and Measure Space
- 2 | Cut Wood to Size
- 3 | Mark the Location of Each Peg on the Board
- 4 | Drill a Hole and Screw in the Peg
- 5 | Paint or Stain the DIY Peg Rail
- 6 | Hang the Peg Rail with Screws
- DIY Peg Rail Reveal
- More Affordable DIY Projects You Will Love
How to Make Your Own DIY Peg Rail
This blog post contains affiliate links, thanks for supporting Building Bluebird!
1 | Gather Materials and Measure Space
First, measure the dimensions of your wall space so that you can buy or cut the perfect length board for your peg rail. Along with the wood board, will also need screws or nails, a drill, and pegs that fit into your chosen aesthetic – whether it’s classic or modern. I chose the simple shaker peg design because it fits perfectly with their 1930’s era home.

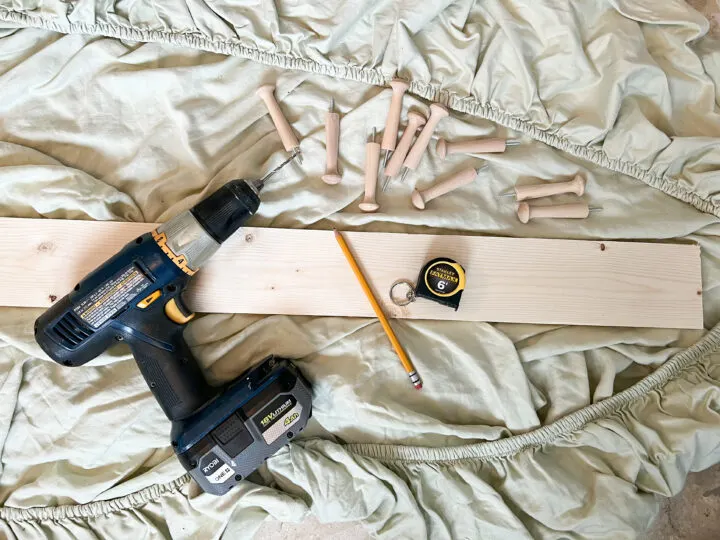
DIY Peg Rail Materials Used
- 1×4 common board
- Shaker Pegs (10 pack)
- Drill & Screwdriver & Screws
- Measuring Tape
- Level
- Pencil
- Caulk & Wood Filler
- Sanding Block
- Paint and primer (if applicable)
- Stud finder

2 | Cut Wood to Size
I chose a 1×4 common board from our local Home Depot and cut it down to size using a table saw. You can also cut your board to size at Home Depot if you do not own a saw. Use a sanding block to smooth the edges where you cut down the board.
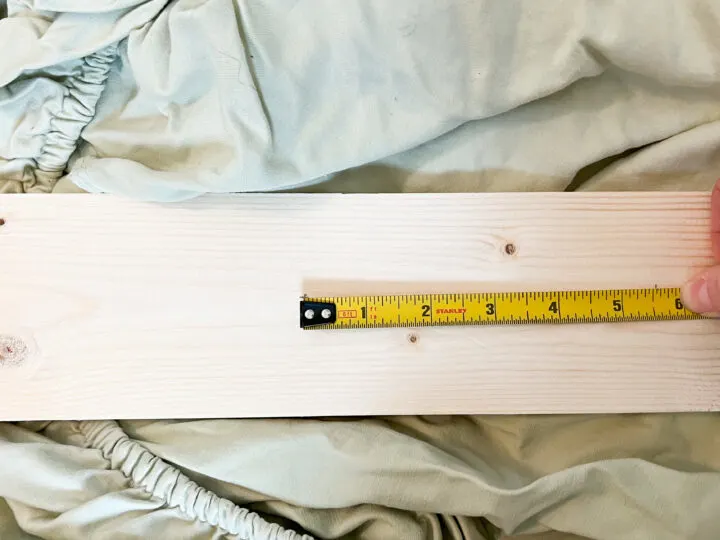
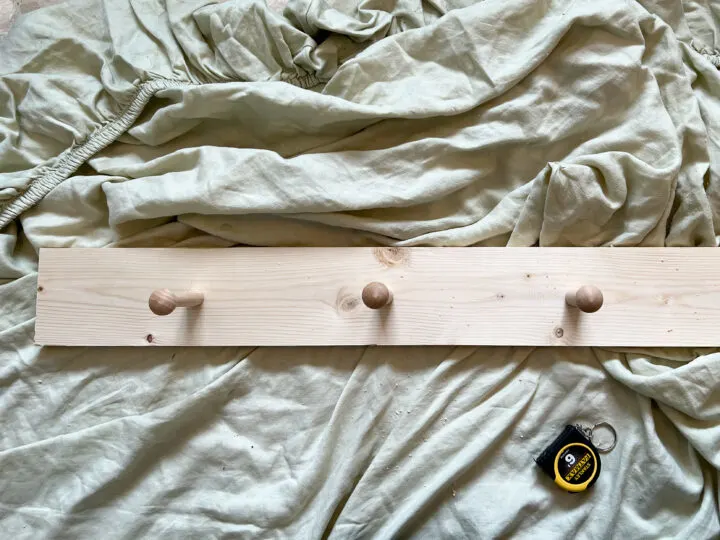
3 | Mark the Location of Each Peg on the Board
Next, determine how many pegs you want on the DIY peg rail and mark the location on the board.
This step requires some math to determine the placement and ensure it is symmetrical. The number of pegs you add is completely up to you, however, I do prefer using an odd number. For our project, specifically, I decided to add 9 pegs.
Here is where the math comes in:
Take the total length of your board and divide it by the total number of pegs plus 1.
67.5 inches / 10 = 6.75 inches
With a pencil, mark the board every 6.75 inches using a measuring tape.
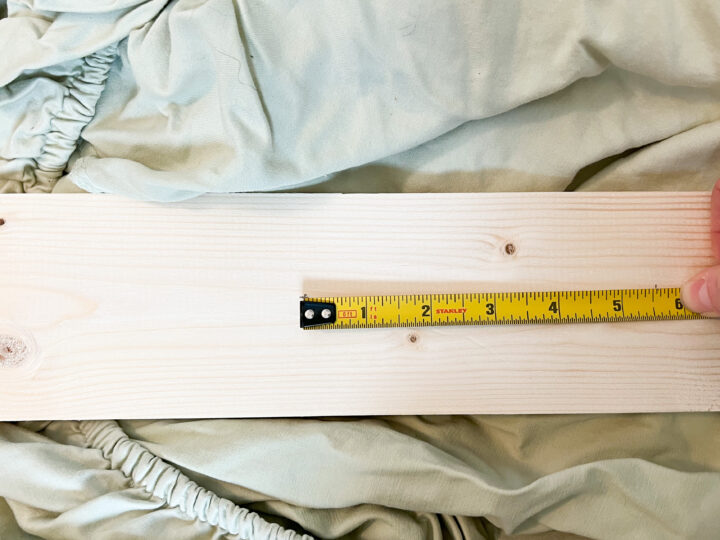
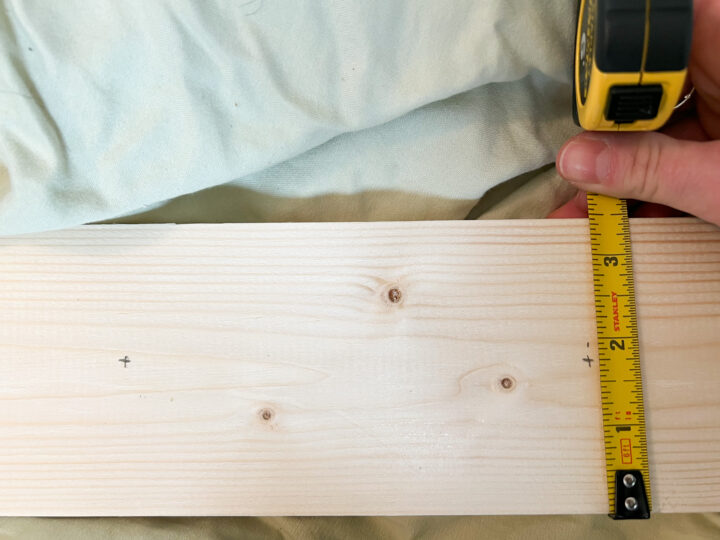
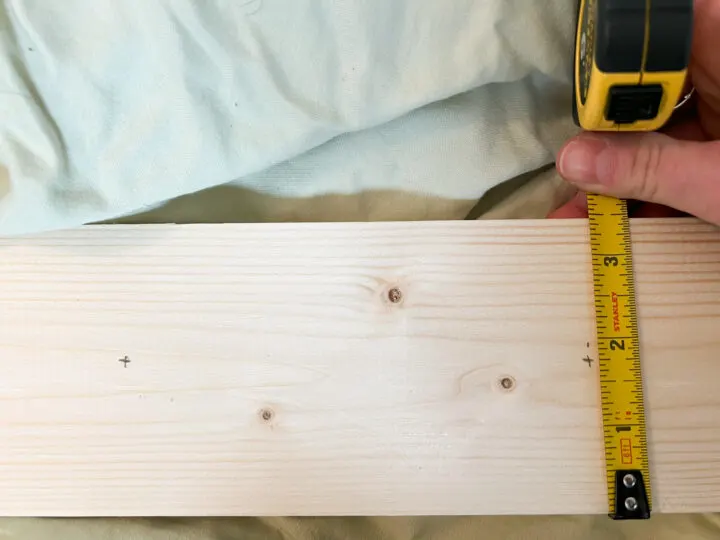
Once the locations are marked, I measured 1.75 inches (the height of the board is 3.5 inches) at each peg location to ensure they were aligned in the center of the board.

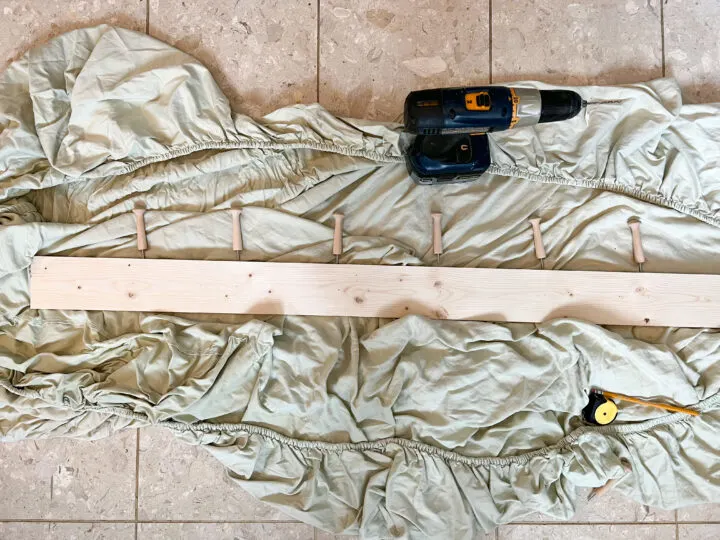
4 | Drill a Hole and Screw in the Peg
Because I purchased shaker pegs with a screw attached to the bottom, I drilled a pilot hole to easily screw them onto the board.
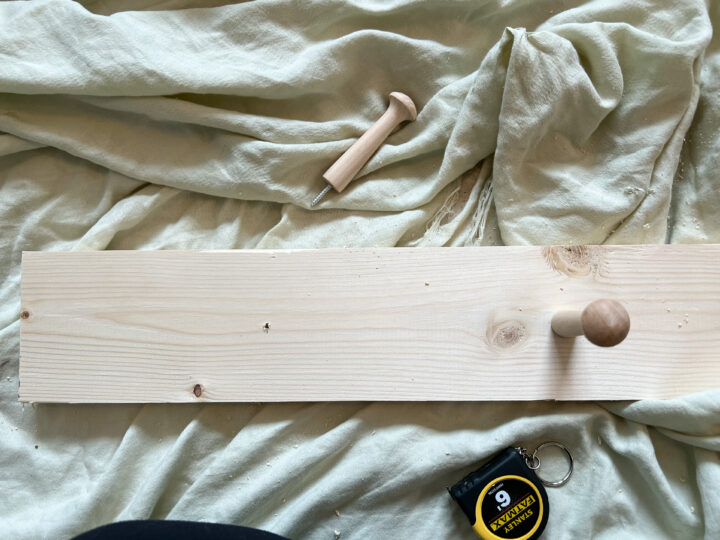
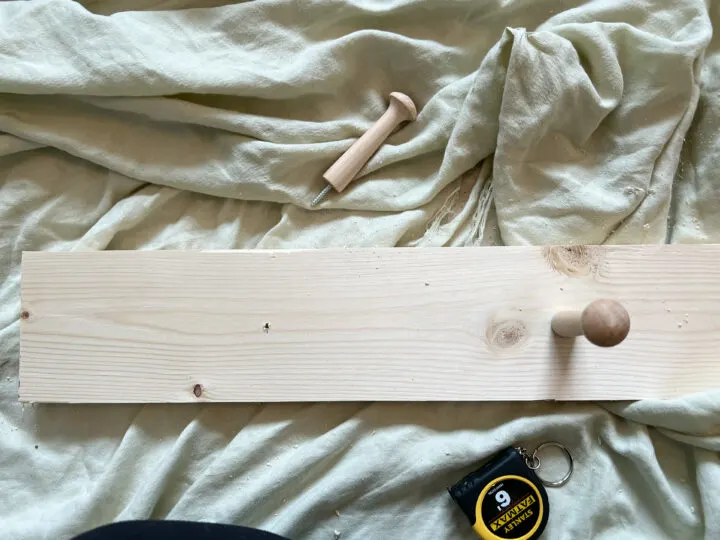


Use a drill bit that is slightly smaller than the screw on the peg so it is tightly secured. This process was quick and easy!

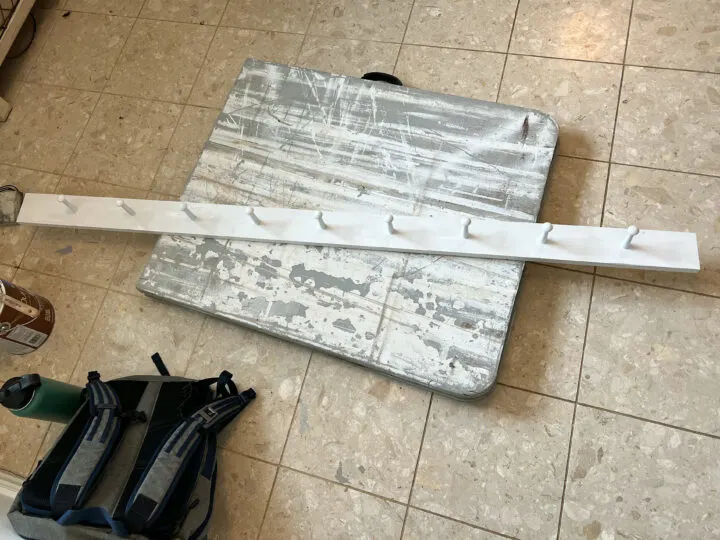
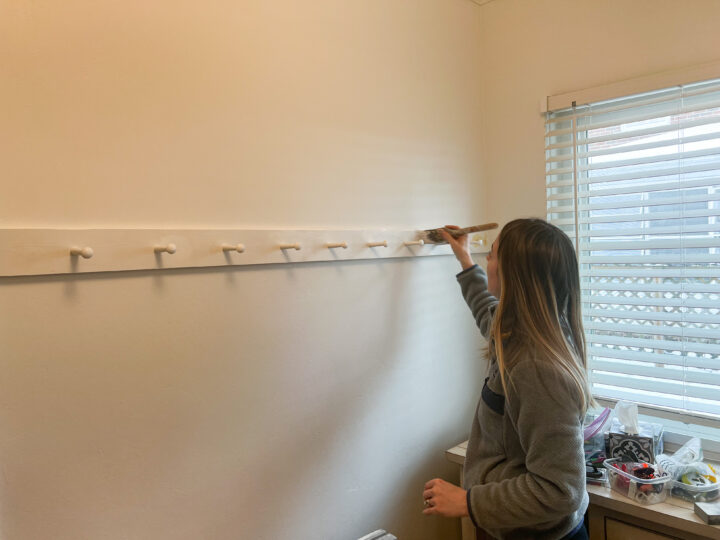
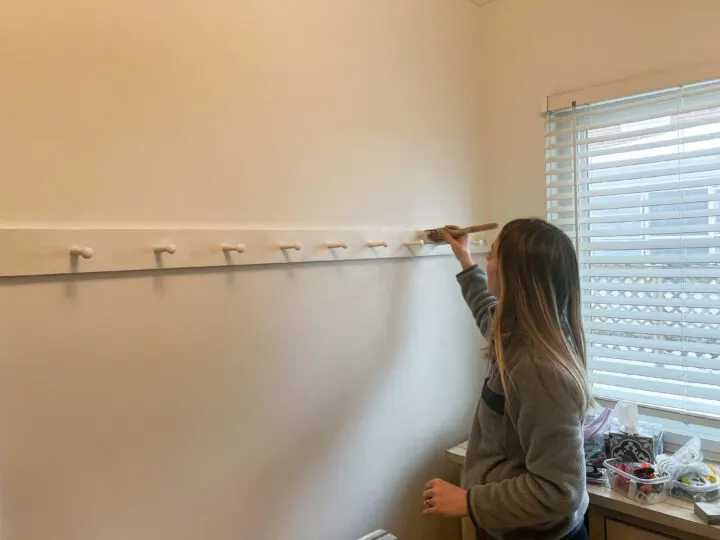
5 | Paint or Stain the DIY Peg Rail
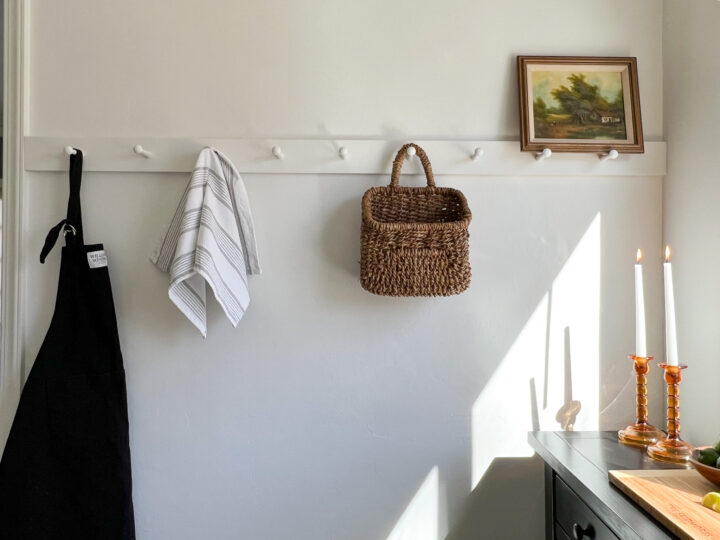
While this DIY peg rail is beautiful with simple raw wood, it looks great painted and stained as well. The peg rail in my brother’s kitchen is painted the same color as the wall for a seamless look. For the best results, apply a primer coat first to prevent any knots in the wood from bleeding through. Brush one or two coats of paint on the peg rail and let it dry.

6 | Hang the Peg Rail with Screws
Place your newly assembled peg rail in the desired location on the wall and make sure it is straight using a level.


If you have a stud finder, use it to find the studs in the wall and mark the location. This is where you will attach the DIY peg rail with screws. Drill a pilot hole and drive the screw into the wall. Countersink the screws slightly so that you can cover the hole with wood filler.
We used 4 or 5 screws across the board and then filled each hole with the wood filler and sanded it smooth.
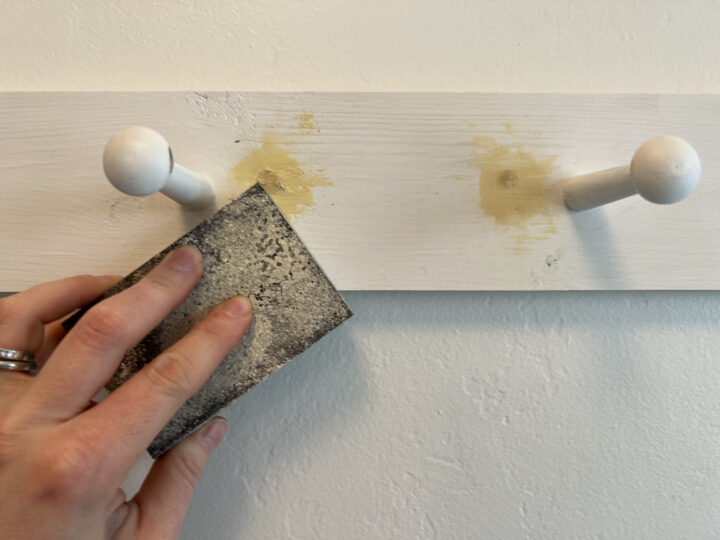

I like to use wood filler to smooth out any rigid knots on the common board too. Caulk the seams for a professional finish. Apply another coat of paint to the peg rail and it is ready to go!

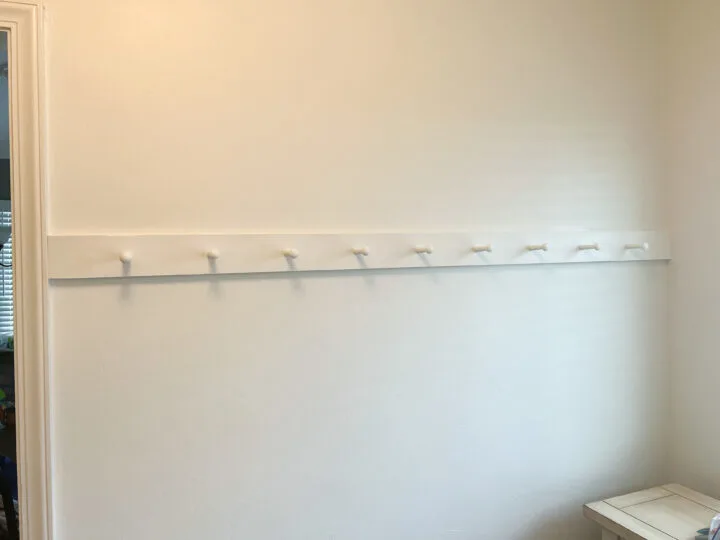
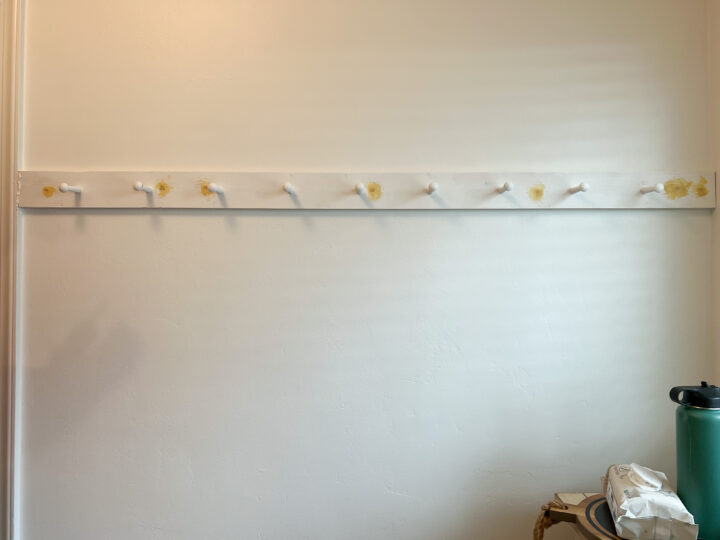
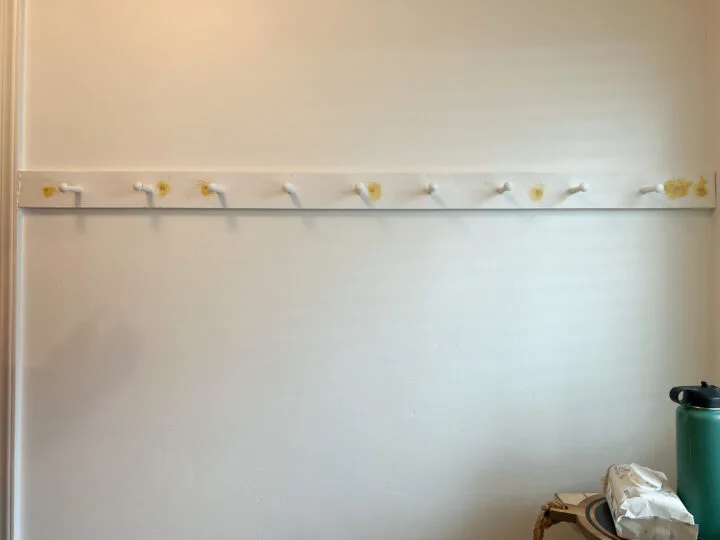
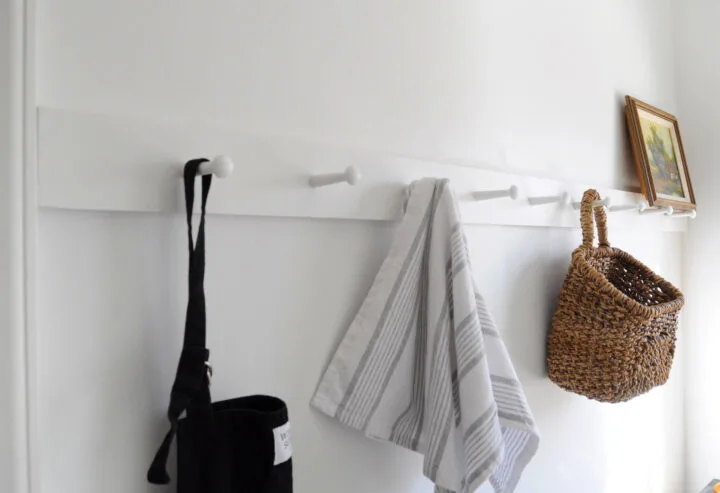
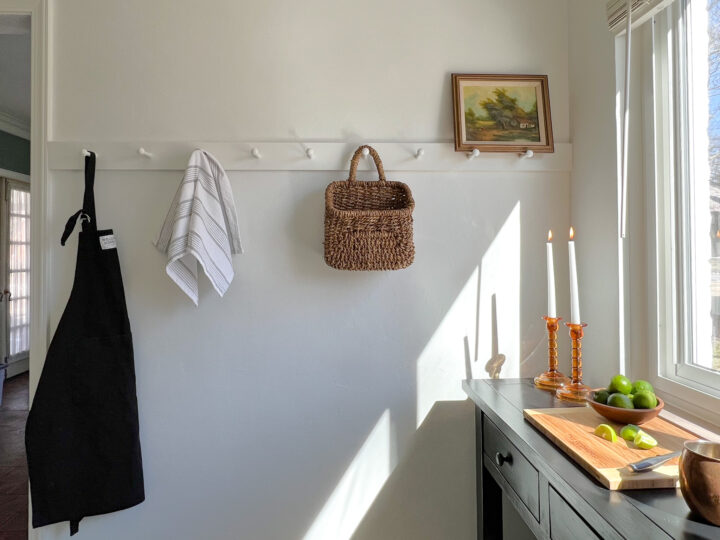
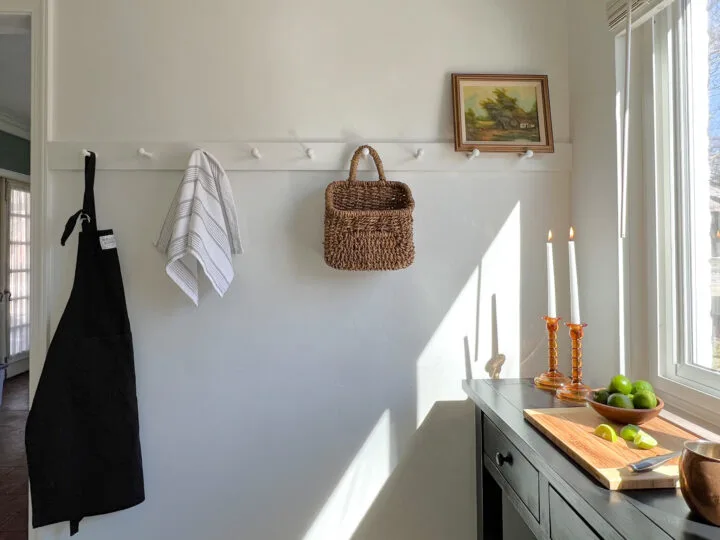
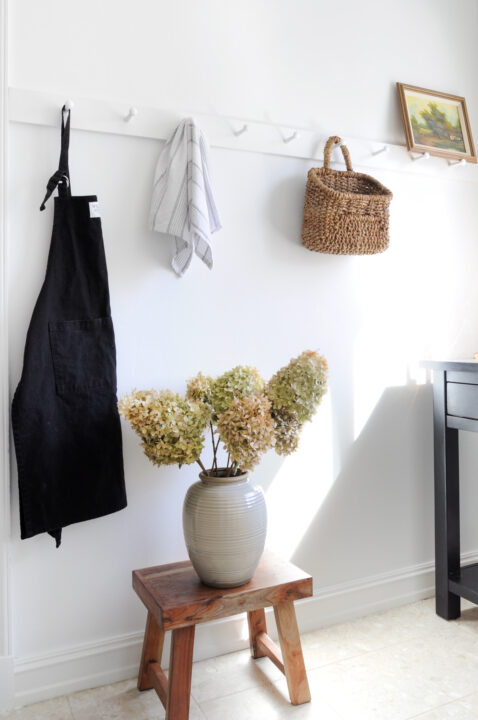
DIY Peg Rail Reveal
Isn’t she a beaut?! This DIY peg rail adds so much function to this busy kitchen with small children. The pegs can hold anything from aprons and towels to bibs and lunch boxes. It is pretty and versatile.


This project is great for DIY beginners to try too without spending a fortune. I hope this tutorial inspires you to try it in your own home!