
How to Paint an Exposed Basement Ceiling Black | DIY
Last Updated on July 11, 2024 by lindseymahoney
I have tackled many home renovation projects in my day, but painting the basement ceiling black was the most physically taxing DIY yet. Don't get me wrong, it was totally worth it for the look and the money saved, but it was exhausting!
In total, it took me 10-12 hours to paint about 1,500 square feet of our basement ceiling. Let's go through exactly how to paint a basement ceiling with a budget-friendly tutorial that will completely change the overall feel and look of the space!

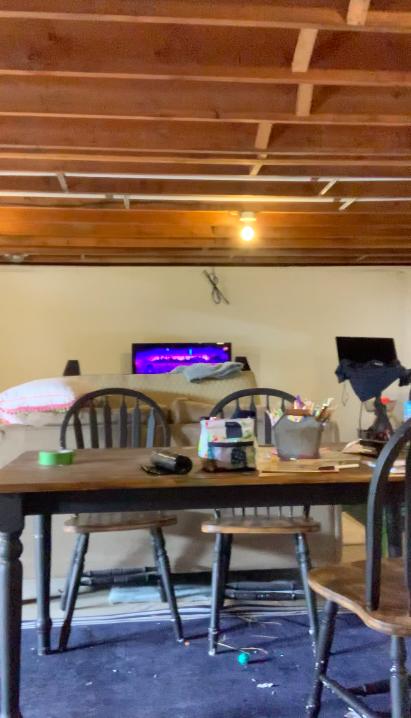
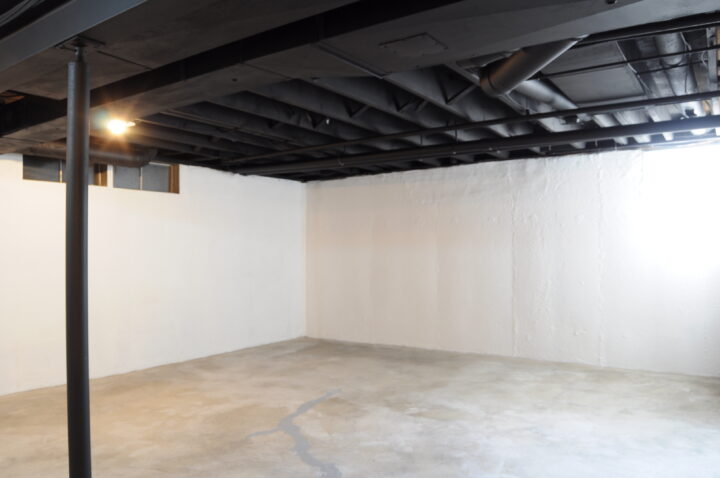
Our basement ceiling went from looking like this:
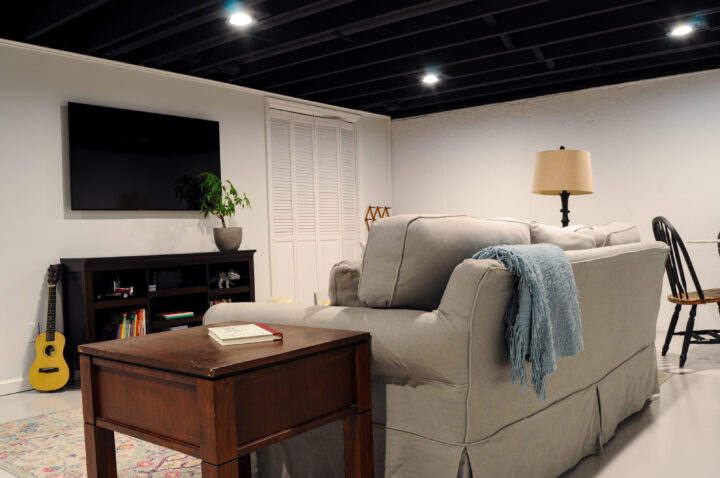
To this:
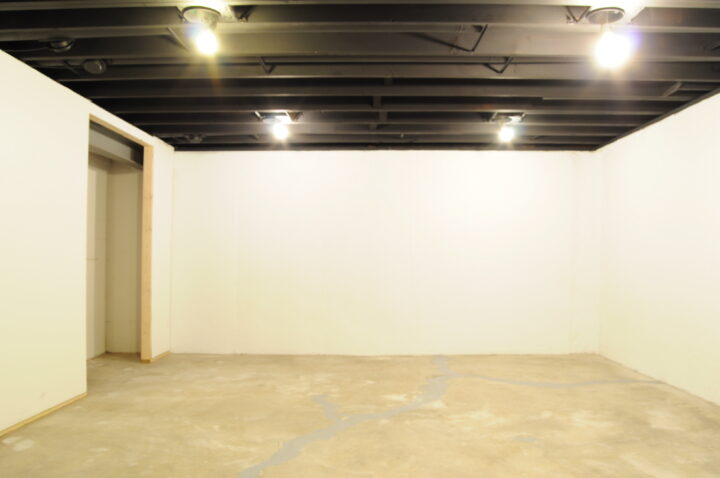
So much better, right?!
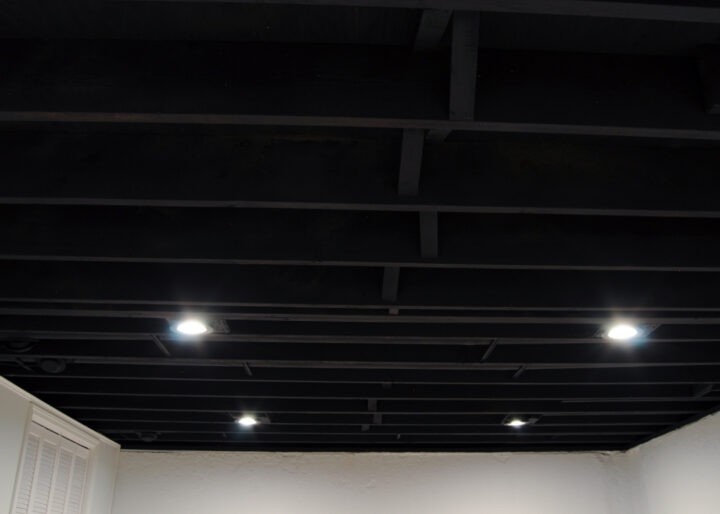
Table of Contents
- How to Paint an Exposed Basement Ceiling Black
- 1 | Organize Electrical Wires in the Ceiling
- 2 | Add Electrical and Overhead Light Fixtures (if needed)
- 3 | Clean the Basement Ceiling Joists
- 4 | Protect the Basement Walls and Floor From Paint
- 5 | Paint the Exposed Basement Ceiling
- 6 | Install Can Lights
- Pros and Cons of Painting an Exposed Basement Ceiling
- Painted Black Basement Ceiling Reveal
- More Content You Will Love
- Frequently Asked Questions
*Check out the complete unfinished basement makeover reveal!
How to Paint an Exposed Basement Ceiling Black
[affiliate links included in this post, thank you for supporting Building Bluebird!]
Project Source List:
- Valspar 2000 Flat Black Interior
- Coveralls with a hood
- Protective eyewear
- N95 mask or Respirator
- Wagner Spraytech Flexio 5000
- Dropcloth and Plastic Sheeting
- Work platform and/or ladder
- Wire Cutter
- Cord Staples
- Broom or Leaf Blower
- Shop Vac
- Black can lights
- Dimmer Switches

1 | Organize Electrical Wires in the Ceiling
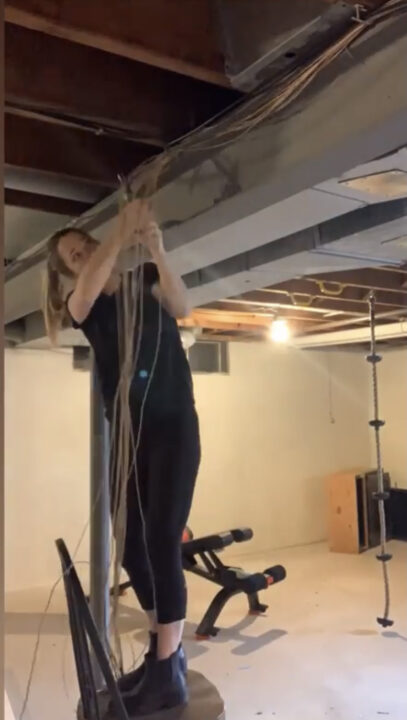
Before painting the ceiling, it is important to organize and remove any old wiring and pin any active electrical wire to the joists using cord staples. This will help conceal the wires once the ceiling is painted.
Our basement ceiling had old TV cable and alarm system wires that I easily removed. I used a wire cutter to remove the old wires.
For any loose wires that needed to stay, I pinned them to the side of a joist for a clean look.
2 | Add Electrical and Overhead Light Fixtures (if needed)
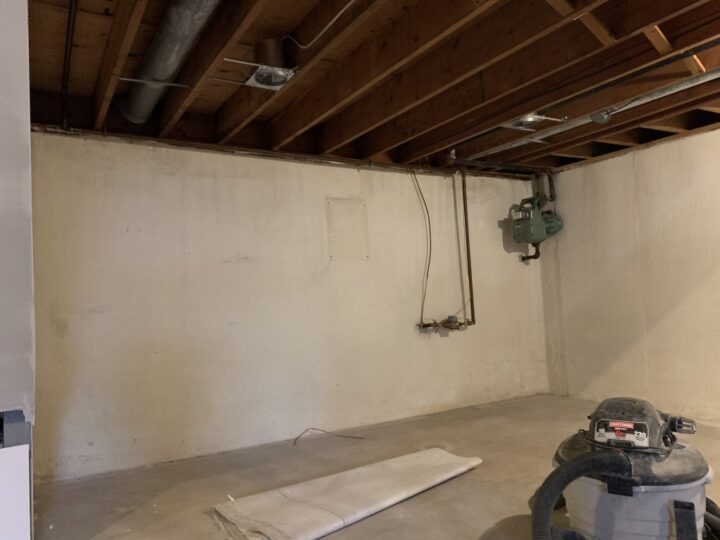
Our basement lighting consisted of only pull-string lights. I hired an electrician to install overhead lighting that we could turn on and off with a few switches.
Because I wanted everything on the ceiling black, I had the boxes installed before I began painting the ceiling.
Before the electricians got started, I asked that they attach the wires to the joists. If they needed to cross any joists I asked them to try and do it at the edges of the room so it wasn't noticeable.
Never assume that contractors know how you want something to look. You know the saying, "assuming makes an ass out of you and me!"
3 | Clean the Basement Ceiling Joists
Removing dirt and dust from ceiling joists can be accomplished in a few different ways. I found that using a broom to brush away any dust and cobwebs was the most effective for me.
I also tried a leaf blower which would have been great if I was properly dressed and our basement wasn't filled with our furniture. If your basement is empty, throw on some goggles and go to town with the blower.
Finally, I utilized our shop vac to remove larger debris found on the support beams or ledges of the wall.
4 | Protect the Basement Walls and Floor From Paint
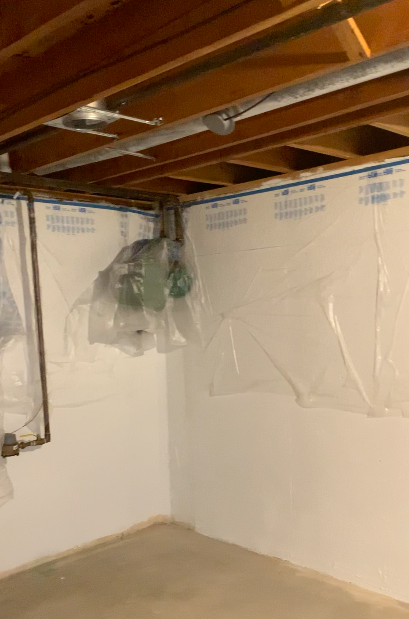
If you have plans to paint the basement floor and walls, start with the ceiling first!
I know this rule, but still got antsy and decided to apply the first coat of paint onto the walls before spraying the ceiling.
Because I followed the steps out of order, I spent a whole day taping plastic sheets on the walls only to have all of it blow away as soon as I turned on the paint sprayer!
Next time I will follow my own advice and skip painting the walls until the ceiling is completely finished.
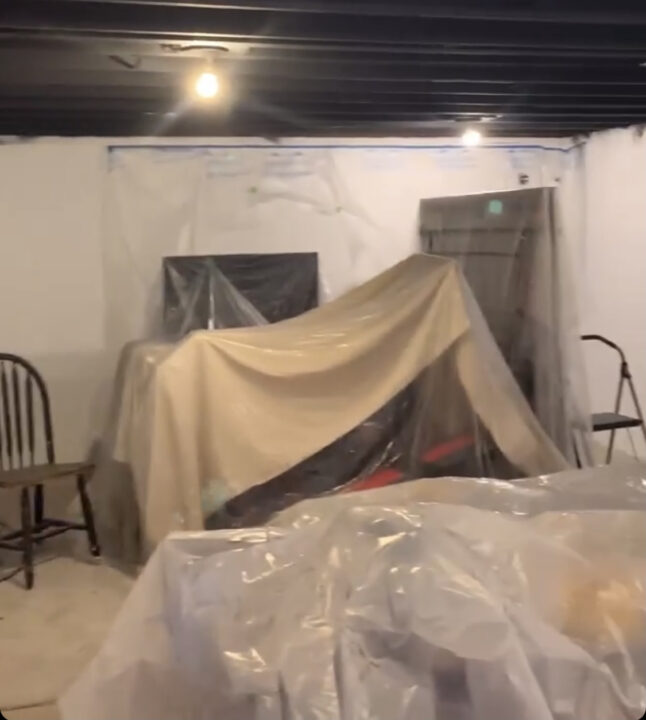
To protect large items that are staying in the basement, move them into the center of the room and cover them with drop cloths and plastic sheeting.
If you are not updating your basement floors, I recommend covering those as well. Our concrete floor had black speckled paint all over once the ceiling was finished, but I didn't mind since the floors would be painted next.
Paint Protection Gear
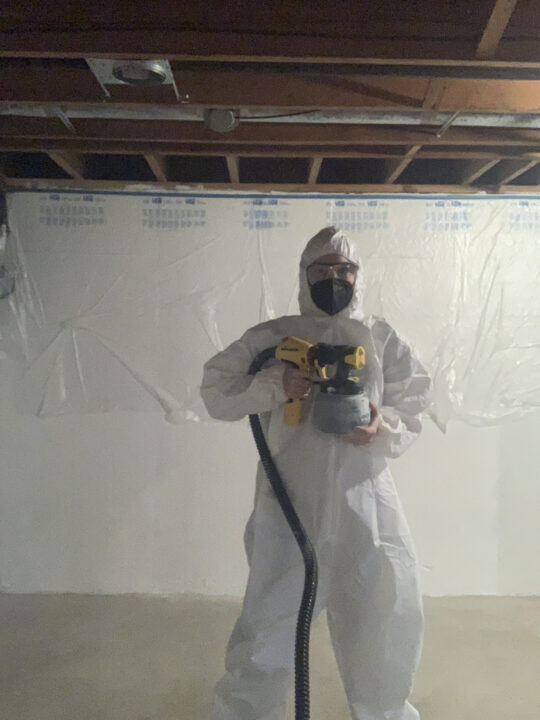
You also want to get protective gear for yourself. I wore a full body suit, protective eyewear, and an N95 mask. Gloves are a good idea too, but I decided not to use them.
I used a nail brush in the shower on my hands to remove any paint and it worked well but it does make them quite dry.
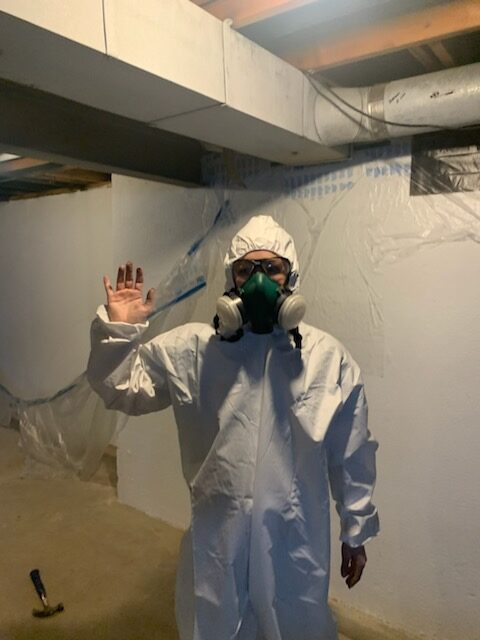
My father-in-law saw my standard mask in the photo above and immediately drove to my house to give me a respirator to use.
I used the respirator about half of the time but it would slip off of my head after a while.
My preferred mask for this task was the disposable N95 mask with the mini respirator. Side note: We could not stop laughing at these pictures with me all geared up!

Even with my protective gear, I still had paint all over my face and hands at the end of the day.
5 | Paint the Exposed Basement Ceiling
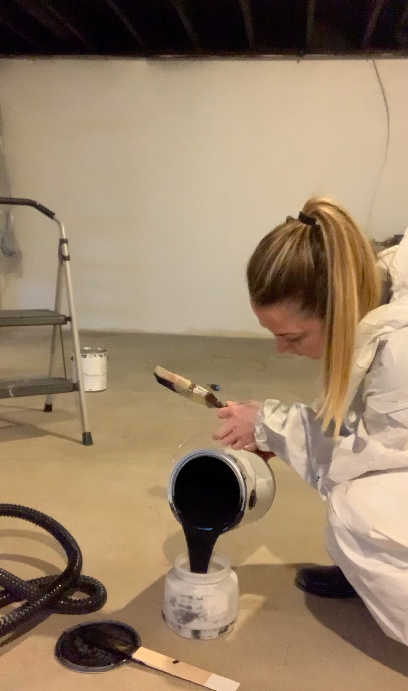
For this project, I used my Wagner Flexio 5000 to spray paint the basement ceiling black. It is really easy to use, but it took a long time. A paint sprayer is a MUST to effectively paint all of the nooks and crannies on the ceiling.
I heard from multiple people after I finished this project that renting an industrial sprayer from Home Depot would have cut my time in half.
I am guessing this is the paint spray gun that professional painters use and is a great option to speed up the painting process.
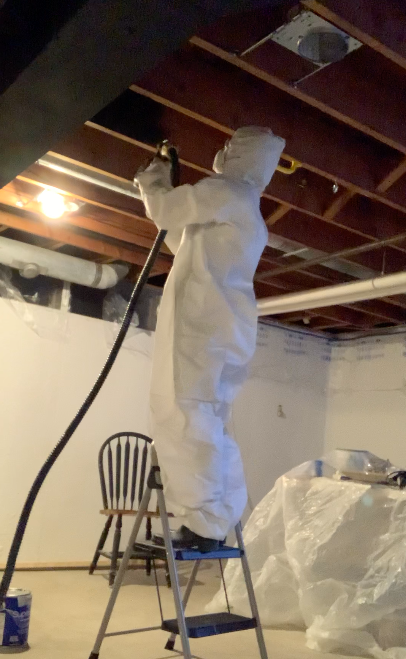
As I mentioned above, this project took about 10-12 hours! I packed it into 2 days and had to see a chiropractor afterward.
Looking up at the ceiling, holding a paint sprayer, and consistently pulling the trigger starts to hurt after a while! I would recommend taking more time if you can.
I followed the paint sprayer manual recommendations when setting up the machine to paint the ceiling. You can change the size of the spray coverage and the air pressure depending on your project.
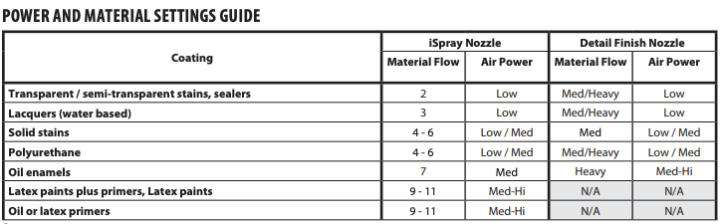
I used the latex paint settings and kept the material flow between 9-11 and the airpower on med-hi.
We chose Valspar 2000 flat black ceiling paint and used 6 gallons of paint. I decided to go with black paint for the basement ceiling because I wanted to camouflage the wires and pipes as much as possible.
White looks really nice as well but was not the look I was going for. With the can light placement, there is no light shining on the ceiling joists and it just disappears.
Paint Sprayer Tips
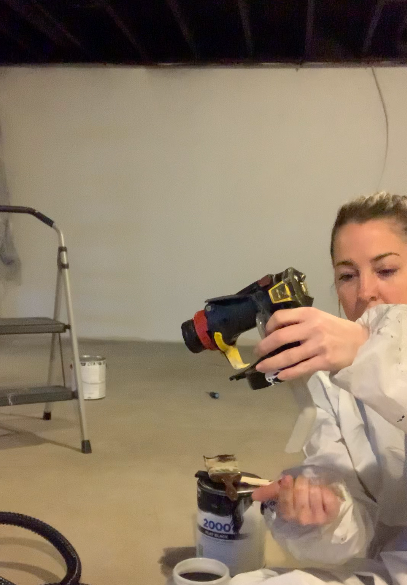
Because I had the sprayer tilted back as I sprayed the ceiling, I angled the intake tube towards the back so it would suck up all of the paint.
If I were pointing the sprayer downward to spray a kitchen cabinet, for example, the intake tube would be angled toward the front of the sprayer.
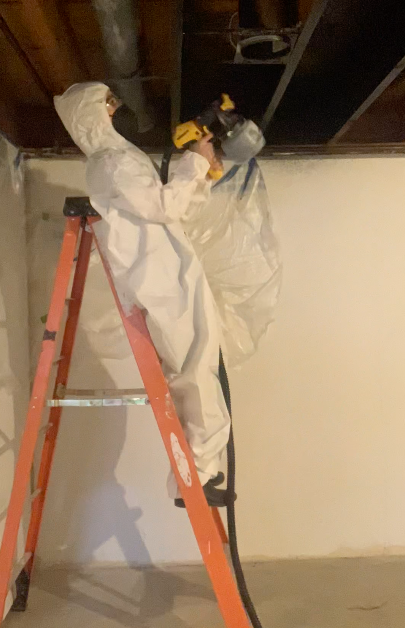
It took me a little bit to figure out the best way to use the paint sprayer, but once I got my system down, it was easier to get all of the hard-to-reach areas on the ceiling.
I primarily used the horizontal spray position to cover in between the joists.
Then I switched to the vertical spray option where I moved the sprayer up and down when there was a narrow area to cover.
Paint Touch-Ups
After spraying the unfinished basement ceiling for two days, I decided that one coat of paint was enough!
I touched up any areas that needed some more coverage with a paintbrush and a small roller.
Applying a second coat of paint is always better than one, but I was not interested in tackling that project.
The single coat of paint looks great and unless you are looking to find spots that may need more paint, you do not notice it at all.
*Check out my recommended supplies for painting interior spaces.
6 | Install Can Lights
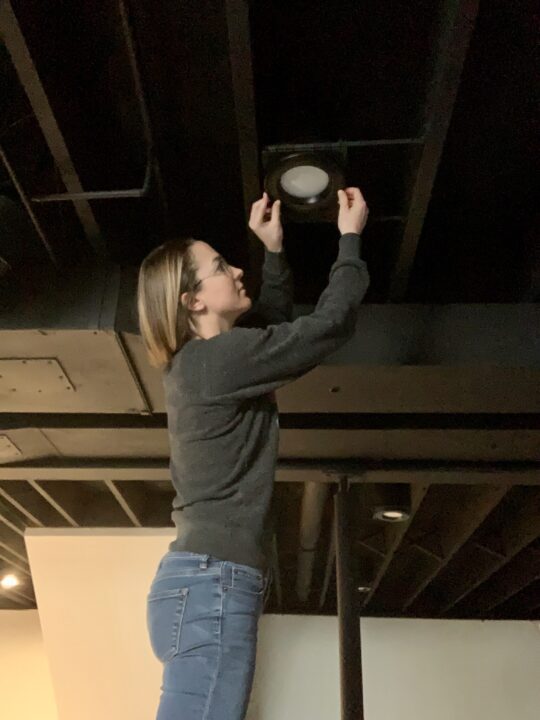
I chose black can lights to match the black paint and it looks so good! We added dimmers to the switches too.
I like having the option to dim the lights for a movie or while we are working out.
Removing the pull lights with hanging bulbs and adding can lights completely elevated the look of our basement.
Pros and Cons of Painting an Exposed Basement Ceiling
Pros:
- More affordable than a new drop ceiling or drywall
- It gives the basement a cool, industrial look
- Gives the appearance of a high ceiling with a dramatic effect when paired with a neutral color on the walls
- Easy access to the mechanicals of the house when necessary
Cons:
- If you DIY this project, it can be time-consuming and exhausting
- There is no sound buffer that a drop ceiling and drywall can add
Painted Black Basement Ceiling Reveal
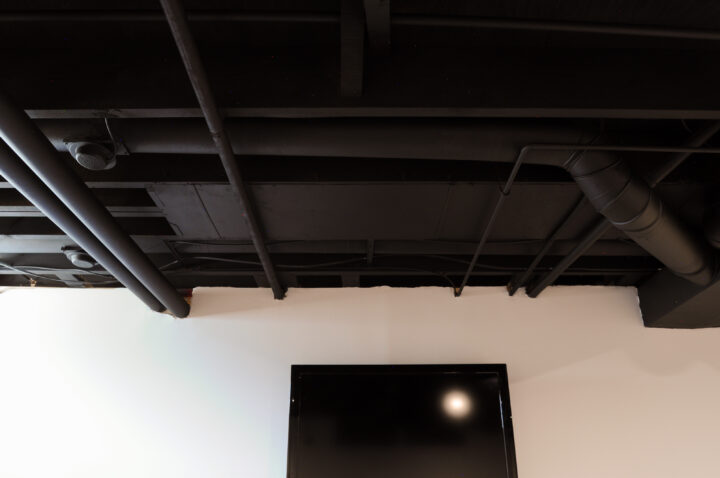
I am so happy with how the black exposed basement ceiling turned out!
It looks completely different from when we first started this project. The flat black ceiling paint gives each area a clean and cohesive feel.
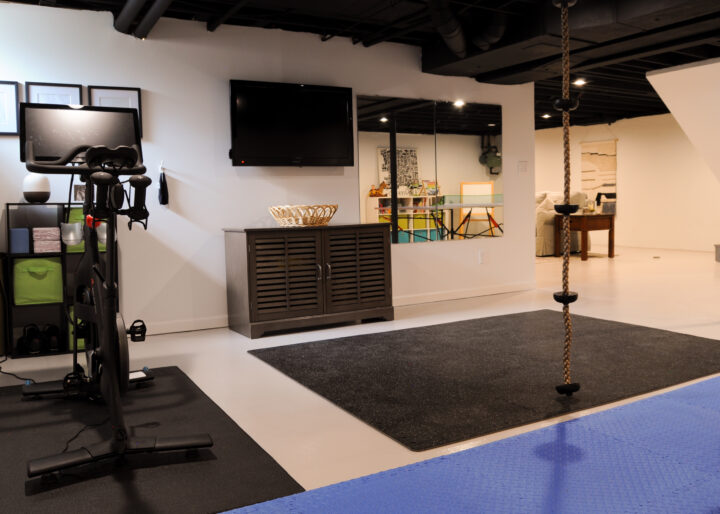
Below is the workout area before we painted the floors.
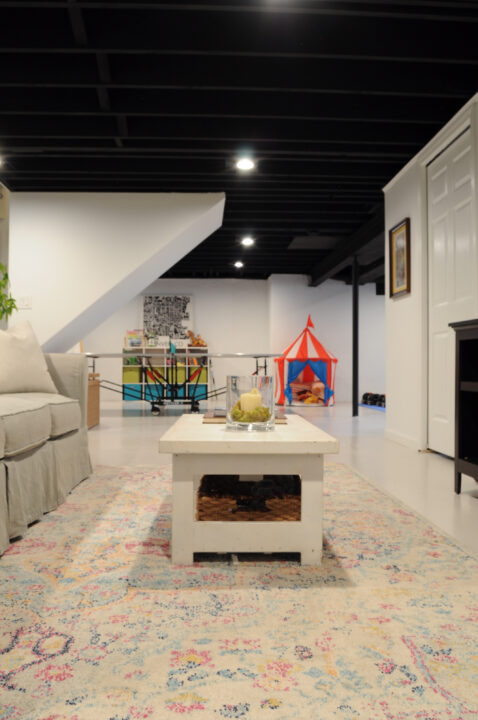
Here is the basement once the concrete floors and walls had been painted. It has such a cozy feel in the kids' new hangout space!
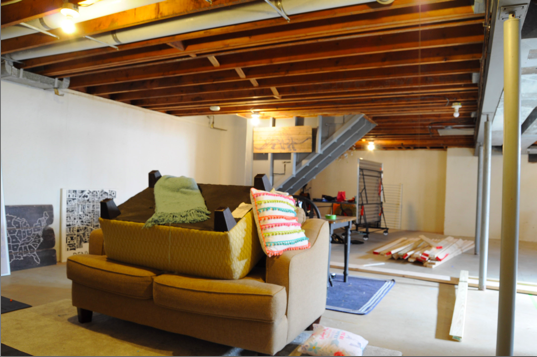
Here is another great before shot of the basement:
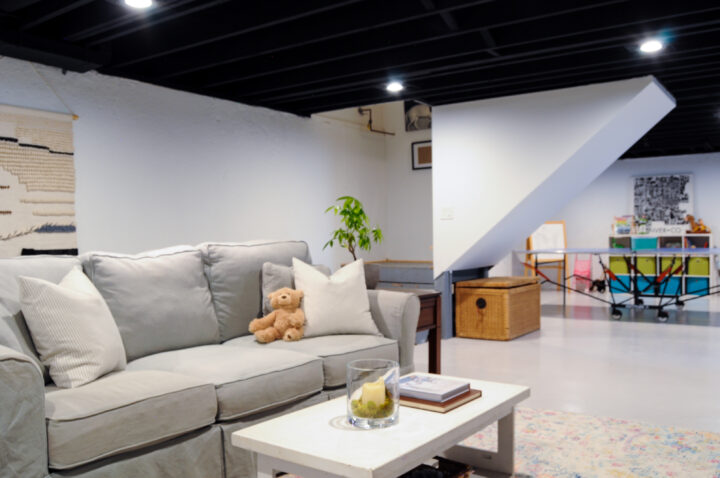
And that same view after!
I am thrilled with how our unfinished basement looks and our family uses the entire space daily.
Painting the unfinished ceiling is a great way to update your basement on a small budget. Using a paint sprayer will give you the best results and speed up the project.
I hope these tips inspire you to add livable square footage to your basement by painting the ceiling yourself! Good luck!
More Content You Will Love
- 10 Most Popular Farrow and Ball Paint Colors
- 25+ Easy Outdoor DIY Projects to Try This Year
- How to Paint a Dated Rock Fireplace | DIY
- Laundry Room Makeover on a Budget
- I Applied Latex Over Oil Based Paint | How To Fix
- How to Paint Your Old Floors Using Rust-Oleum HOME
- How to Lay Brick Border Garden Edging | Easy DIY
- Paint Your Basement Stairs Black for a Modern Look
Frequently Asked Questions
What is the best kind of paint to use on the exposed basement ceiling?
I used standard latex ceiling paint that can be used in handheld paint sprayers. A flat sheen is the best option when painting ceilings to hide imperfections and purchased Valspar 2000 flat black ceiling paint for this specific DIY project.
What is the best paint color for exposed basement ceilings?
Painting the exposed ceiling one color will give it a nice, cohesive look. Your paint color choice is really a personal preference. A white paint color on the ceiling will brighten the room and give it a larger appearance. This is an excellent choice for a basement with a low ceiling. A white ceiling will need a few coats of primer before applying the finish paint because bare wood ceiling joists will suck up the paint quickly.
Dark colors on the ceiling, like black, make a room feel more grounded and hides imperfections. The best ceiling color varies depending on the characteristics of the room and the goals of the homeowner.
How much does it cost to paint a basement ceiling?
The cost of this DIY project will vary based on the size of the basement. You will need to purchase paint and supplies and either rent or buy a paint sprayer.
The surface of our basement ceiling is about 1500 sq ft and the main cost for this DIY project was purchasing the paint cans. Painting our basement ceiling cost about $200.
What do you do about parts of the ceiling that the paint sprayer can't reach?
After I sprayed the ceiling, I went back and used a handheld paintbrush to cover any missed areas. A paint roller will be helpful with covering any uneven areas if you don't want to do additional coats of paint. There are definitely imperfections with the paint coverage, but they are not noticeable once the can lights are on.



Bravo! This looked like such a big job, but it looks SO good!!
Thank you so much!!
I did this job a few years ago in our 1300 square foot basement and it was the most challenging project I had ever done, and prior to this I rehabbed multiple foreclosed houses. I had a handheld paint sprayer and ended up renting a professional sprayer from Home Depot and it did make the job much easier. I am moving soon to a house with a bigger unfinished basement and after pricing out a painter my first purchase is a stationary paint sprayer. I plan to take 4 days with the sprayer, 2 for Kilz and 2 for black paint, touchup will be with a handheld. If I rent a sprayer it would be about $400 or I can buy the same sprayer I would rent new for less. Now I'm listing all the things I can paint with the sprayer to save time like the majority of walls and furniture.
Such a great idea! I have done group purchases on bigger tools like this and it is totally worth it. For example, a few family members all went in on a nice pressure washer that we all pass around and use when needed.
This looks great! We are going to do something similar in our basement. I am curious of what the wall looks like where the drywall meets the exposed ceiling beams. Can you show pictures of that?
Sure! I will try and get a good photo and add it to the blog for you to see. On the TV area side, we installed a small piece of crown molding to give the top of the drywall a more finished look. On the gym side we mudded as best we could and left the raw edge of the drywall since there are different pipes and vents attached below the ceiling joists.
You inspired my wife and I to start the same project this past weekend. I'm breaking it up over the next week though (I realized quick I can only spray about a gallon before my shoulders feel like they're on fire). Have about 1/3 of the space done so far
Any additional tips for getting up above the ducting and some of the other weird to get to spots? A couple joists that are weirdly close together and the vertical joist surfaces closest to the walls? I've tried just about every angle on the sprayer but the size of the sprayer + my awkward body is making it hard to contort the nozzle up in there... Is it bad I might just let the poor lighting hide the not as covered spots in the hard to see anyway dark space?
Yay! I know exactly how you feel with the shoulder pain! I saw a chiropractor after the project. After I sprayed the ceiling as best I could, I went back with a paintbrush and small roller to hit some of the awkward areas that the sprayer couldn't reach. There were definitely some spots that I couldn't reach but with the can lights shining below the joists, you can't even tell! I wouldn't overthink it. If it is really noticeable when the lights are on, then try to hit it with the paintbrush or roller.
@Sam P, Try a paint mitt. I used on on stairwell spindles. Took a little bit getting the technique, but end result good.
This is a great idea and I am wanting to try it. I just want to confirm, is it safe to paint all the plumbing and HVAC ducts? It looks like you have done that but I wanted to make sure before I mess something up.
Hey Cassie, yes, it is safe to paint the exterior of the pipes and ducts! If there is a vent in the ceiling, I would cover it up so that paint doesn't spray into the interior of the ductwork.
That looks amazing! How high is it from the floor to the bottom of the ceiling joists? Our basement is low, so I’m wondering if it’s worth it or not. Also did you frame the basement walls yourself? Thanks!!
Some areas in the basement are close to 8 ft ceilings, other areas are lower where the pipes and HVAC ducts hang lower. The areas of the ceiling are probably 7 ft tall. Yes, we framed the two basement walls. We had to make a few adjustments where the pipes and ducts hung lower, but it looks just fine!
I did this to our basement ceiling that was about five years old at the time. I strongly suggest people use the protective gear suggested in this post. I did not and all I will say, it was not wise. We bought our house that was 7 years old from the builder. I did not want a drop ceiling and noticed restaurants inn the area did this to the ceilings. I guess I was a trend setter from what the painters who quoted some work for me on the other side of the basement. I like the look and the height, but the sound is noticeable between floors.
I agree on the sound aspect! We are going to look into potentially adding some panels in between some of the joists to help with the noise control.
Did you paint the galvanized can fixtures also? If so did you use the same paint?
Yes! We had the electrician install the galvanized fixtures before we painted and sprayed those along with the ceiling joists. Once the ceiling was painted, I installed the can lights with the black trim. I used the same paint!
Hi Lindsey, thank you so much for this detailed post - I plan to do the same in my basement.
Do you have a recommendation on the number of can lights per square foot? The lighting looks great in your pictures - was it only provided by the can lights? I am imagining that the matte black ceiling would require more lights than usual to feel adequately lit.
Thank you!
Hi Joe, thanks for your comment! I believe the average guideline is one light for every 25 square feet. Our can lights were placed about every 4 feet. We installed dimmable can lights (link is at the bottom of the post) and that is the only lighting we use in the basement. It feels very light and bright!
Thank you!!!
@joe, I'm a electrical engineer with extensive lighting experience. There is a free tool available on the web called "Interior Tool" from Acuity that will provide a quick and dirty layout for you. You just enter the room dimensions and set the reflectance for the walls, ceiling and floor. Reflection is a judgment call, but black would be 0%, white is typically 80-90% and a reflective silver surface would be 100%. I would set your target illumuminence to 50 FC and then select a few of their basic recessed LED fixtures (each fixture is a separate tab so you can compare)
and see what it spits out. It will map out the number of fixtures and recommended placement for them to give you the most even distribution.
http://www.visual-3d.com/tools/interior/
Thank you for this advice!
I really want to do this too. It doesn't look like you primed anything first. Would that be a problem with the paint sticking to the duck work?
I did not prime it first and I only sprayed one coat of paint. I didn't have any problems with the paint sticking to the duct work. Nothing really touches the duct work on the ceiling so all of the paint has stayed intact!
How far apart did you space your can lights?
I am painting my floor a similar color to yours, so I was thinking the light would come off the floor brighter. Thoughts?
I followed the standard lighting placement for a room with 8 ft ceilings which is 4 ft between each can light. We put the can lights on dimmers so that we can lower the brightness depending onthe activity in the basement.
How many gallons of paint did you use?
I think I used 5 gallons and I only applied 1 coat of paint. Because the can lights are not illuminating the joists, one coat of paint worked just fine even though it didn't have complete coverage in some spots.
Thanks for sharing! Thanks for the photos and ideas on what to do with those unsightly basement rafters!
First, if the respirator was slipping, then it wasn't properly fitted. You should be able to wear it all day without issues.
Second, I agree that a different sprayer would have saved a tremendous amount of time and shoulder pain. I use an airless Graco project painter plus which is pretty inexpensive and doesn't make a mess. Plus, it can pump directly from the paint can (1 or 5 gal). It's a little tedious to set up, but I can still paint even a door faster with it than using a brush.
I agree! It's all a learning process over here. 🙂 There are many things I would do differently if I did it all over again.
Thanks for your detailed post. I’ve been dreaming of doing this same project with our basement for several years now and am finally planning it out. Trying to decide on a white or black ceiling. I’m curious as to why you didn’t prime the ceiling and duct work before painting. I’d love to hear your thought process there. Also, do have info on the housing you used to mount the can lighting? Thanks!
It is a total game changer! The main reason I didn't use a primer is because the black ceiling is not the focal point of the room and is really meant to blend into the background. Because there is no light shining on the black ceiling joists (the light begins shining at the bottom of the joist), I knew that any imperfections would not be visible because of the shadowing. If I painted the joists white, I would be more inclined to add a primer to get an even coat of paint. I hired an electrician who provided guidance on the materials needed to install the can lights, so I can't give great guidance in that area of the project.