
Last Updated on January 1, 2024 by lindseymahoney
Our second house had a tiny, closed-off kitchen. By removing half a wall in the kitchen and installing a breakfast bar, we added value to our home and achieved an open-concept design without a full renovation.

Experts say that when you go to sell your home, you should try to remember your first impression of the house. What did you not like about it and what quirks were distracting from the other amazing features?
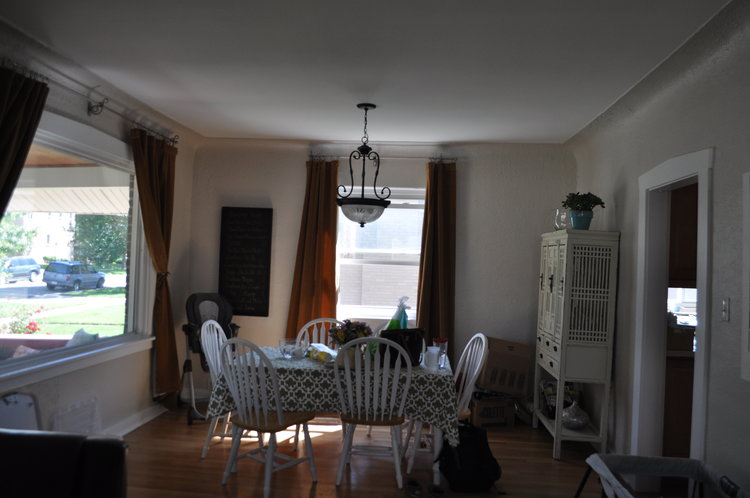
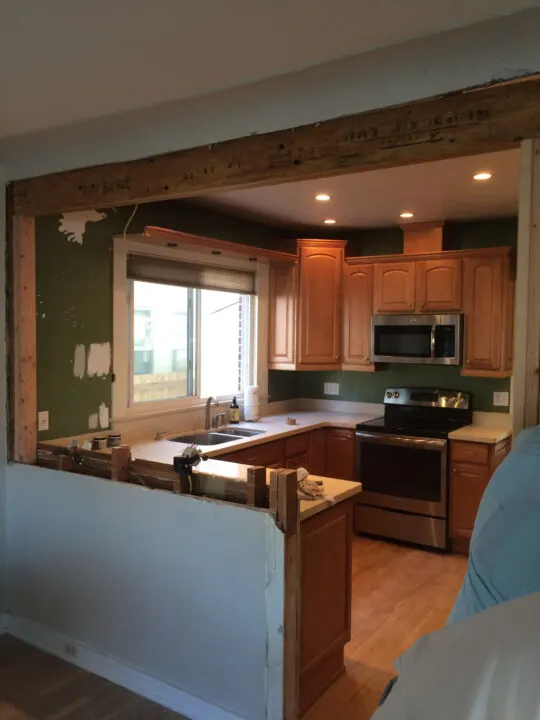
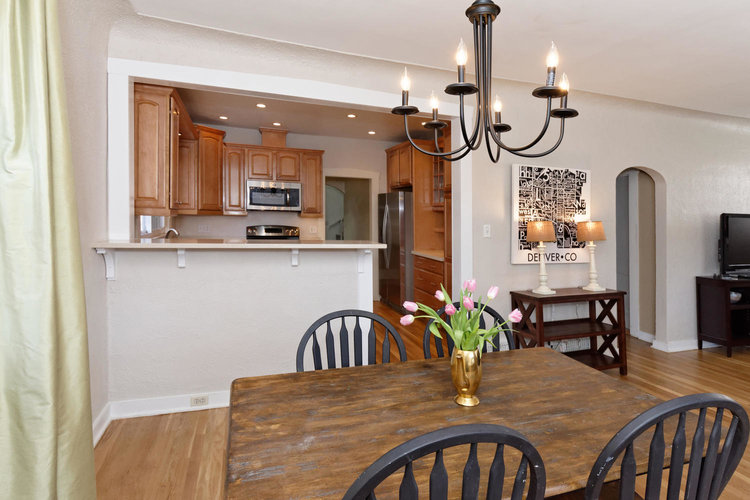
For me, my first impression was that the kitchen was a little small and was more closed off from the living space than I preferred. The door to the right in the image above is the kitchen.
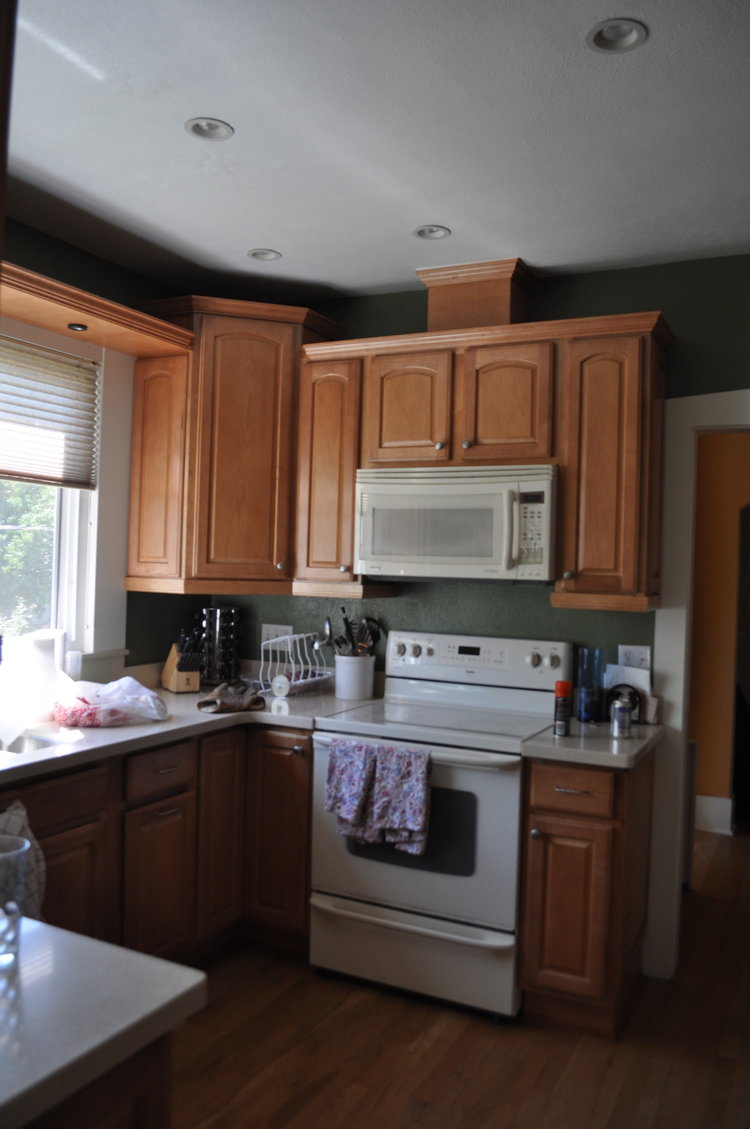
When we moved in, the kitchen had older appliances and the walls were painted a dark green, which made the space feel smaller.
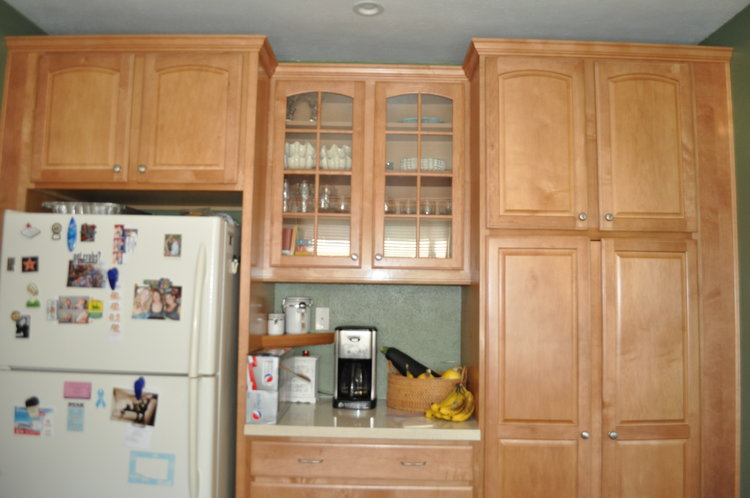
I mentally noted that I would love to open up the wall between the dining room and kitchen.
When we decided to move two years later, the kitchen was still exactly the same. Chris and I were convinced that the closed-off kitchen was a big negative to buyers and we would maximize our profits if we knocked down the wall.
How to Add a Breakfast Bar to a Small Kitchen
[Affiliate links may be included in this blog post, thanks for supporting Building Bluebird!]
Here is how we added a breakfast bar to our small and cramped kitchen.
Remove the Upper Cabinets & Demo the Wall
Because the kitchen was already limited on counter space and we didn’t have the budget to patch the wood floors, we decided to remove the top part of the wall and keep the lower cabinets.
To remove the upper wall, we had to remove three cabinets. One small cabinet, a wine rack cabinet, and a large corner cabinet. We replaced the corner cabinet with the small cabinet, so we really only lost the corner cabinet for storage. Unfortunately, I cannot find any before pictures of this side of the kitchen!
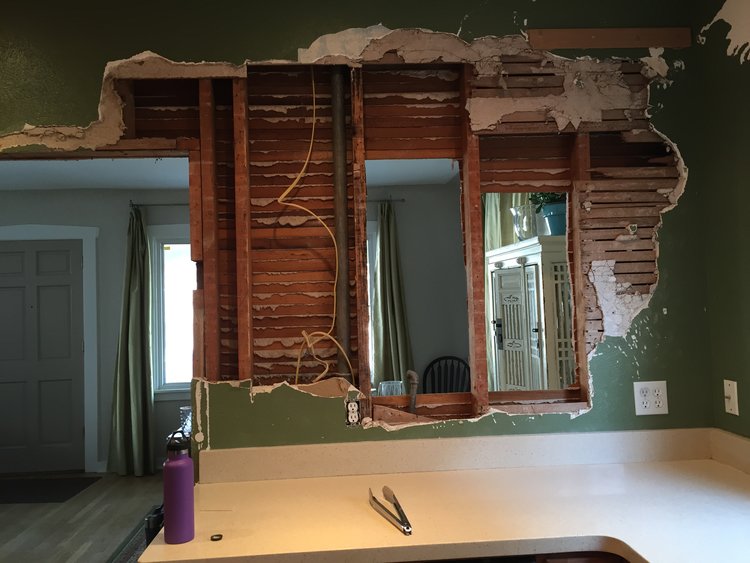
This is an old home so the walls are made of plaster and demo’ing makes a HUGE mess.
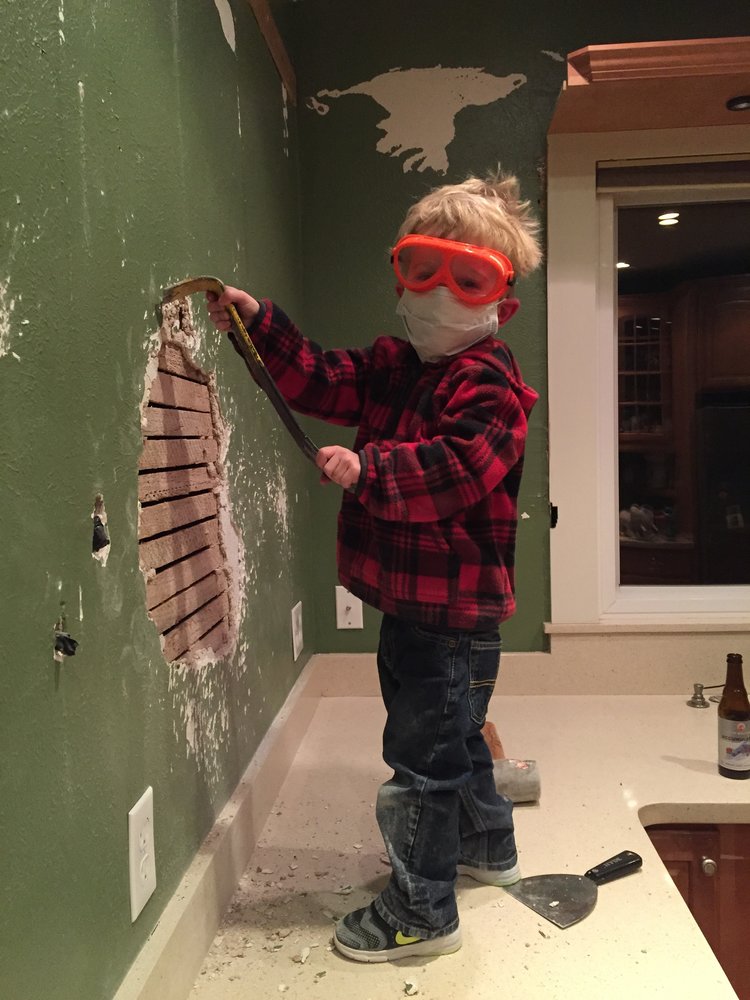
We are raising a mini Chip Gaines because our son LOVES demo day!! This kid spent hours smashing the wall, he even smashed his finger a few times, but always wanted to get back at it and keep breaking down the plaster.
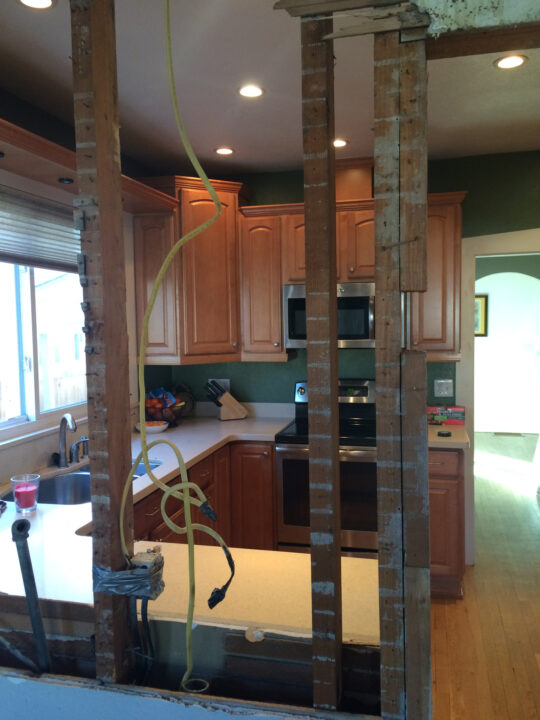

Install a Header

We hired an electrician to move the electrical wires and outlets and installed a header.

Because this is a load-bearing wall, we had to add a header to support the weight of the second story.
Repair Drywall and Install Period Appropriate Trim
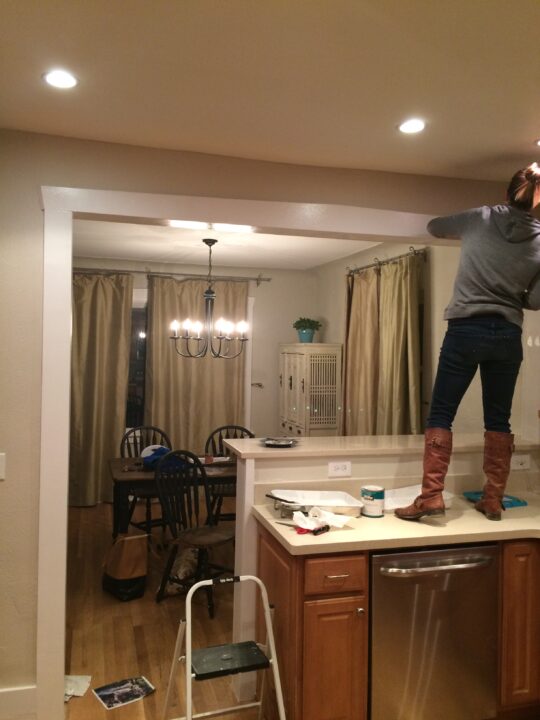

The most cost effective way to finish the new opening in the wall was to replicate the original door trim in the larger opening. We had to do a little bit of drywall repair as well.
Now that the wall was opened up, I wanted the dining room and kitchen to feel more cohesive. I took a piece of chipped paint from the dining room and had it color-matched at Sherwin-Williams. We used this same neutral color in the kitchen to create an open-concept feel.
Install the Breakfast Bar Countertop
Luckily, the kitchen countertops were pretty basic so we were able to find the same kind at Home Depot for the breakfast bar.
REVEAL | Small Kitchen Breakfast Bar
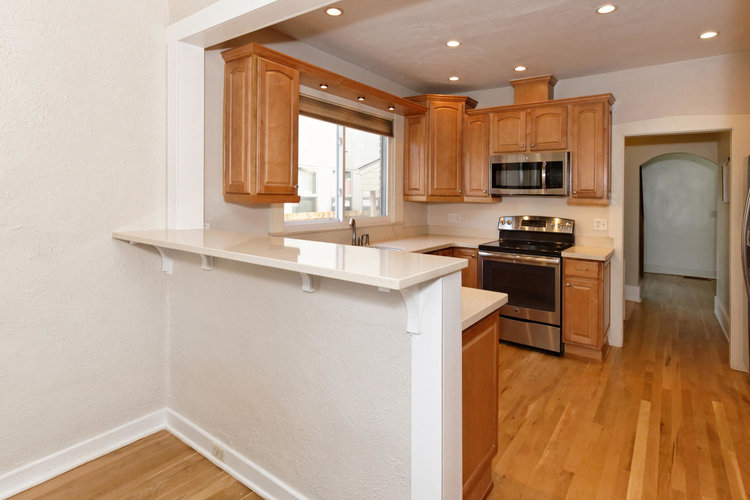
Removing the upper wall between the dining room and kitchen made the kitchen feel so much bigger! Carrying the same paint color from the dining room into the kitchen also really made the kitchen feel more expansive.
We prepared the kitchen for the open house by removing all of the clutter from the kitchen counters and deep cleaning the space.
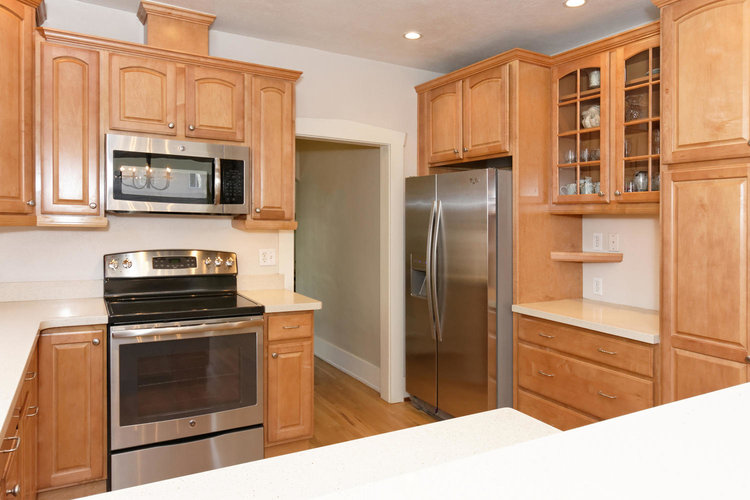
To add more value to this small kitchen, we swapped out the old appliances for stainless steel, which is always preferred by potential home buyers.
Here is the cost breakdown of the kitchen renovation:
- Appliances (Fridge/Oven Range/Microwave/Dishwasher): $3,500
- Opening Wall:$900
- Counter: $500
- Electrical (below breakfast bar): $50
- Paint:$50
Total = $5,000
I am confident that we not only made that money back but doubled our return.
What tips/tricks do you have for making a small space feel larger?
Want a full tour of our second flip house once our renovations are complete? Check out the Flip 2 before and after blog post!
More Content You Will Love
- Stunning Modern Traditional Kitchen Reveal
- The Easy Way to Paint Kitchen Cabinets (no sanding!)
- $200 Budget Friendly Kitchen Makeover – Top Tips!
- 7 Inspiring Kitchens | Mushroom Cabinet Color
Lightweight
Thursday 8th of February 2024
Awesome job, getting ready to do the same thing,I see that you spent $500 dollars on the counter top.Could you tell me what color it is and what type of material? Thanxzz
lindseymahoney
Friday 9th of February 2024
thank you! I don't remember the exact type of countertop, but we were able to match the existing countertop at our local Home Depot. I believe it was a quartz.