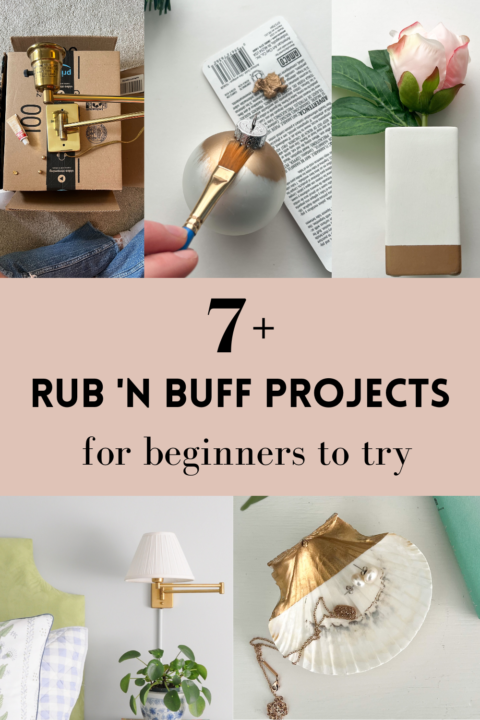
9 Easy Rub N Buff DIY Ideas and Tips for Beginners
Last Updated on August 5, 2024 by lindseymahoney
If you enjoy DIY projects, chances are you have used Rub 'n Buff a time or two!
This tiny tube has the ability to turn a tacky-looking object into something that looks antique or even real brass.
Do you remember the line in Meet the Fockers, "you can milk anything with nipples"? Well, you can add rub n buff to any object with a surface!
Don't ask me why that scene pops into my head when I use this product, it just does. This wax buffs smoothly onto wood, glass, porcelain, metal, and many more surfaces.
Today I am excited to share many of my own Rub n Buff DIY projects throughout my home, as well as share a few other DIYers projects to check out on their blogs.
What is rub 'n buff?
Rub 'n buff is a metallic wax that is used to change the finish of various items. It can be used on anything from furniture to light fixtures to create an antique look or gilded finish.
There are many different color options to achieve the effect you desire. The colors can also be used together for even more color options.
Rub 'n Buff Color Options
- Antique Gold
- Silver Leaf
- Gold Leaf
- Ebony
- Spanish Copper
- Autumn Gold
- European Gold
- Pewter
- Grecian Gold

7+ Easy Rub 'n Buff DIY Projects to Try at Home
[This blog post contains affiliate links, thanks for supporting Building Bluebird!]
Personally, I have only used the antique gold and gold leaf color options for my home decor projects but would love to try more in the future.
I have seen multiple DIYers raving about the beautiful finish when you mix together ebony and Grecian gold, so that is on my list to try!
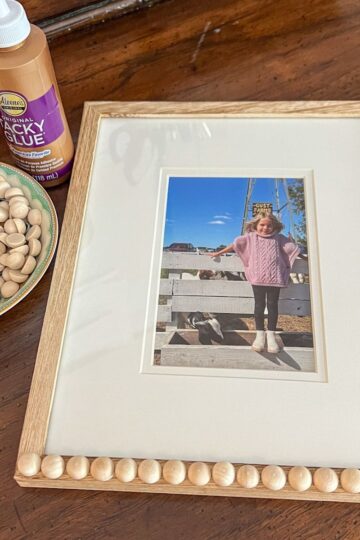
1 | Apply Rub 'n Buff to Picture Frames
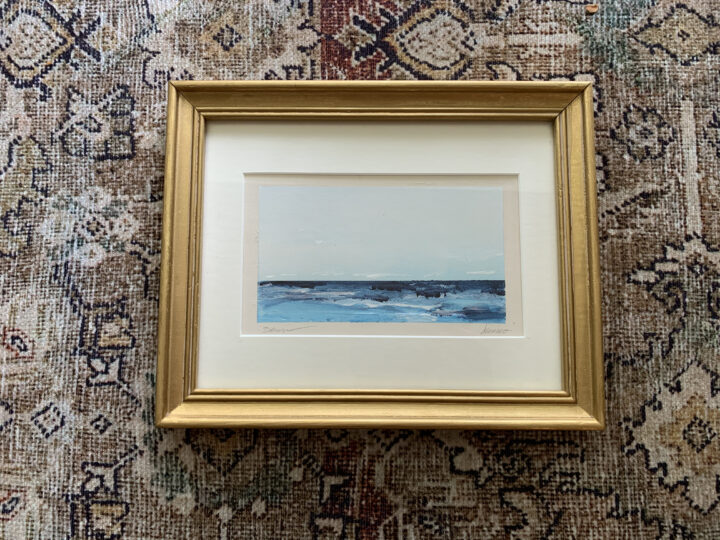
Creating gold picture frames is one of the easiest and most popular rub-n-buff DIY projects out there.
I found this unique original artwork at a local thrift store and the frame (with different artwork) at an estate sale.
At our local Michaels, I had the painting rematted in this gold frame.
The original frame had the yellowish brass that I don't love, so I applied gold leaf rub n' buff using a small paint brush. I used a small amount of rub n buff to dull the yellow and give the frame a more aged look.
Charlotte, from At Charlotte's House, uses the silver leaf color on picture frames in her dining room.
These tiny tubes of metallic wax really do work like magic that can change the look of a picture frame in minutes!
2 | Antique Lamp Base
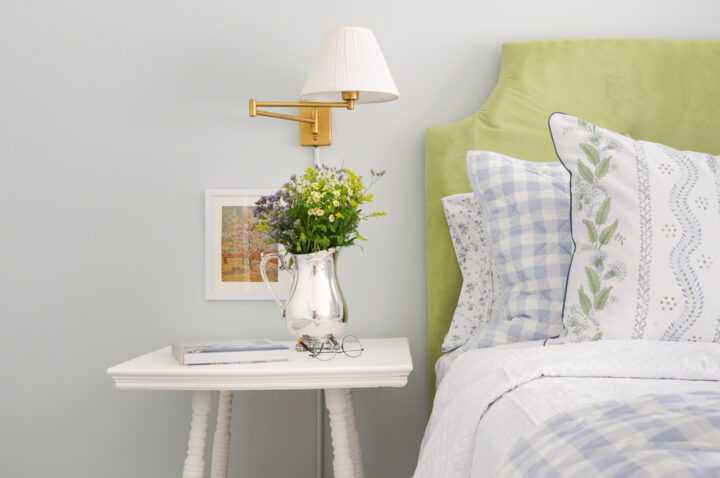
I found a pair of sconces at a thrift store for $8 a piece and quickly snatched them up. The shape was beautiful, but the base of the lamp was dated yellow brass.
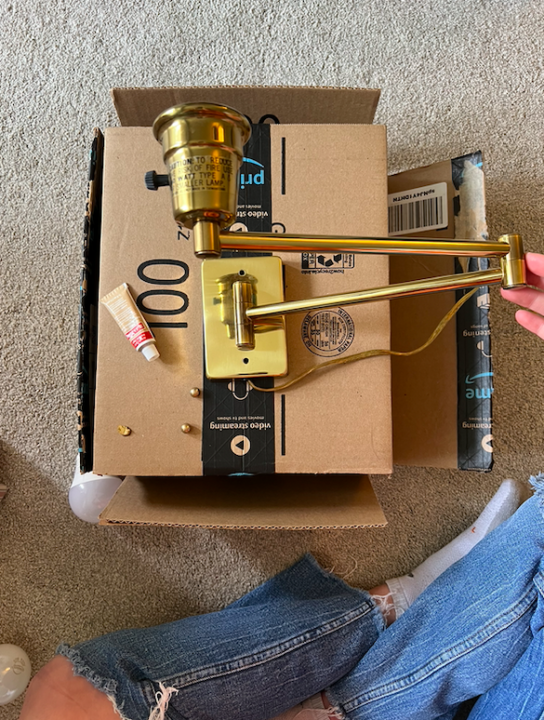
I used my finger and gold leaf rub 'n buff to dull the shiny "faux brass" to give it some age and create an antique or vintage look. Latex gloves are a good idea if you do not want the metallic sheen all over your fingers.
The sconces fit perfectly in our guest bedroom and the lamp bases now had the perfect finish!
3 | Fun Flower Vases
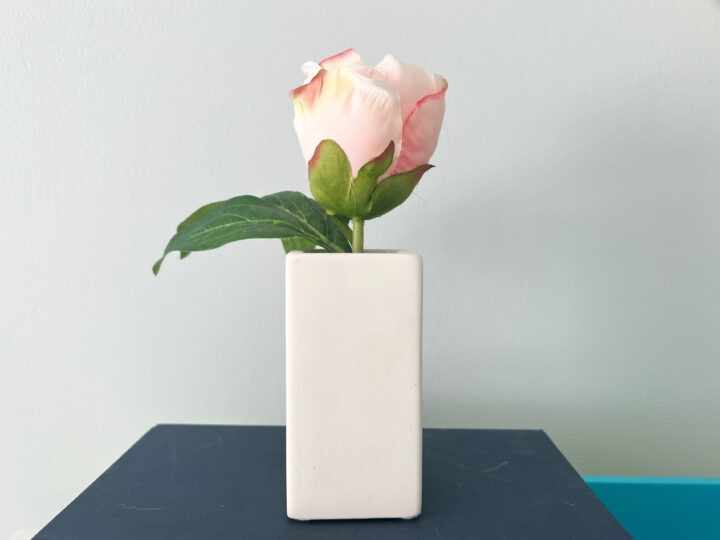
Using any of the metallic rub 'n buff colors, you can add lots of personality to a vase.
The vase can be any material, like glass or porcelain. I decided to breathe new life into a tiny bud vase sitting in my storage closet.
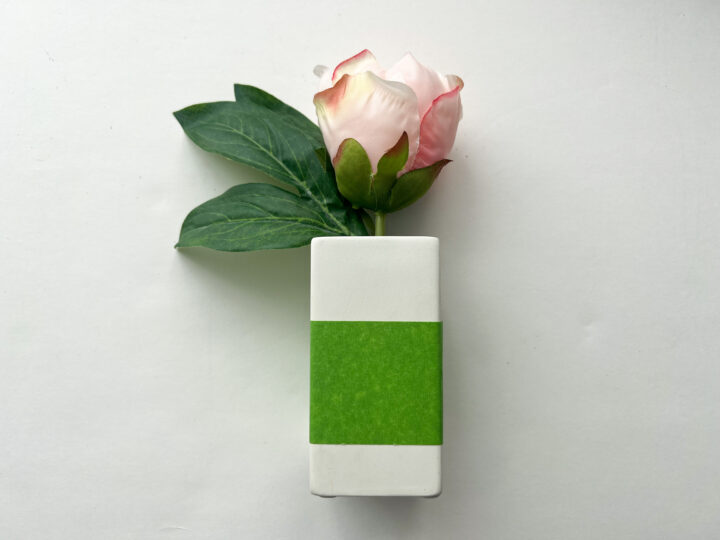
Using painter's tape, I carefully created a straight line on the lower portion of the vase.
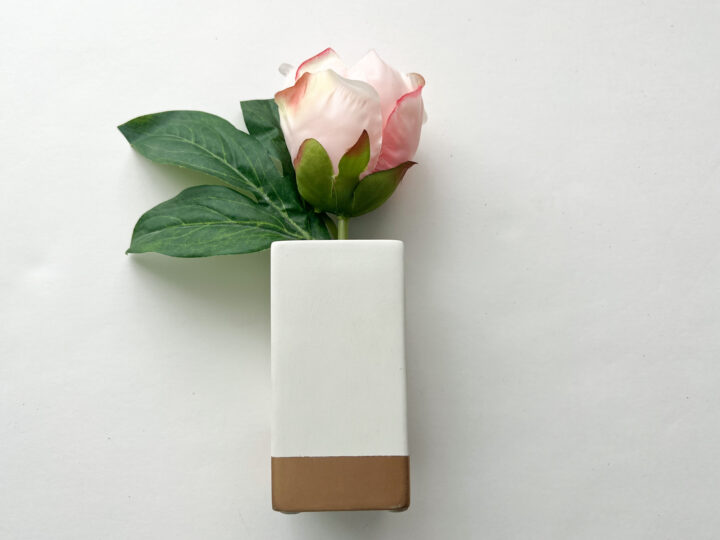
I quickly painted Antique Gold rub 'n buff on the bottom portion of the vase pulled off the tape and my tiny bud vase had a modern, new look!
There are endless designs that can be added to a simple vase like this and an inexpensive way to give it personality. I have another bud vase that I plan on adding vertical stripes!
4 | Highlight Furniture Details
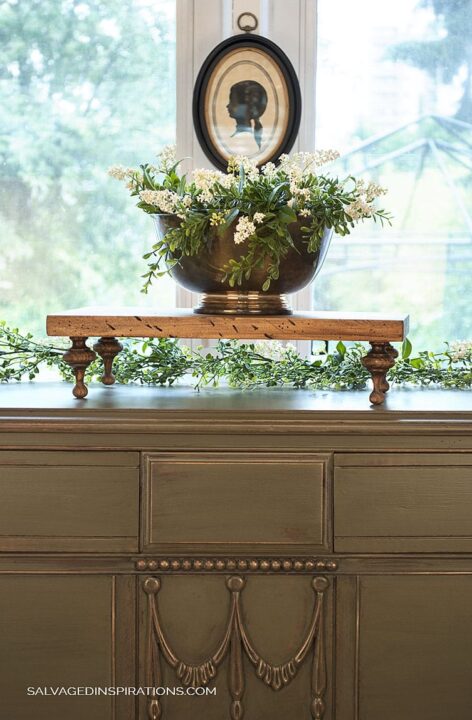
Salvaged Inspirations used antique gold rub 'n buff to highlight the intricate details on an antique dresser. The luster is subtle but makes these detail work pop.
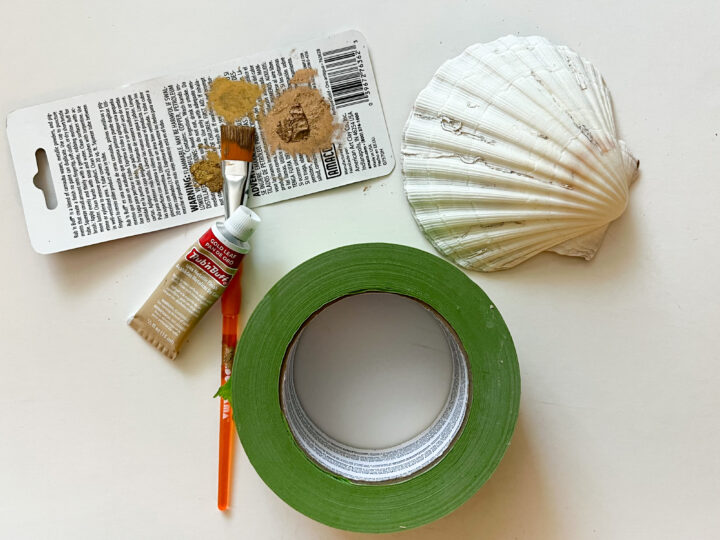
5 | Gilded Seashell Jewelry Dish
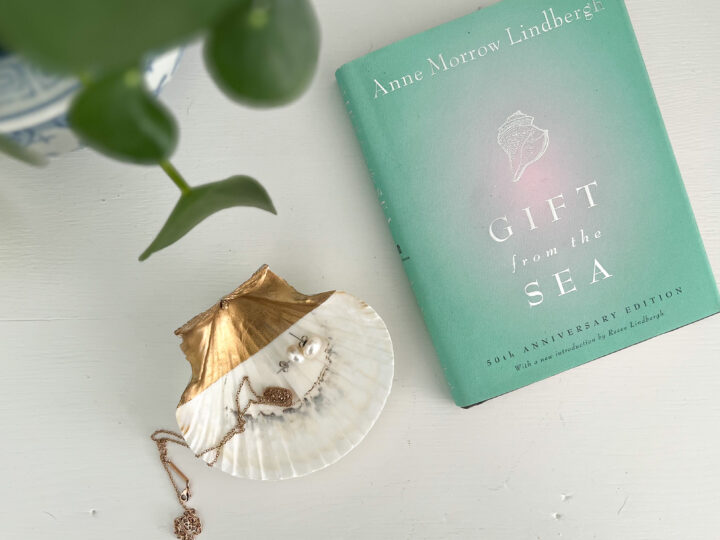
This gilded seashell jewelry dish was a quick and easy DIY and I love how it turned out!
I wanted to add a small dish to the nightstand of our guest bedroom and decided to use items found in our home to whip something up.
Using painter's tape and gold leaf Rub 'n Buff, I finished this trinket dish in minutes! The gilded portion of this shell makes it feel special and unique.
Add gold edging to this simple DIY trinket dish using a seashell, napkins, and mod podge. This is my favorite DIY family vacation keepsake!
6 | Golden Christmas Ornaments
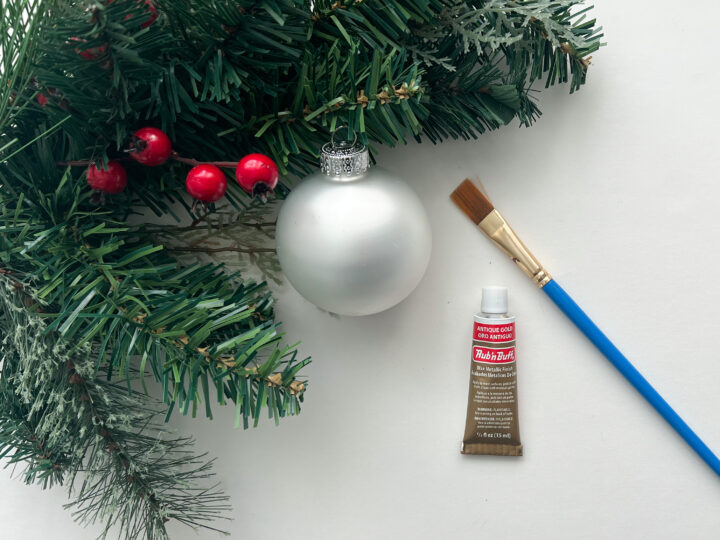
Have some old ornaments that need a facelift? Rub n' Buff is the perfect solution!
I took white Christmas bulbs and applied the Antique Gold color to create a festive, fresh look.
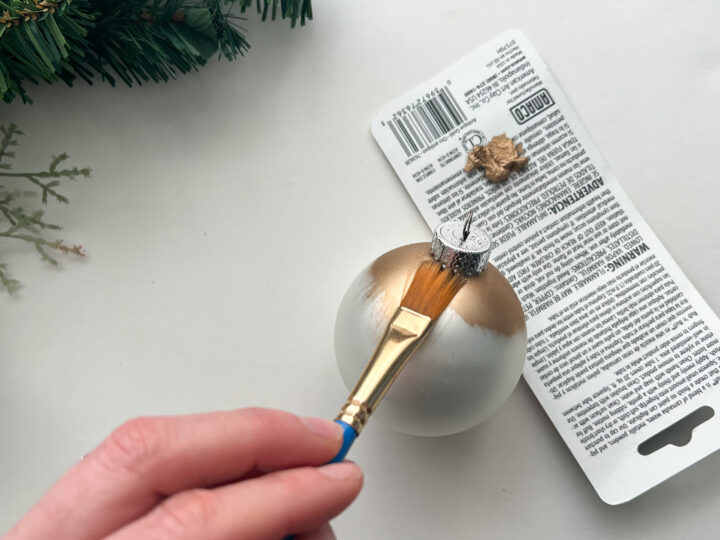
I left some of the ornaments gold and added a few Christmas ribbons to others.
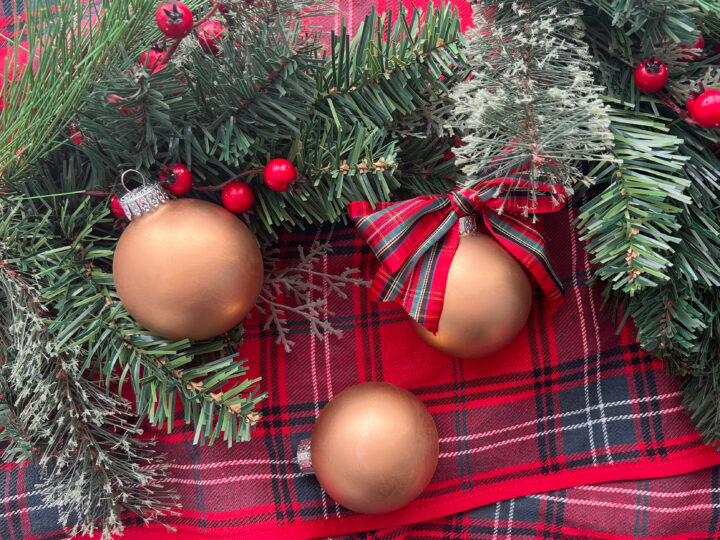
It is the perfect DIY project for people with red and gold Christmas decor. To create more of a patinaed look, I recommend painting the ornaments with black paint and then brushing on the gold, metallic wax.
7 | Vintage Jingle Bells Using Rub n Buff
Gold Rub 'n Buff can be added to pretty much any piece of holiday decor and look festive and merry. Cuter Tutor used antique gold to give her Christmas bells a vintage and aged look.
Adding greenery and a beautiful velvet ribbon completes the festive decor.
*Looking for more Christmas decor ideas? Check out this detailed blog post filled with blue and white Christmas decor ideas!
8 | Gilded Mirror Makeover

Wildflower Home Blog upcycled an old mirror using spray paint and gold leaf rub n buff to create this beautiful, gilded mirror.
9 | Shimmering Flower Pots
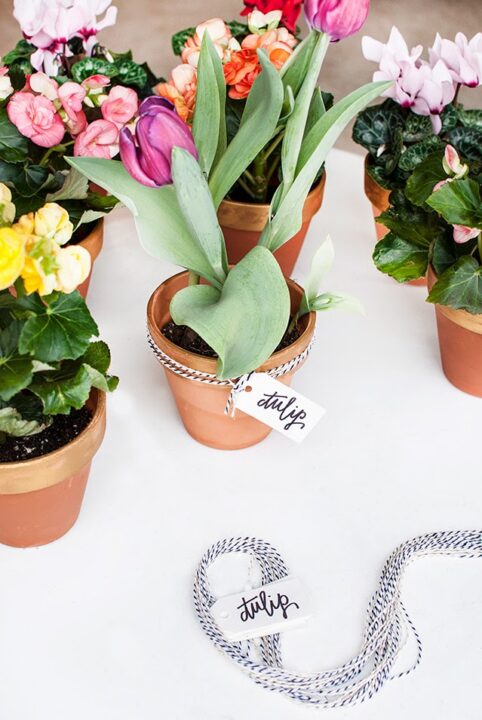
A Pinch of Lovely added a "pinch" of gold rub 'n buff to the top of flower pots for a little shimmer. This is such a great gift idea for friends, family, and clientele!
*Check out this sweet DIY for kiddos who want to create their own Valentine's!
Other Items to Consider for a Rub 'n Buff DIY
- Candlesticks
- Plate chargers
- Napkin rings
- Halloween costumes
- Doorknobs
- Painted or mismatched door hinges
- Easter egg decor (a golden egg)
- Furniture feet
- Cabinet hardware
- Door knockers
- Doorbell
- Candles
*Check out this super simple DIY to create an adorable custom match holder!
I hope these Rub 'N Buff DIY ideas have inspired you to try a few at home!
Frequently Asked Questions
How do you apply rub 'n buff?
A little goes a long way!
These tiny tubes last a long time and can be used for multiple projects. You apply the metallic wax using a clean finger, a soft cloth, or a soft brush (paintbrush or makeup brush).
As the name of the product says, rub the wax onto the surface in a buffing motion to apply.
Adjust the Shine
For a subtle shine, apply a thin layer of the rub n buff wax. For a high-shine look, apply the wax and polish the surface for more of a luster.
To create a patinaed look, many DIYers prefer to begin the application on a dark surface. If your object is not black, you can easily spray paint the object and then add the rub 'n buff gold wax.
Is Rub 'n Buff Permanent?
Yes, however, it can be removed with powerful cleaning solvents like mineral spirits and bar keepers friend.
Rub 'n Buff dries in minutes and does not rub off once it is applied.
Is Rub 'n Buff waterproof?
Yes! Rub 'n Buff is a metallic wax paste that repels water. Because it is a wax, some people use it on their faucets and handles in bathrooms.
More Content You Will Love
- How to Paint a Stone Fireplace | Easy DIY
- Brick Border Edging for Your Garden | How To
- Fall Wreath DIY using Decor From the Dollar Tree
- DIY Checkered Frame | Fun and Easy Decor Trend
- Paint an Exposed Basement Ceiling Black | DIY
- How to Paint A Bed Frame | Easy DIY Tutorial
- 25+ Easy Outdoor DIY Projects to Try This Year
- I Applied Latex Over Oil Based Paint | How To Fix