Last Updated on August 25, 2025 by lindseymahoney
Our first big project in this house was a basement bathroom renovation. Starting from scratch, we transformed an unfinished storage space into a functional guest bathroom and bedroom. Since we had a long list of renovations, this project had to be as budget-friendly as possible. In this post, I’ll share the exact steps we took to design the floor plan, hire subcontractors, and save money on our basement bathroom remodel.
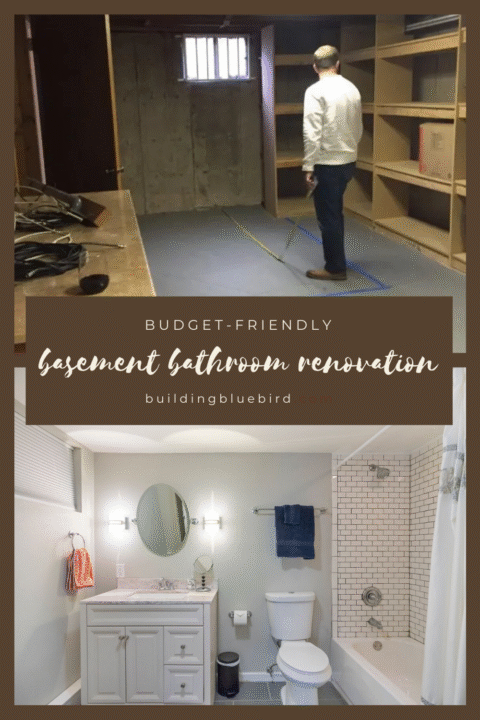
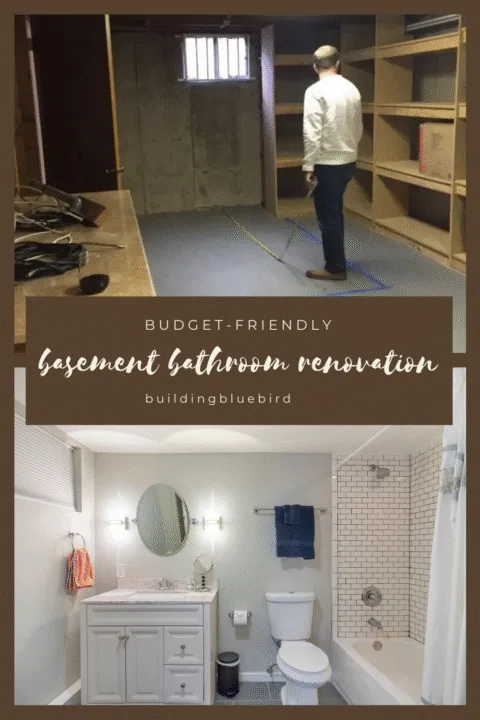
Table of Contents
- Why Add a Bathroom in the Basement?
- Our Basement Bathroom Renovation Process
- Basement Bathroom Renovation Cost-Saving Ideas
- Basement Bathroom Before and After
- Basement Bathroom Source List
- Similar Content You Will Love
Why Add a Bathroom in the Basement?
There were a few reasons we decided to add a bathroom in the basement, and why it had to be our first big project.
- First and foremost, we needed a functioning shower when we began the two full bathrooms upstairs.
- Another bathroom increases property value – adding another bedroom and bathroom adds value to our home.
- It is a comfortable space for guests to relax and our au pair to live.
Our Basement Bathroom Renovation Process
[Affiliate links are included in this blog post, thanks for supporting Building Bluebird!]
1 | Create a Basement Bathroom Floor Plan
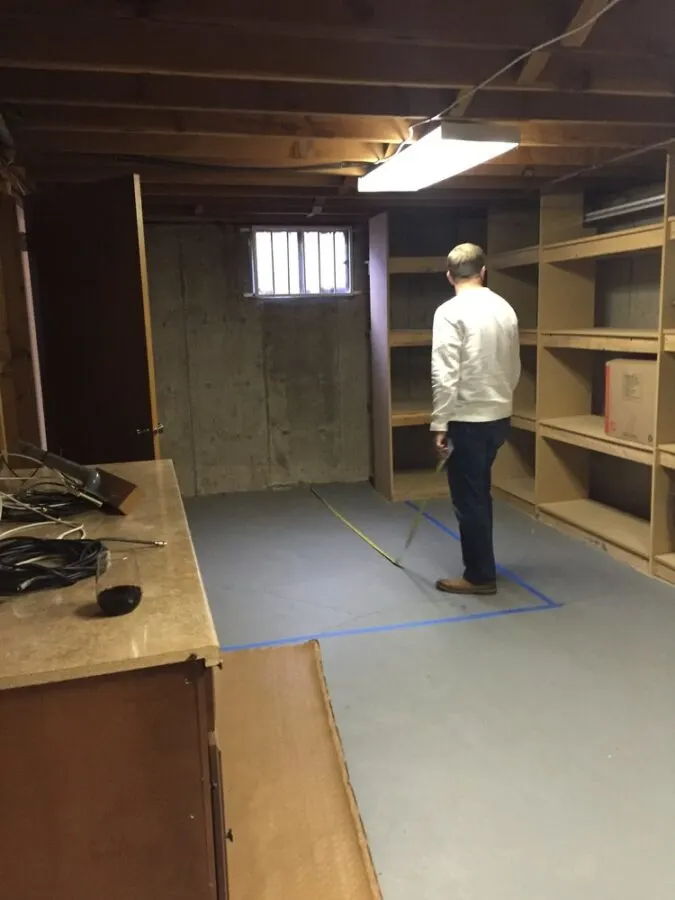
First, we measured the space we planned to use in the storage room and marked it with tape.

I found a free program online to create the bathroom layout and we came up with a few options. The image below is one of the options we considered, but did not end up choosing.
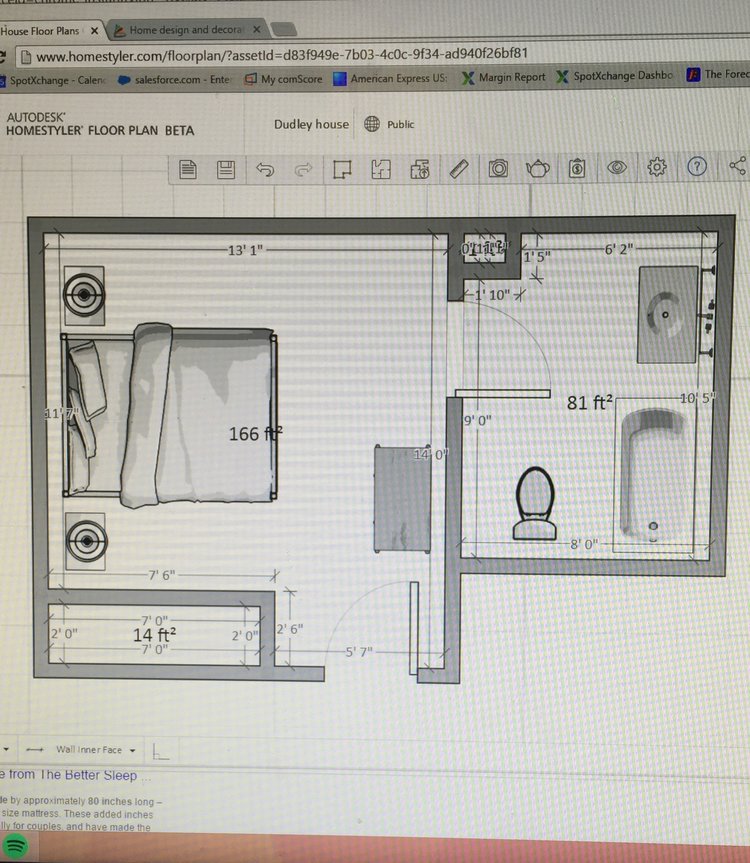
As we began planning the bathroom design, Google was my best friend. It is important to follow current building codes so we were very careful with the layout.
Based on certain building codes, each item has required space requirements, like the distance between the toilet and the tub, the door swing, electrical outlets, etc.
2 | Hire Subcontractors and DIY What You Can

We had enough on our plates moving into our new home and happily hired out trade projects for the bathroom renovation.
Here are the projects we hired out to sub-contractors:
- Concrete demolition & replacement – to connect plumbing to the main drain
- Plumbing
- Framing
- Heating
- Electrical
- Drywall
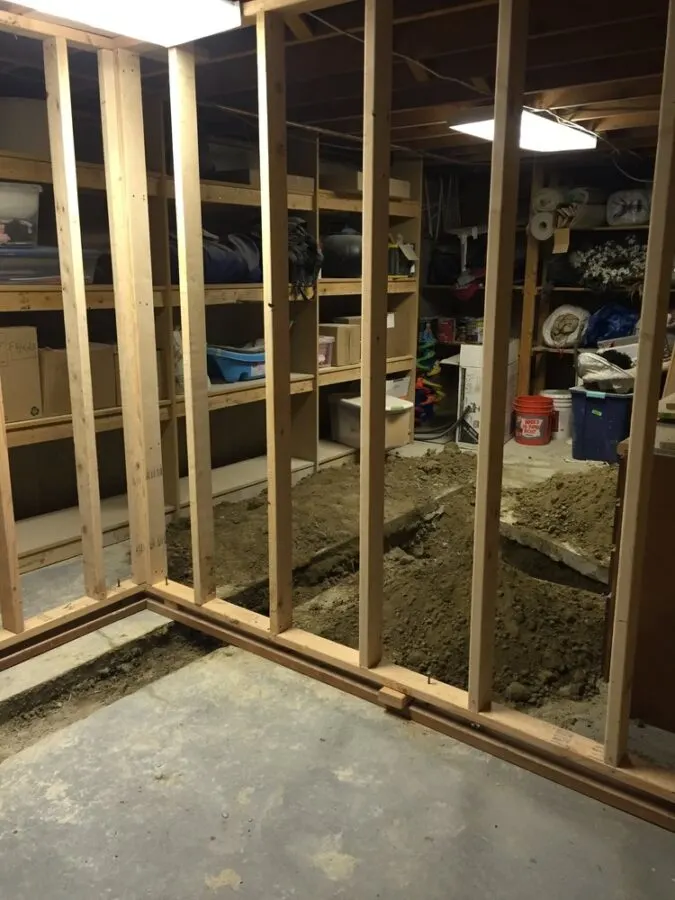
Pro Tip: Remove everything from a room when cutting into concrete! Debris flew everywhere and all of our stuff was a dusty mess. I definitely would have taken more time prepping the storage room because it is still a dusty mess.
The bathroom was quickly plumbed, framed, and wired for electrical and heating, and then drywall was installed. We saved a lot of money by taking on most of the cosmetic projects in the bathroom.
3 | Bathroom Floor Tile Installation

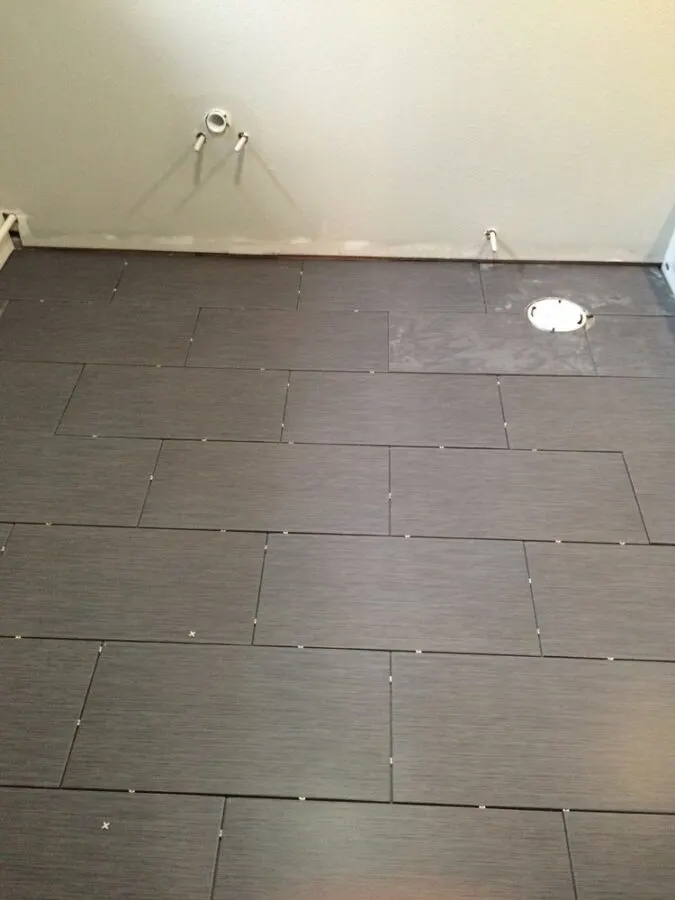
With this renovation, I was determined to try my hand at tiling and the basement bathroom was the safest place to learn.
We purchased the floor tile at Home Depot and they were affordable and easy to install! I now recognize this same tile in almost every flip and new build.
Tile Installation Issues
Once the floor tile was installed, we ran into some issues.
First, I insisted on grouting the floor because I considered myself more detail-oriented than my husband. Once I started I quickly realized the positioning was not ideal for someone 5 months pregnant.
Second, I had been reading all of my handy dandy blogs and learned about the benefits of pre-mixed grout. I chose Simple Grout which was not the most expensive but also not the least. This was a mistake.
When I spread the grout into the cracks and waited a few minutes before wiping it off, the grout would not wipe off! I realized it was a really big issue and called for Chris to help.
We spent the next few hours carefully adding the grout to the cracks and removing the grout on the tiles quickly, but it still looked terrible.
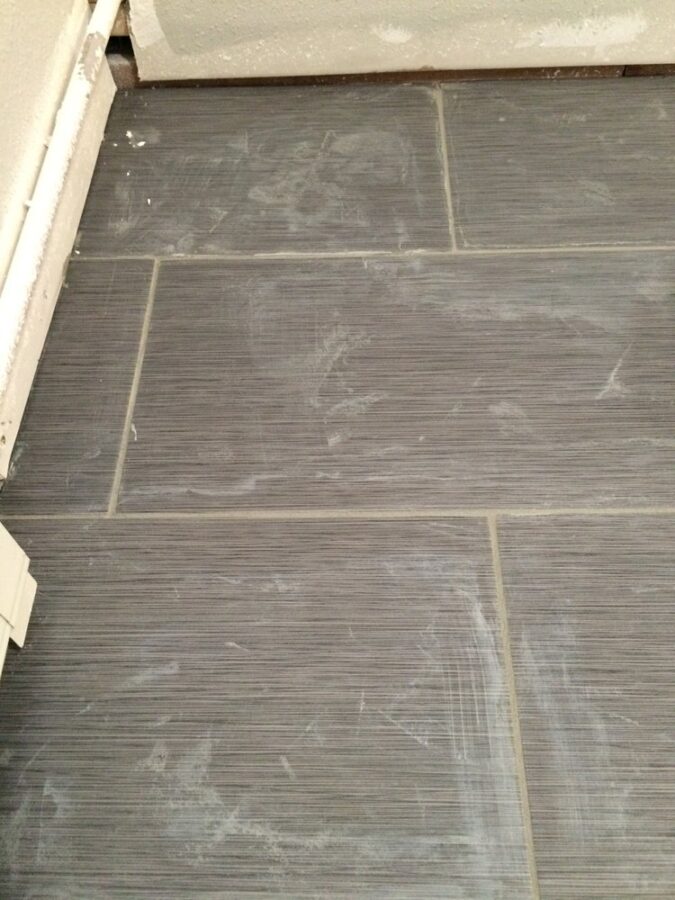

Here is what our beautiful tile looked like after we added the grout. I was so mad I wanted to cry!
I made one critical error when choosing the floor tile materials – I forgot to check the reviews!
If I had looked at the product reviews before using the product I would have seen that most people who used it would not recommend it. So if you are looking for a premixed grout, do NOT go with Simple Grout for filling in the cracks!
Because I was pregnant, I could not participate in cleaning up my mess with chemicals, so Chris had to spend the next few days scrubbing the floors.

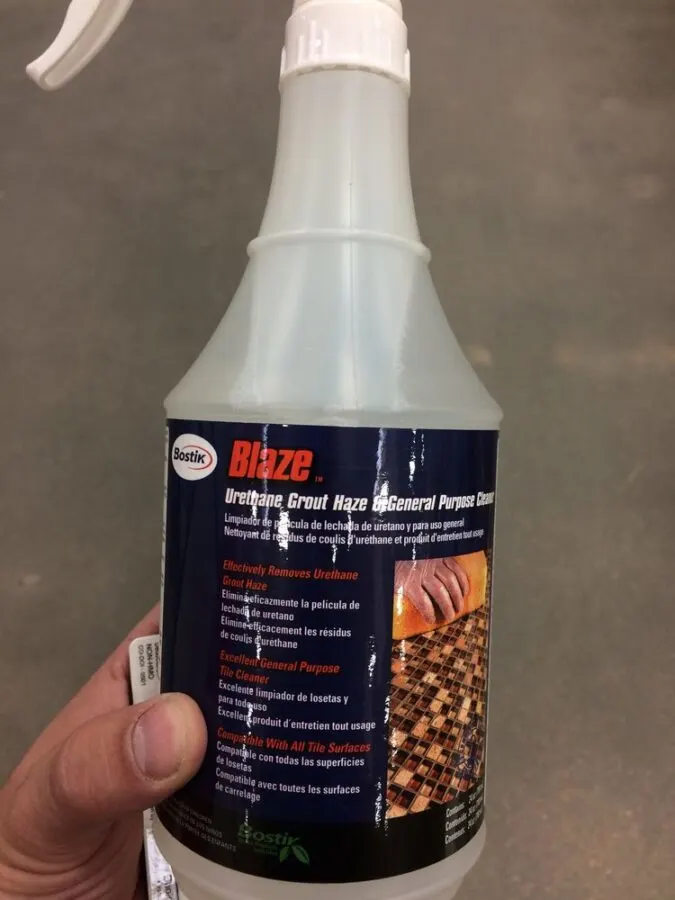
When nothing seemed to work, he found a product that finally fixed the problem – BLAZE! Sounds pretty hardcore, huh? I DEFINITELY recommend this product to remove tough grout haze! 🙂
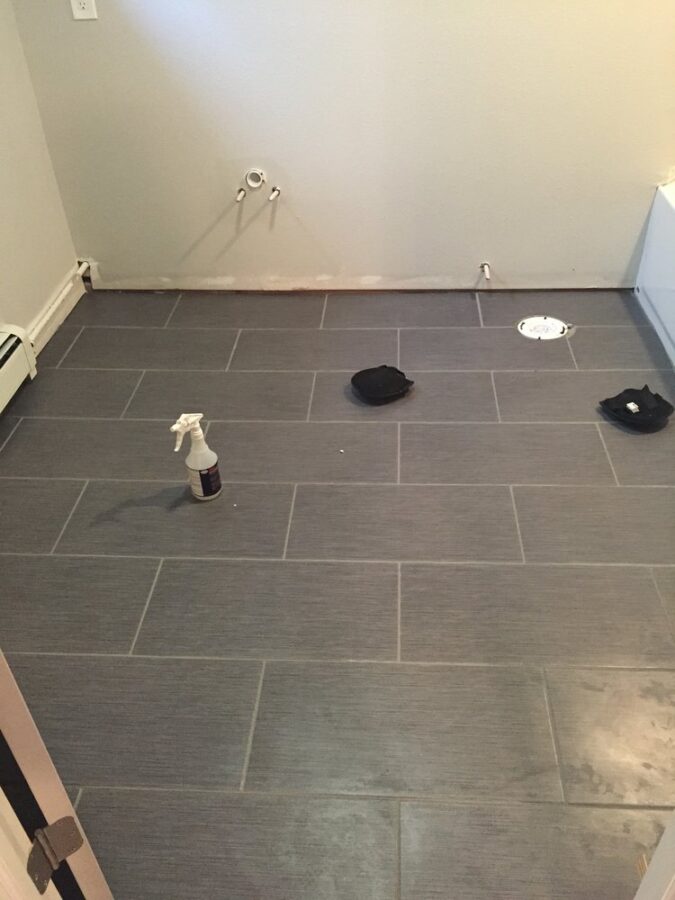

Here are the floors once Blaze was done kicking its ass. Blaze is my hero.
4 | Shower Tile Installation
The plumbers installed the tub and the drywallers installed the backer board where the tile would be installed.
Next up was installing the shower tile. Again, I was convinced I wanted to do this tiling project to learn and save on the budget.
And again, sitting on the edge of a tub tiling with a big ol’ belly was not ideal. I also chucked the Simple Grout to the curb and had Chris mix up some basic grout and water.
Turns out I wasn’t great with this product either! We could not get the right consistency to stick to the walls, so most of it fell into the tub.
*Check out how to easily install shower tile with my latest bathroom makeover!
After the second failed attempt and a lot of pouting/whining from me, Chris went out and bought the most expensive premixed grout at Home Depot.

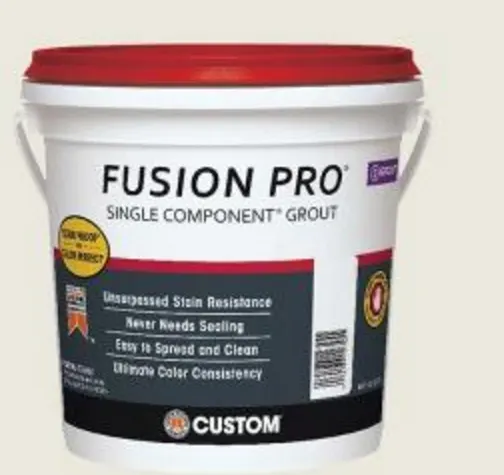
Guess what – it worked! I never knew a grout could make me SO happy. Fusion Pro was expensive but completely worth the cost for tiling projects.
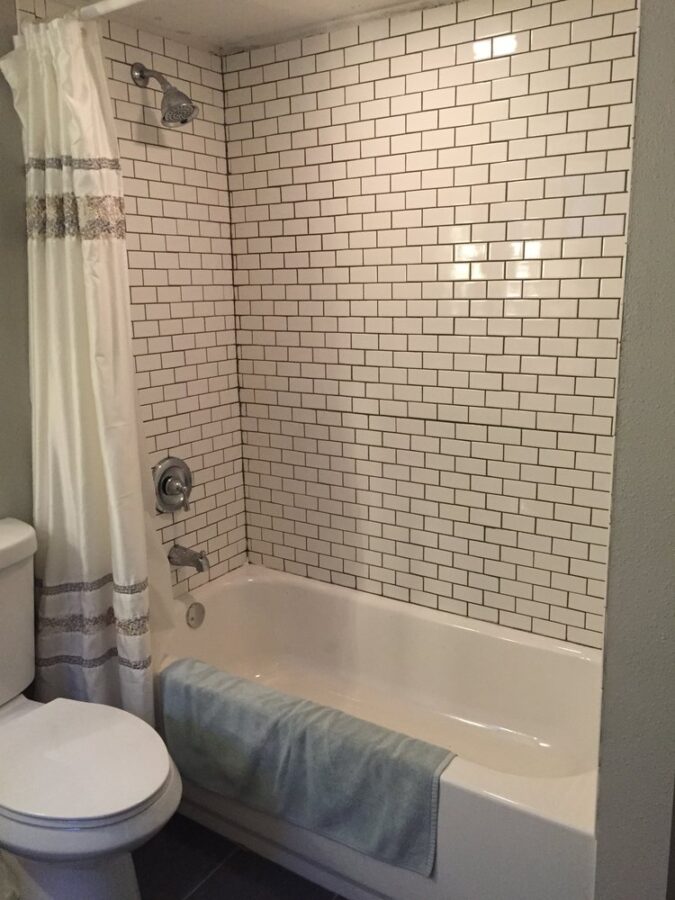

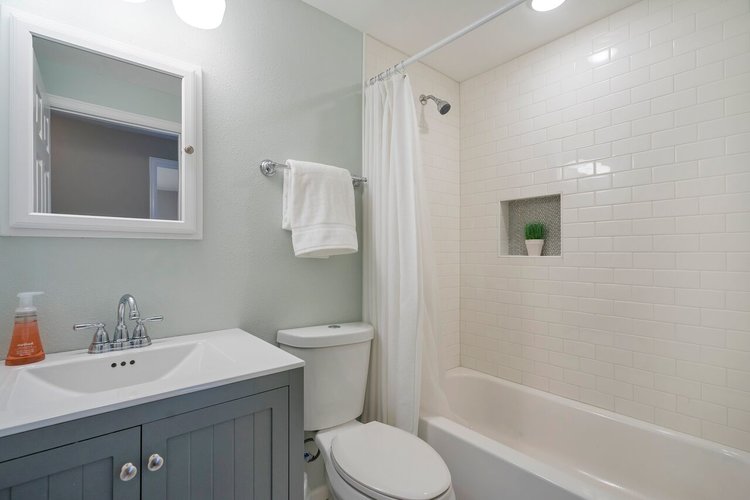
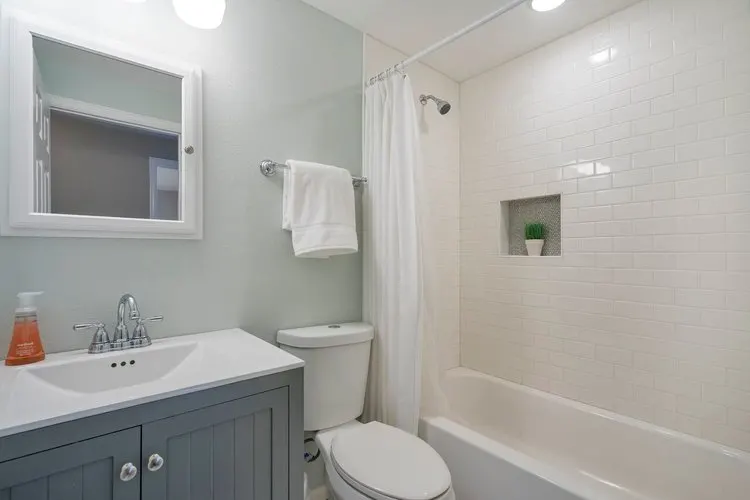
And here was the shower once the tiling was finished!
We went with smaller subway tiles that came in sheets. We learned SO much from these first tiling projects and I am grateful we had this basement bathroom to practice and make some mistakes.
5 | Paint the Walls & Install Bathroom Accessories
One DIY project that I always tackle myself is painting the walls.
For the ceiling, I used standard white ceiling paint in a flat sheen. The walls are Repose Gray by Sherwin Williams in a satin sheen.
Once the walls were painted we installed the toilet and sink making it a fully functioning bathroom!
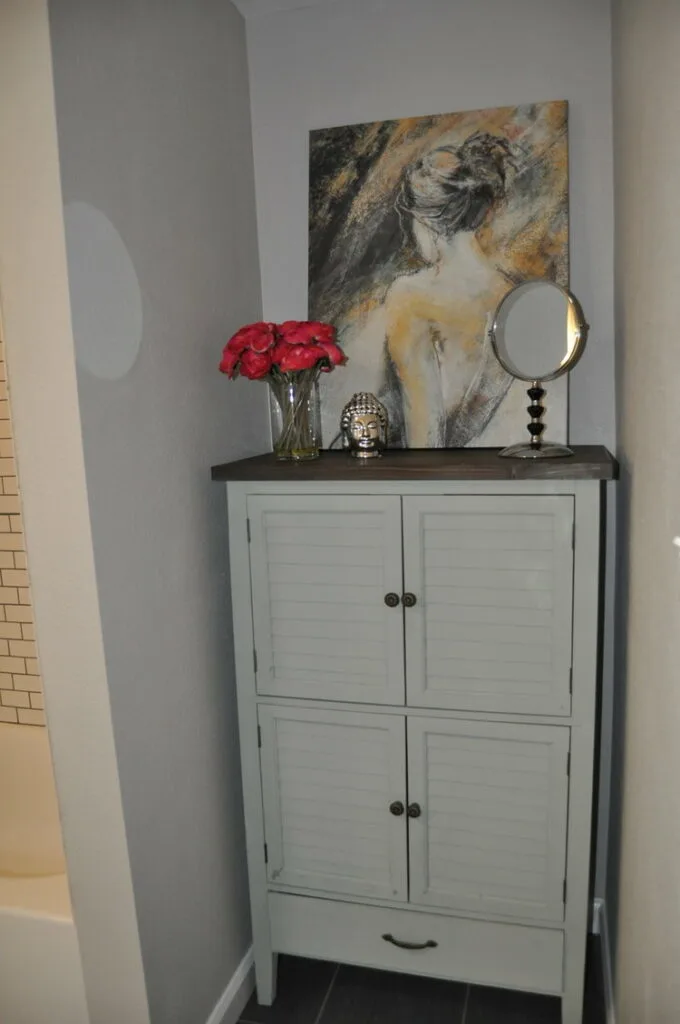
I hung the remaining bathroom accessories including the toilet roll holder, mirror, hooks, and blinds on the window.
Basement Bathroom Renovation Cost-Saving Ideas
- Avoid hiring a general contractor if you can – this saved us a lot of money. We acted as the general contractor and hired subcontractors for various tasks.
- DIY bathroom renovation projects where you can.
- Purchase materials during large weekend sales.
- Take advantage of zero percent interest credit cards often available at at big box stores like Home Depot.
- Choose classic and affordable finishes and add personality with accessories.
Basement Bathroom Before and After
Here is the basement bathroom area before the renovation.


And here is the finished product!

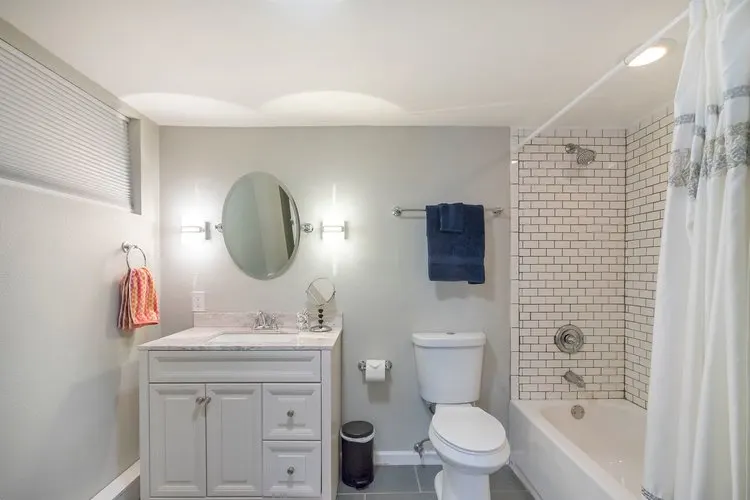
I am so incredibly proud of how this basement bathroom renovation turned out!
We saved thousands of dollars by tackling some of the labor-intensive projects ourselves and we learned some new skills!

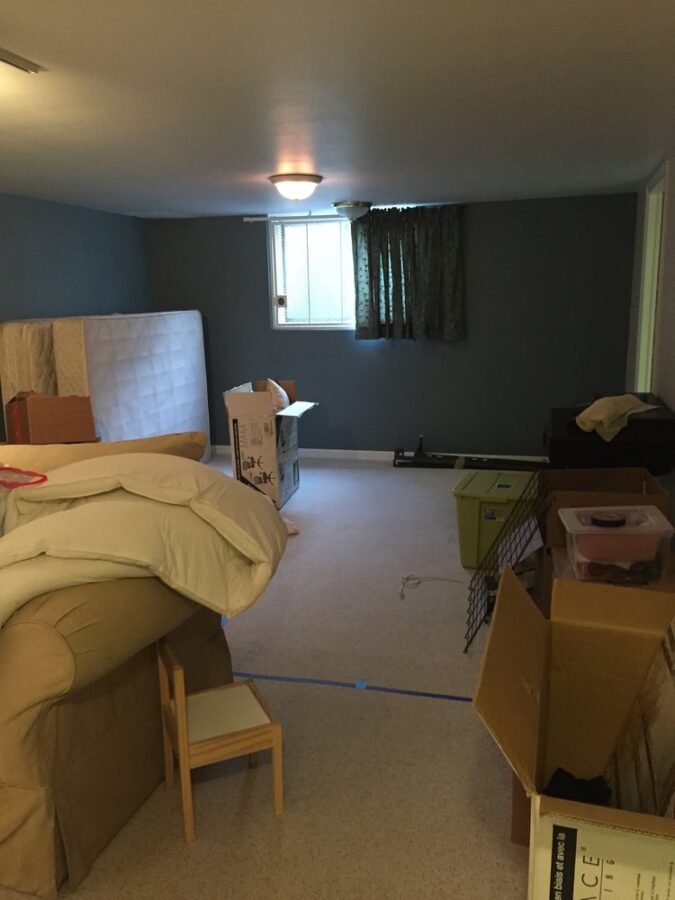
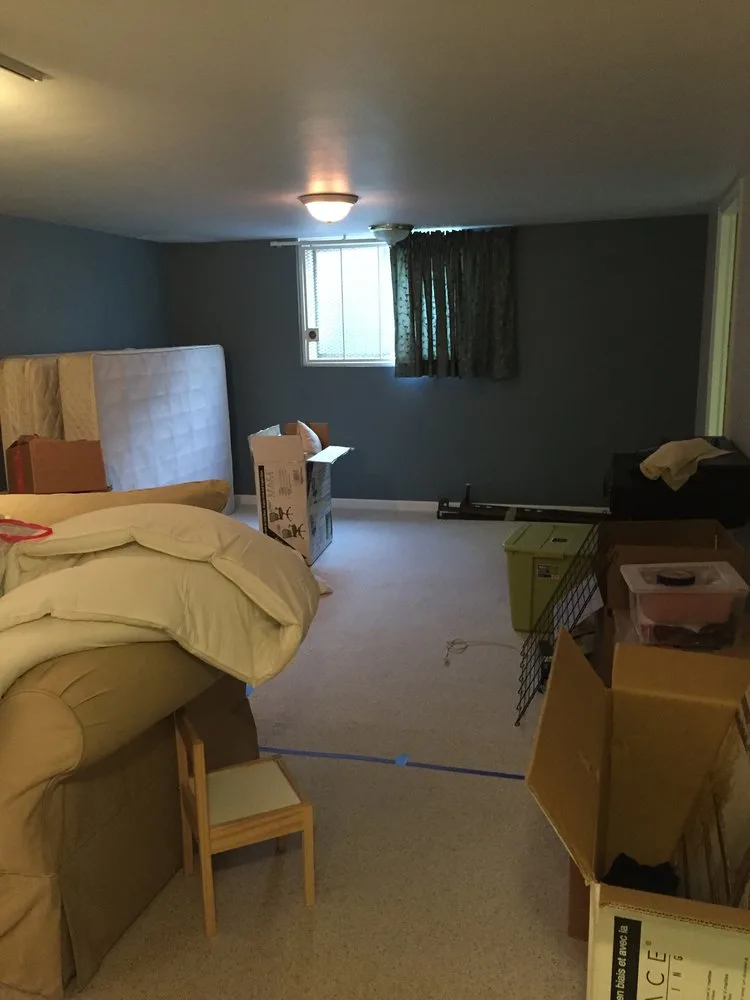
Here is the basement area that was turned into the legal bedroom. The basement bathroom was added to the right of the room where the door already existed.
And here is that same space after!

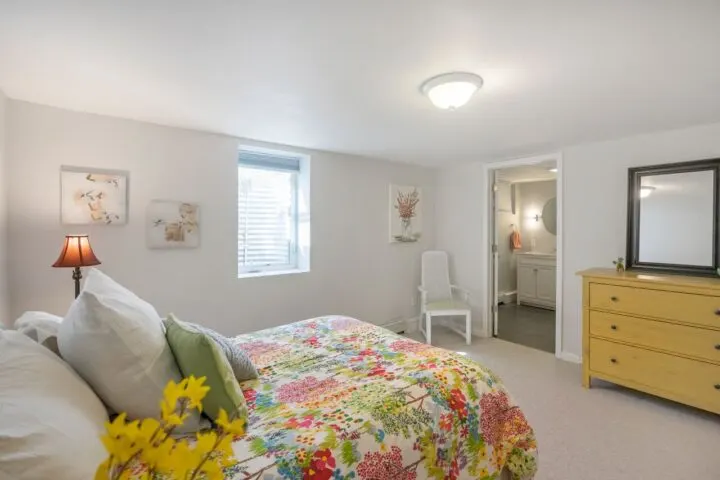
Check out the legal basement bedroom we created next to this bathroom to create a welcoming en suite for guests.
This basement bathroom renovation completely transformed our home, adding both value and functionality. By acting as our own general contractor and focusing on budget-friendly choices, we created a stylish and practical space without overspending. If you’re planning a basement bathroom remodel, I hope our tips and process inspire your own project!
Basement Bathroom Source List
- Wall Color – Repose Gray by Sherwin Williams, satin
- Floor Tile
- Shower Subway Tile
- Fusion Pro Grout
- Blaze Grout Haze Remover
- Vanity (similar)
- Mirror (similar)
- Sconces (similar)
Similar Content You Will Love
- 10+ Affordable Unfinished Basement Ideas
- Awesome Unfinished Basement Before and After
- Paint an Exposed Basement Ceiling Black
- How to Paint Concrete Basement Floors
- 8 Ways to Update Your Vintage Tile Bathroom
- Install Picture Frame (Box) Molding | Easy DIY