
Last Updated on June 26, 2024 by lindseymahoney
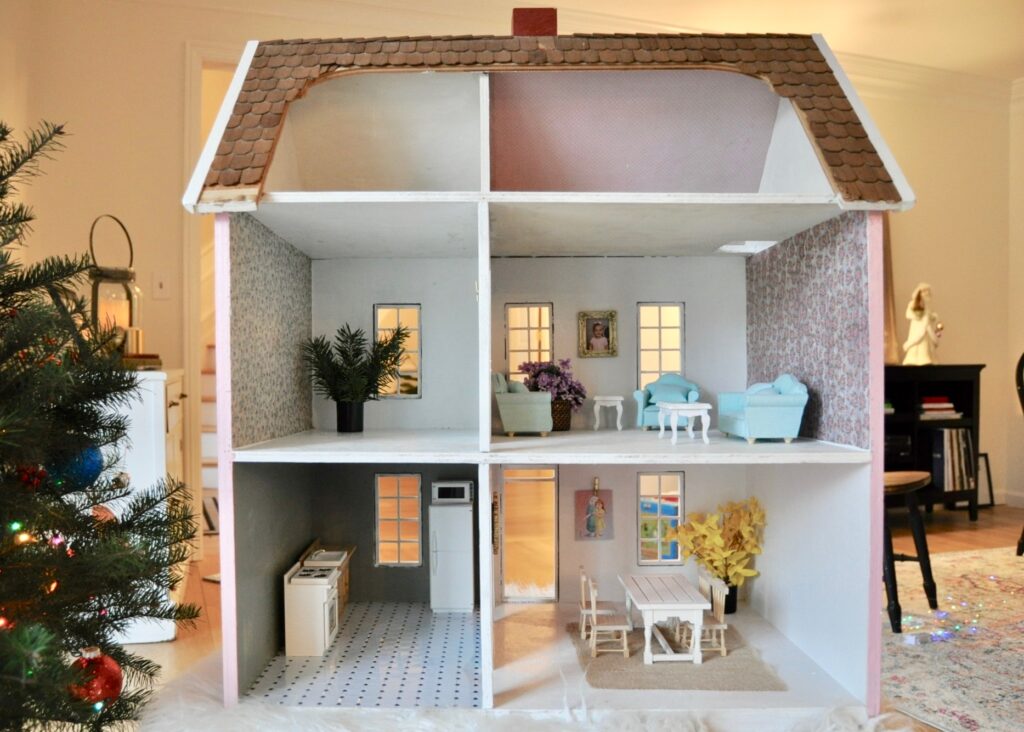
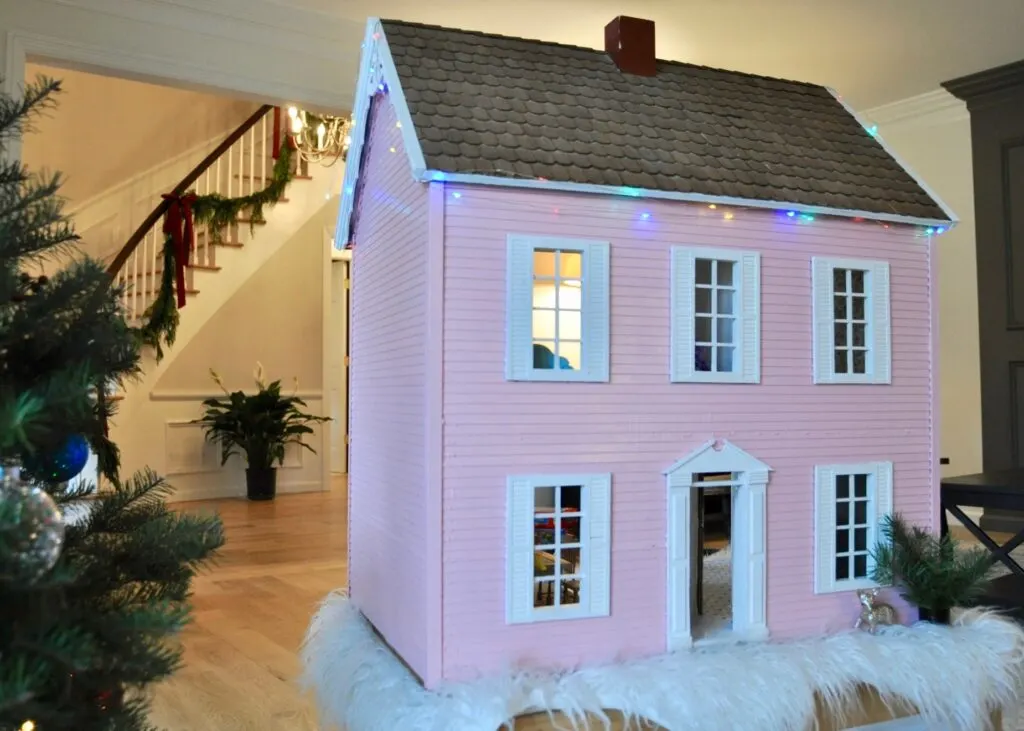
The doll house makeover is complete!
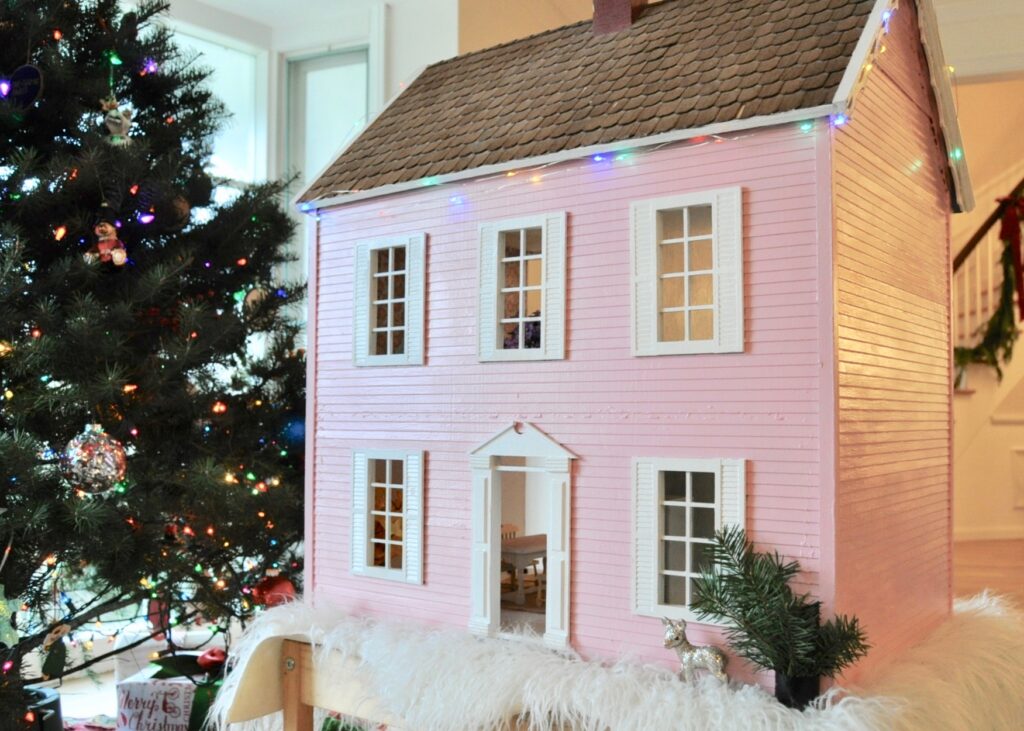
In the words of Pinkalicious (my daughter’s favorite show), “it’s pinkatastic!” This was such a fun DIY project for me. I loved designing this doll house with my daughter in mind.
When you see the finished product you will quickly realize that she LOVES the color pink and everything girly. I can’t wait to give it to her on Christmas morning.
Let me take you through the full makeover of this sweet little dollhouse!
Table of Contents
- Doll House Makeover on a Budget
- Dollhouse Exterior Makeover
- Doll House Interior Makeover
- Budget-Friendly Dollhouse Furniture and Decor
- Dollhouse Dining Room
- Dollhouse Living Room
- Dollhouse Bedroom
- Kitchen
- Dollhouse Makeover Source List
- More Content You May Like
Doll House Makeover on a Budget
[Affiliate links are included in this blog post, thanks for supporting Building Bluebird!]
Isn’t it a little girls dream?! Along with this doll house, we gifted Evelyn a Calico Critters family that fit perfectly in this little house.

Dollhouse Exterior Makeover
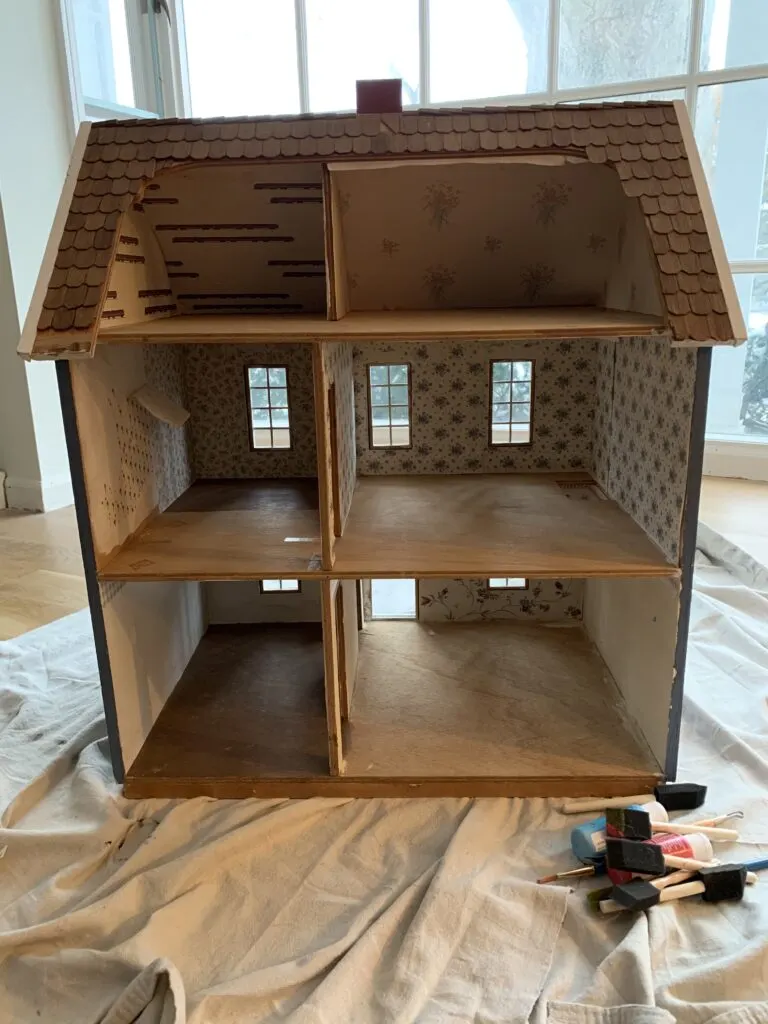
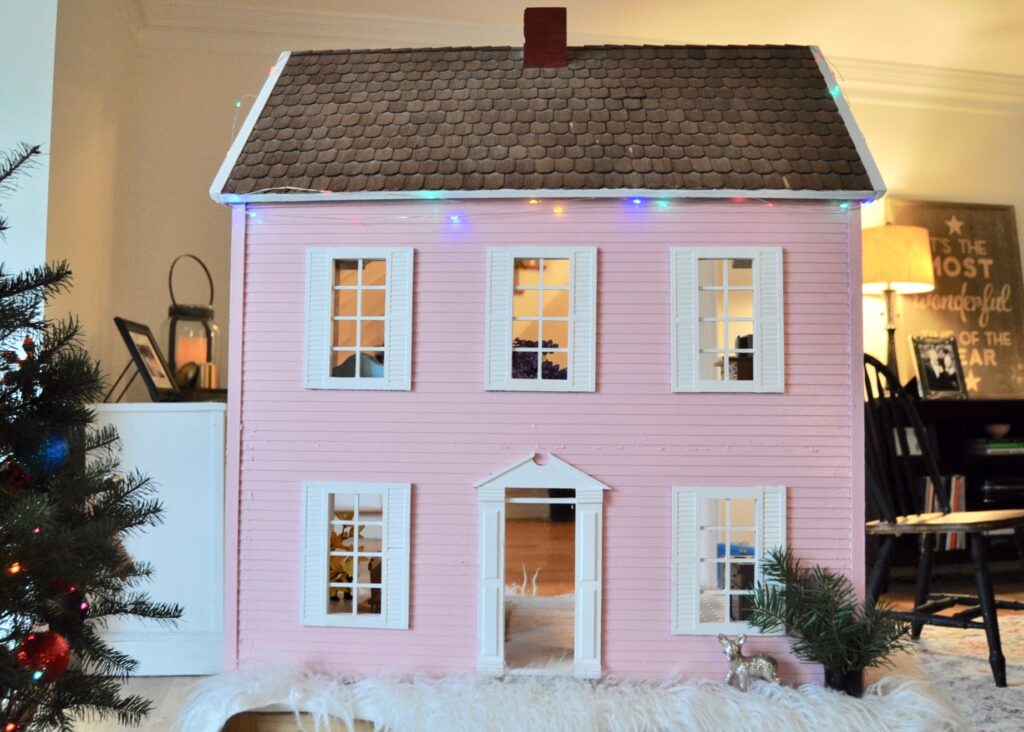
I found this old doll house at a thrift store and knew it would be the perfect Christmas gift for my daughter.
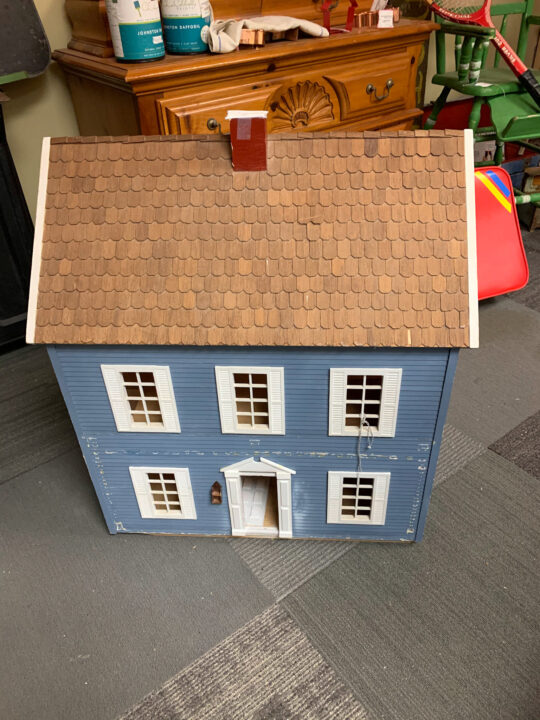
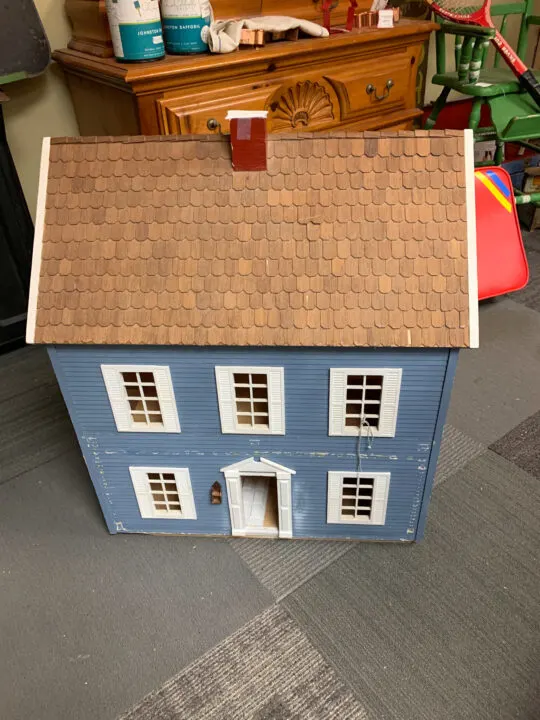
I snagged this beauty for $50 at a consignment shop and was excited to tackle a budget-friendly makeover. It was in pretty good shape but it was begging for a fresh coat of paint!
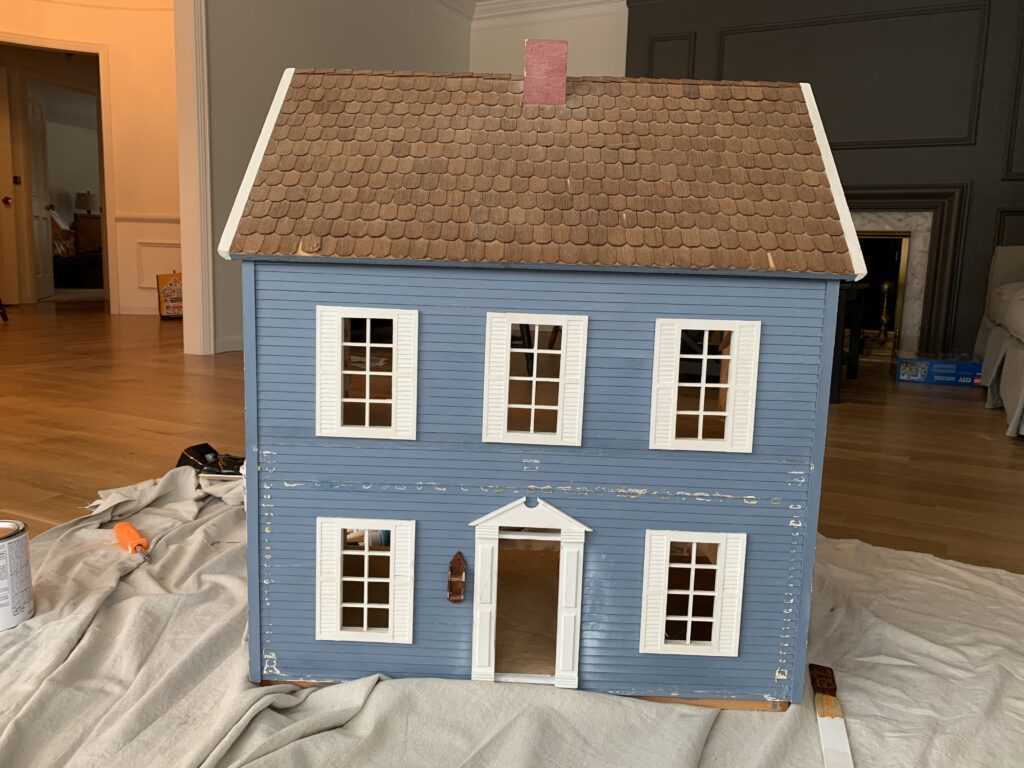

When I found the house, the exterior was blue with chipping paint.
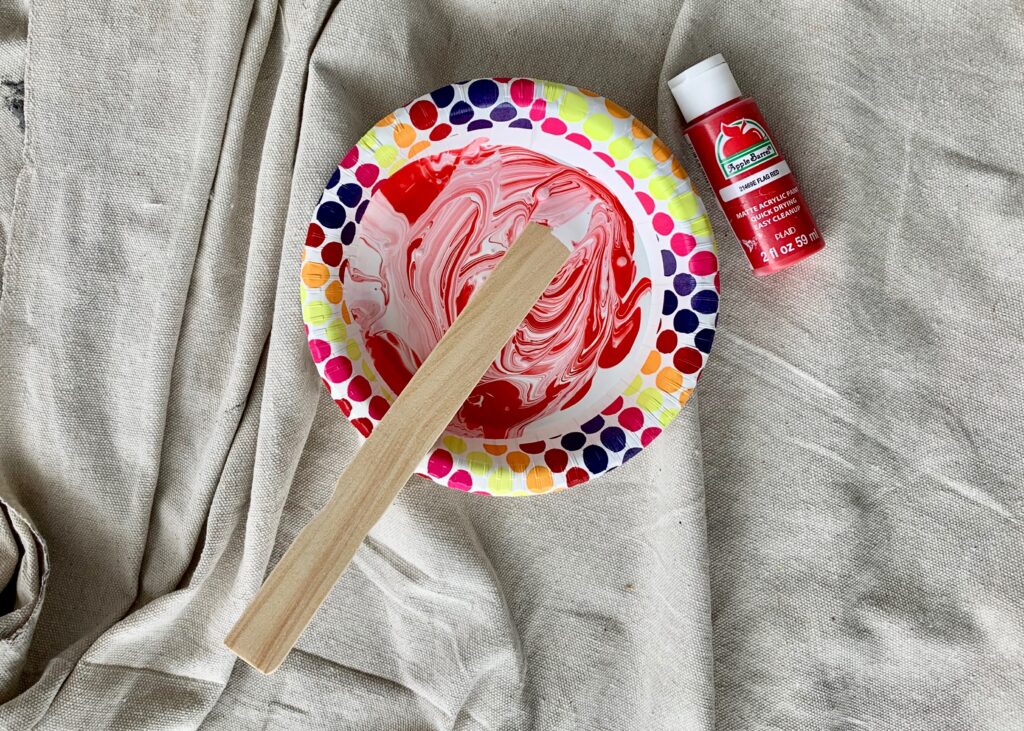

One cheap way I saved money on this DIY dollhouse makeover was to mix my own pink paint. I used leftover white paint from our home and mixed in red craft paint to find the pink tone I wanted for the dollhouse.
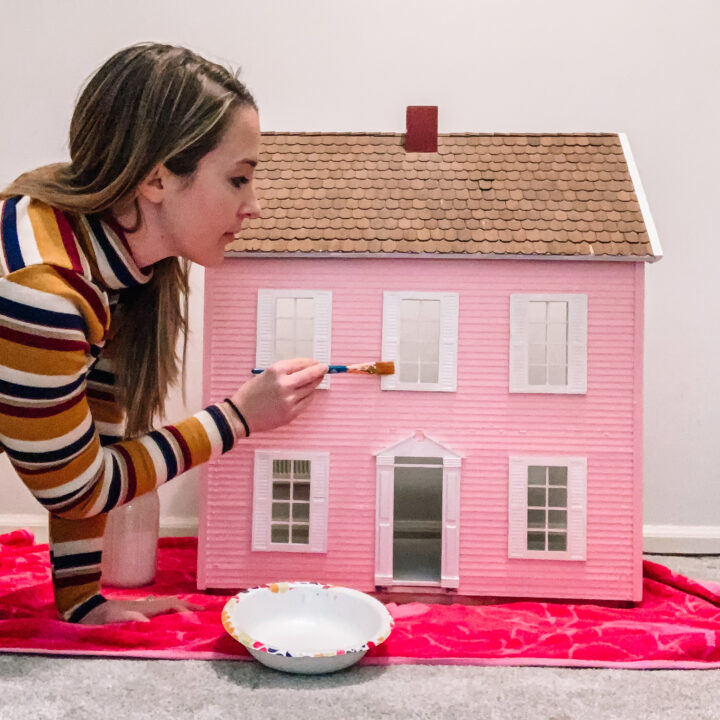
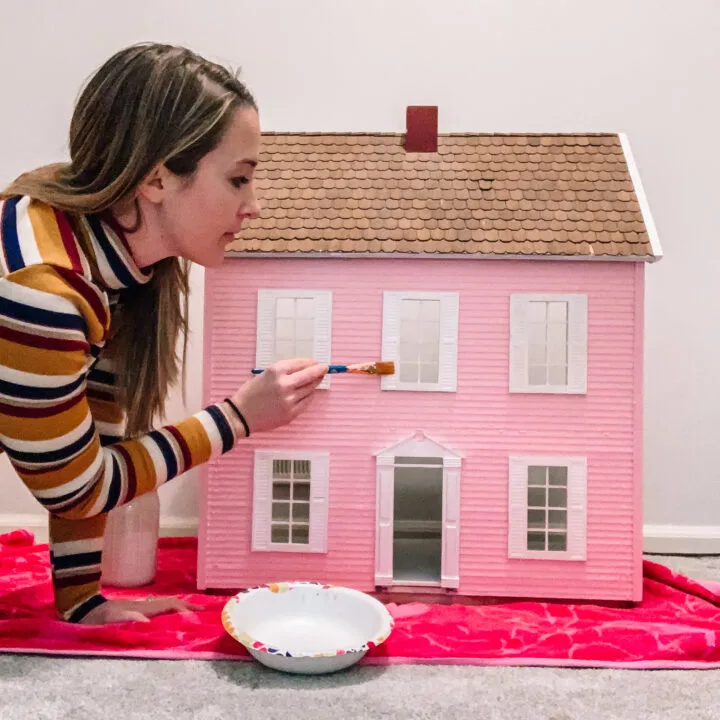
With the doll house siding now pink, I applied a fresh coat of white paint to the door and shutters. And because this was a surprise Christmas gift, I spent a good amount of time painting in our closet or working on it while she was at daycare.


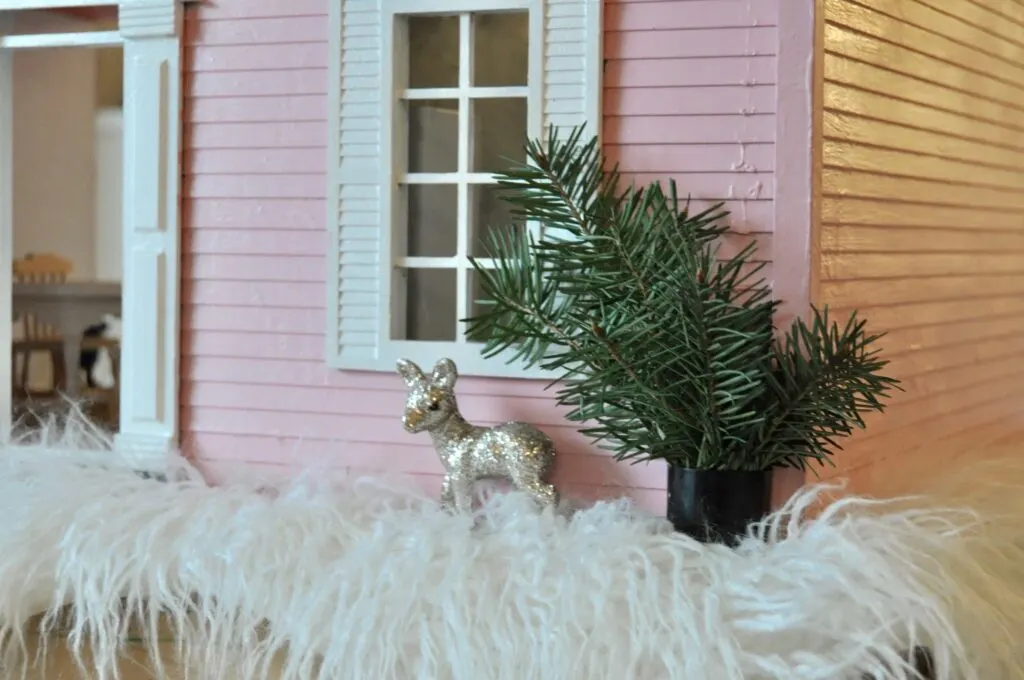
After a few coats of paint, this dollhouse is just the cutest thing.
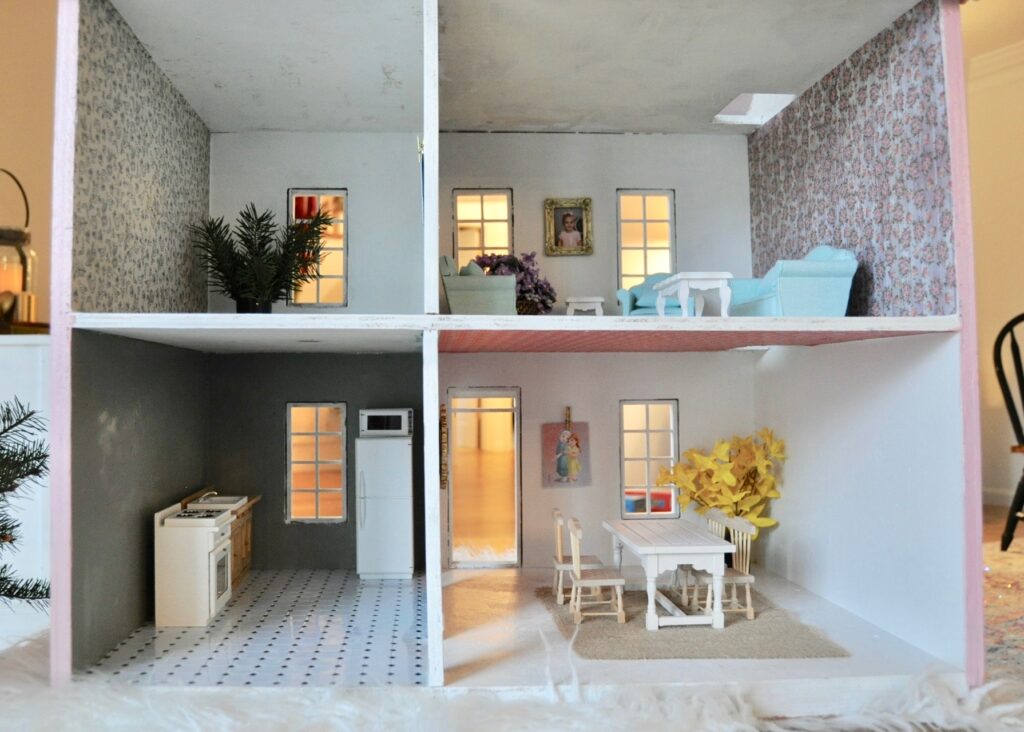
Doll House Interior Makeover

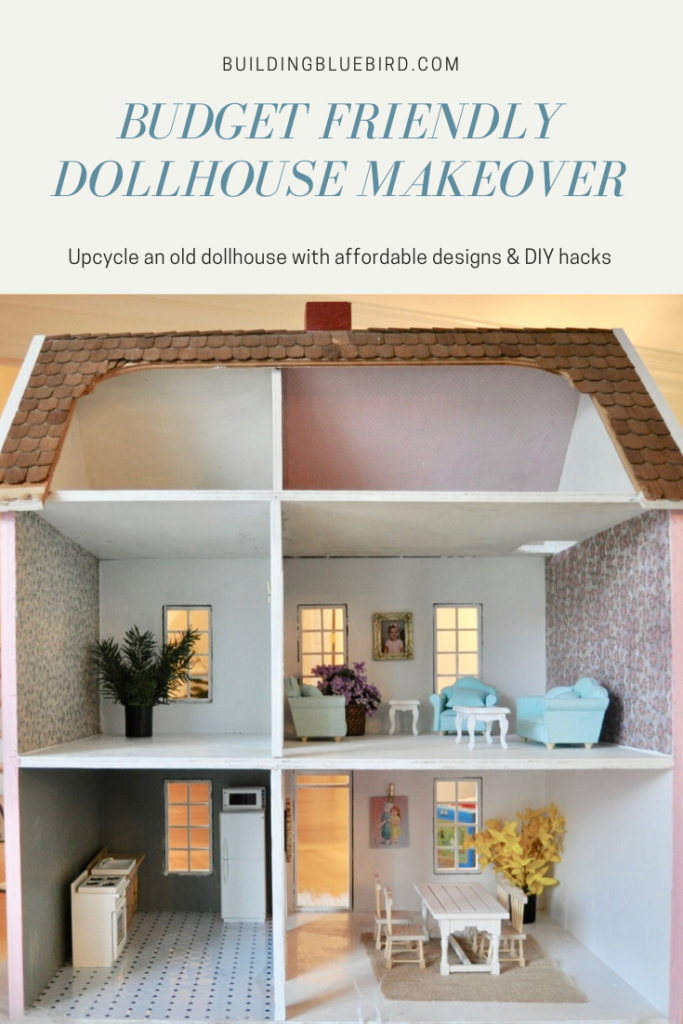
The interior of the dollhouse was covered in old wallpaper that needed to be removed. Luckily, I had all of the tools required on hand to quickly strip the wallpaper from the inside of the house. Easy peasy!

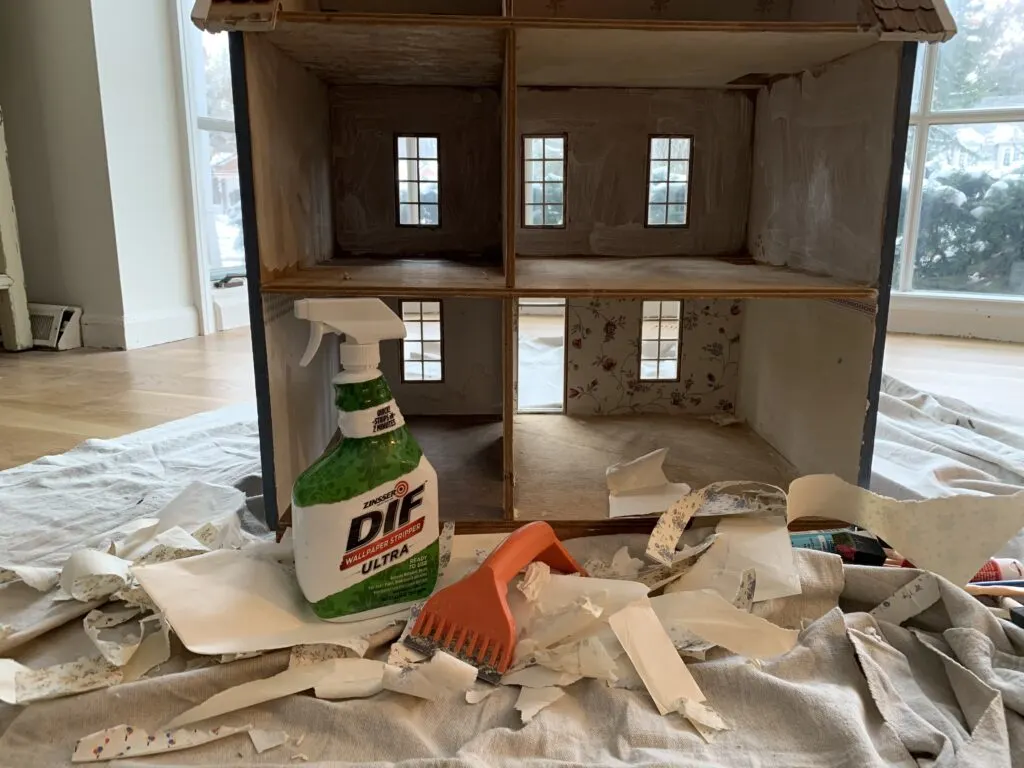
First, I removed all of the old wallpaper inside of the house using a scraper and DIF spray.
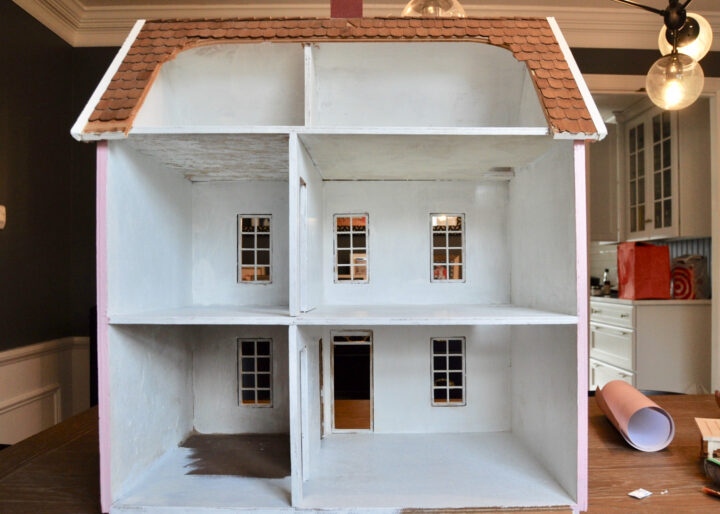

Next, I applied a few coats of white paint to create a blank slate as I began to decorate each room. In each room, I applied new wallpaper using decorative craft paper with a fun pattern and craft glue from a local craft store.
Budget-Friendly Dollhouse Furniture and Decor

When I started looking for decor to furnish this house, I quickly learned that lots of people share this hobby and there are some seriously cool dollhouse accessories you can buy.
I looked to Young House Love and At Home With Ashley for inspiration and tips on saving money, but man, it is REALLY easy to get carried away transforming these little dollhouses!

You can legit design an entire dollhouse the way you would design your own living room or bedroom. There are so many modern accessories, it was hard to resist not buying them all!
As I mentioned earlier, I wanted to keep this makeover as cost-effective as possible, so I really limited myself to what I bought for the house.
I focused on the shell of each room and limited my purchases to a few staple pieces for the main rooms. If my daughter loves playing with it, we can buy the rest of the furniture together to decorate the remaining rooms.
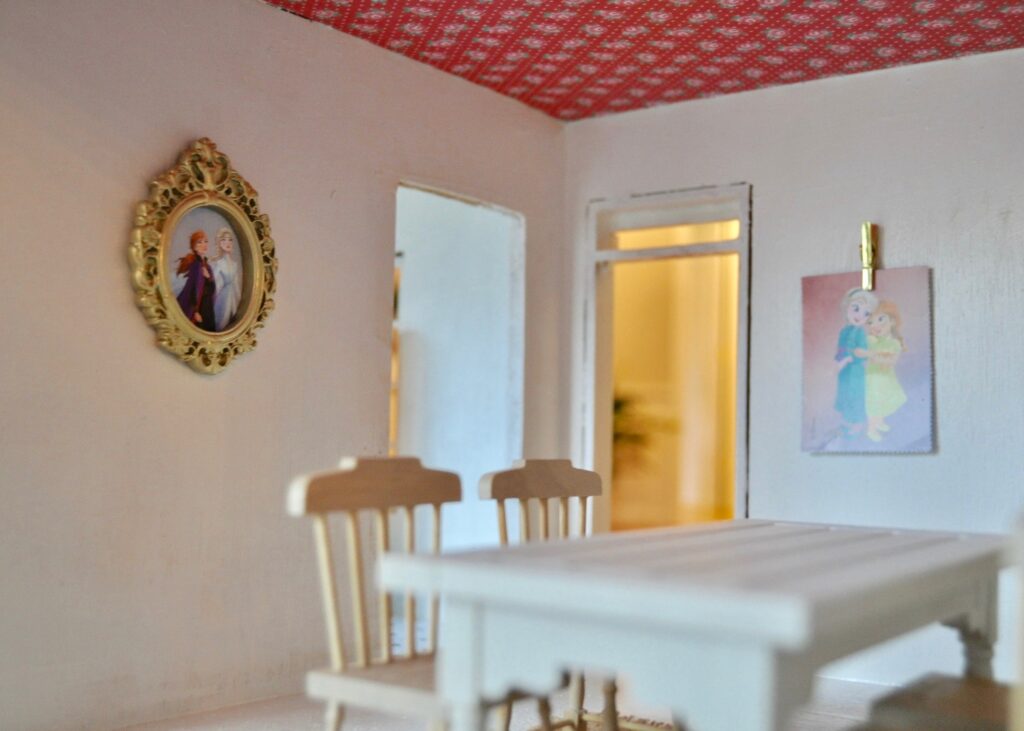
Dollhouse Dining Room
Let’s start with the cute little dining room!

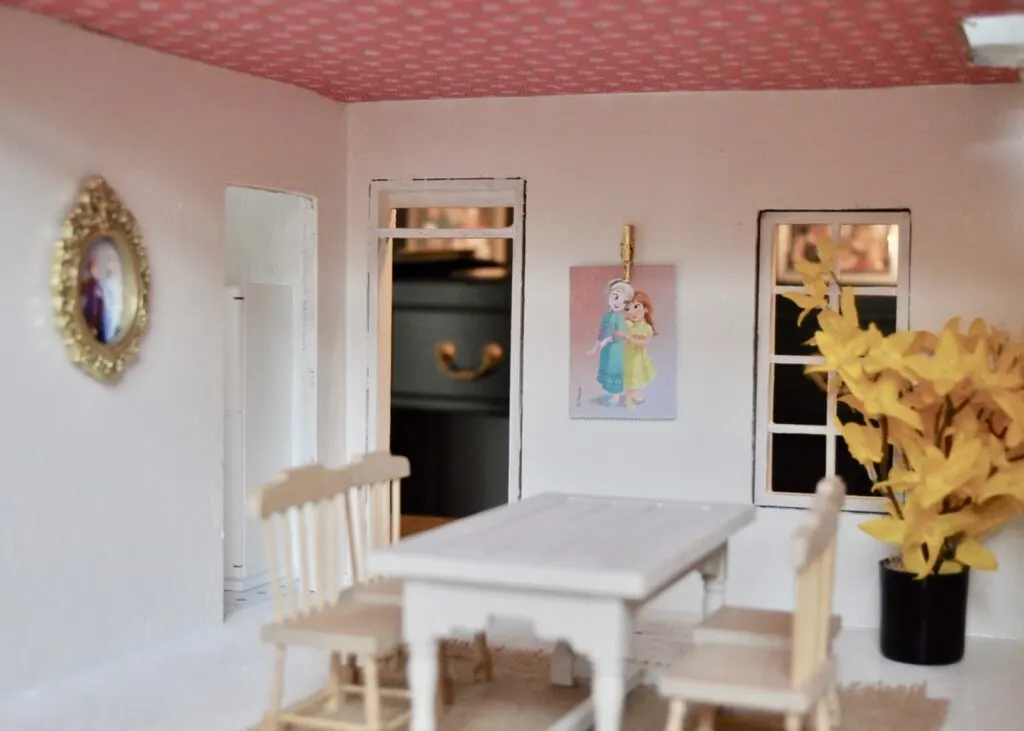
My daughter has Frozen collectors cards that I used as the artwork in the dollhouse. In the dining room, I applied wallpaper on the ceiling to add a little statement design to her dollhouse.

I cut some faux flowers I had in my craft bin and tucked them into the cap of my travel hairspray to make a potted plant. I love how it turned out and love that it was free!

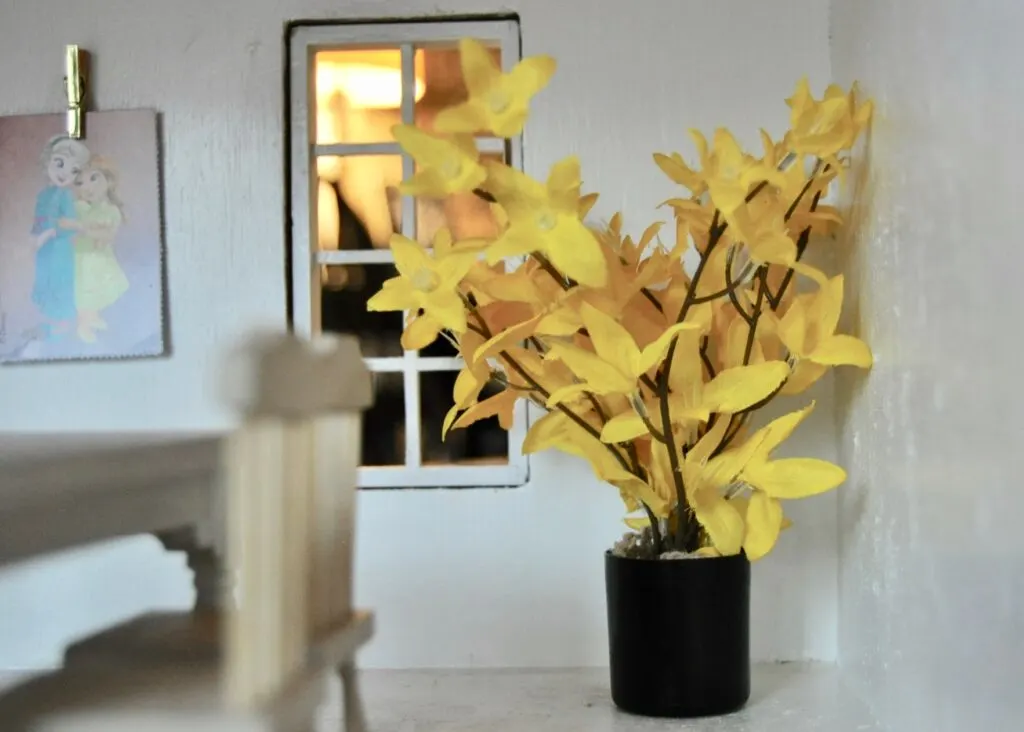
The kitchen table and chairs were purchased at Hobby Lobby.
Dollhouse Living Room

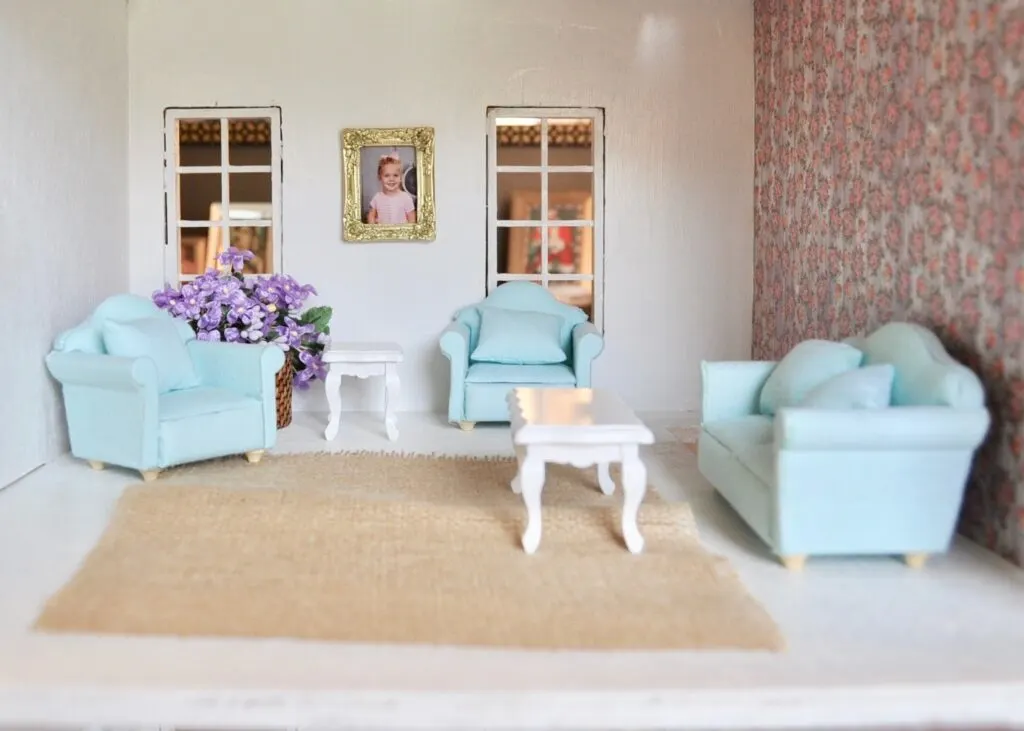
A floral wallpaper accent wall and baby blue furniture create a sweet feminine aesthetic I was going for. Using leftover burlap from one of my projects in my art bin, I cut out a square to create an area rug for the living room.
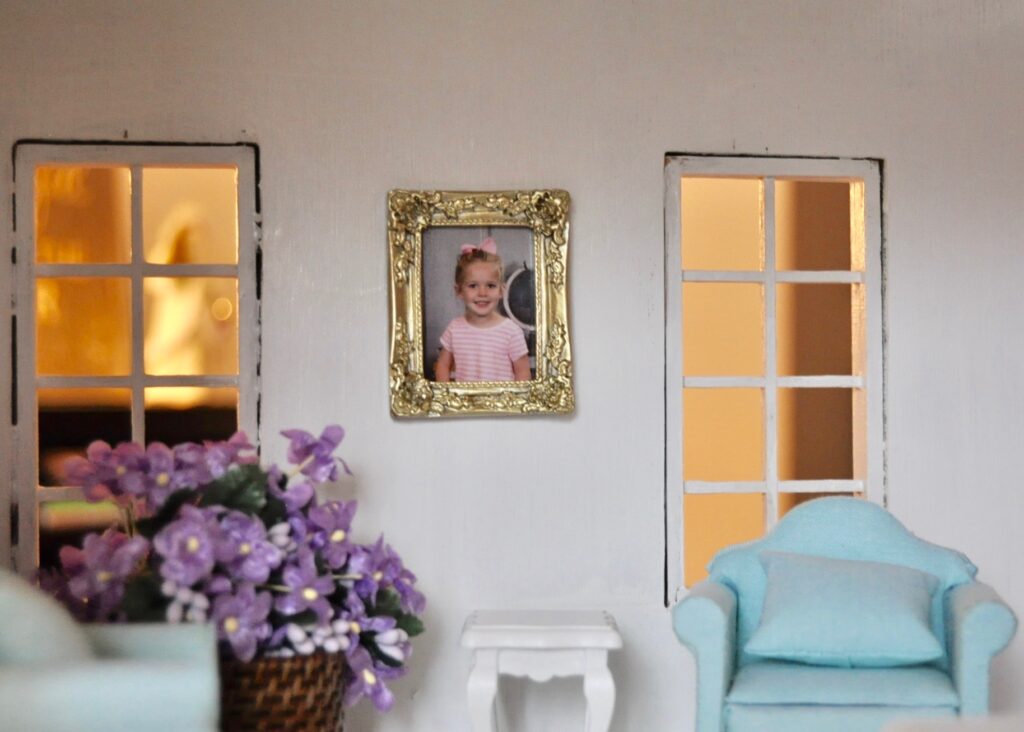

I couldn’t resist adding Evelyn’s sweet school photo to the frame in the living room. It’s the little details like this that really make this dollhouse feel so special.

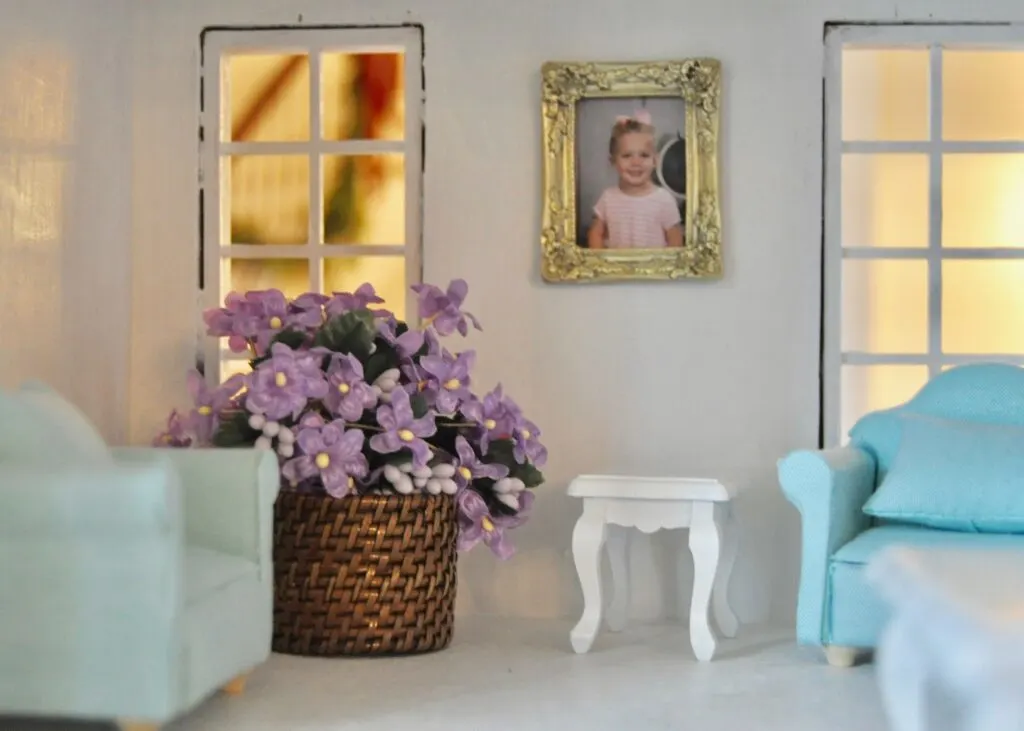
The flower arrangement in the living room is another bunch of faux flowers in my storage room that I placed in a napkin ring. The living room furniture was purchased for the space.
Dollhouse Bedroom

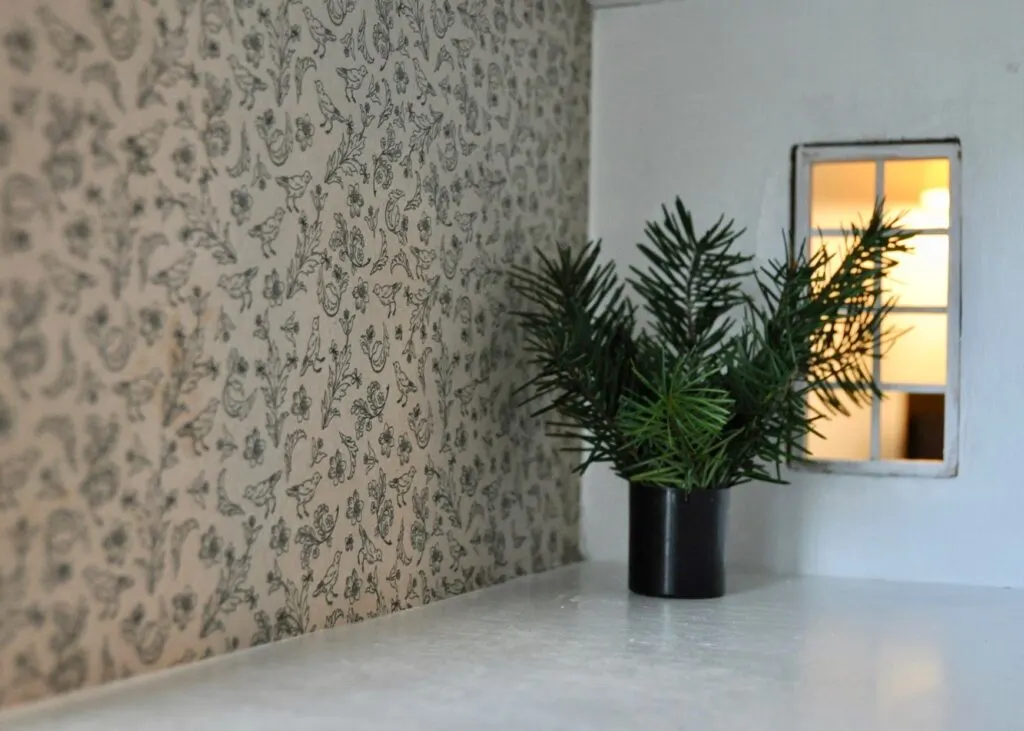
Evelyn and I will furnish this bedroom together. I painted the room white and installed a cute accent wall with little birds on it. Using another hairspray cap and tree trimmings, I added some greenery to the space.
Kitchen
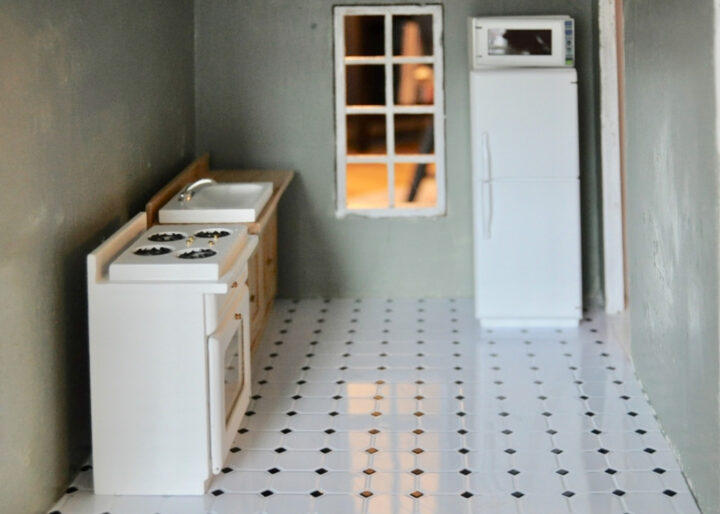
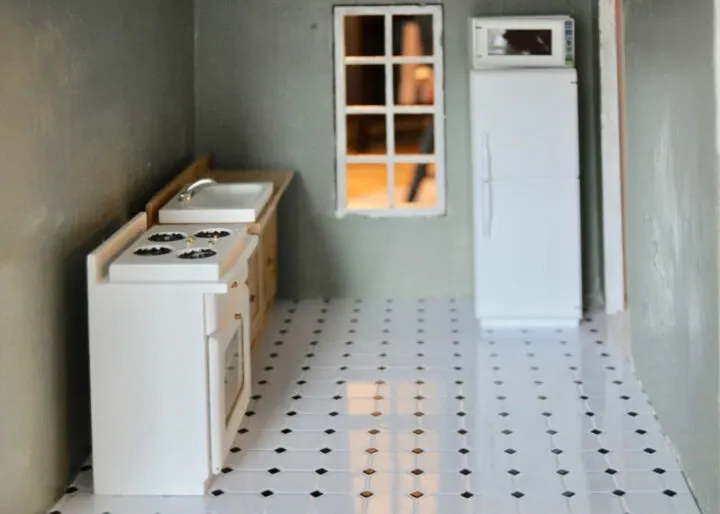
The kitchen got a fresh coat of greenish gray paint and a classic black and white pattern on the floor. A few cabinets and appliances complete the simple kitchen space.
Dollhouse Makeover Source List
- Kitchen table and chairs
- Kitchen tile floor
- Wallpaper
- Dining room table and chairs
- Living room set
- Gold clips
- Two miniature frames
- Rug: Cut from leftover burlap fabric
- Artwork: Frozen cards we owned
- Purple floral arrangement: Faux flowers I owned & a napkin ring
- Yellow floral arrangement: Faux flowers I owned & a travel hairspray cap
- Green plant: Christmas tree trimmings & travel hairspray cap
- Paint: All leftover from our home projects

I spent about $80 on the interior of the doll house makeover. With the price of the house at $50, the entire house was $130.

This gift was a labor of love with my little girl in mind. I had so much fun with this makeover and hope that this is her dream house that sparks creativity and joy. I can’t wait for her to open this gift on Christmas morning!

If you are interested in designing a dollhouse of your own, check your local craft store or thrift stores. Once I had dollhouses on my mind, I found multiple in thrift stores around town! Check out Facebook Marketplace too!
More Content You May Like
- Grandmillennial Girls Bedroom Reveal | ORC
- Easily Make Scalloped Furniture with this Hack
- 15+ Thrifted Christmas Decor Items to Buy This Year
- How to Make Cheap Garland Look Expensive
- Easy Ways to Update a Vintage Tile Bathroom
- Make Stunning Ribbon Bows for Gifts | Easy DIY
- How to Wrap a Present So It Looks Beautiful Every Time
Corinne
Monday 16th of December 2024
I just bought a thrifted doll house recently that needs some work. Haven't started any work on it yet, but wanted to thank you for your tips and techniques. Luckily it came with lots of furniture that I plan to paint. Can't wait to get started!!!
lindseymahoney
Monday 16th of December 2024
I am so happy you found my post helpful! Good luck with this fun DIY!